I still remember the day I ruined a perfectly good batch of traditional brownies by dumping an entire bag of coconut on them in a moment of tropical-inspired madness. What started as a kitchen disaster became the obsession that would consume my baking life for the next six months. You see, most coconut brownies taste like someone took a decent brownie and buried it under a mountain of sunscreen-scented sawdust. They're either too dry, too sweet, or they have that weird waxy texture that makes you wonder if you just ate a craft project. But this version? This is the one that made my neighbor cancel her dinner plans because she needed to eat three more squares while standing over my kitchen sink. The brownies that had my brother-in-law texting me at midnight asking if I had any left. The ones that actually made my coconut-hating husband sneak back into the kitchen for seconds.
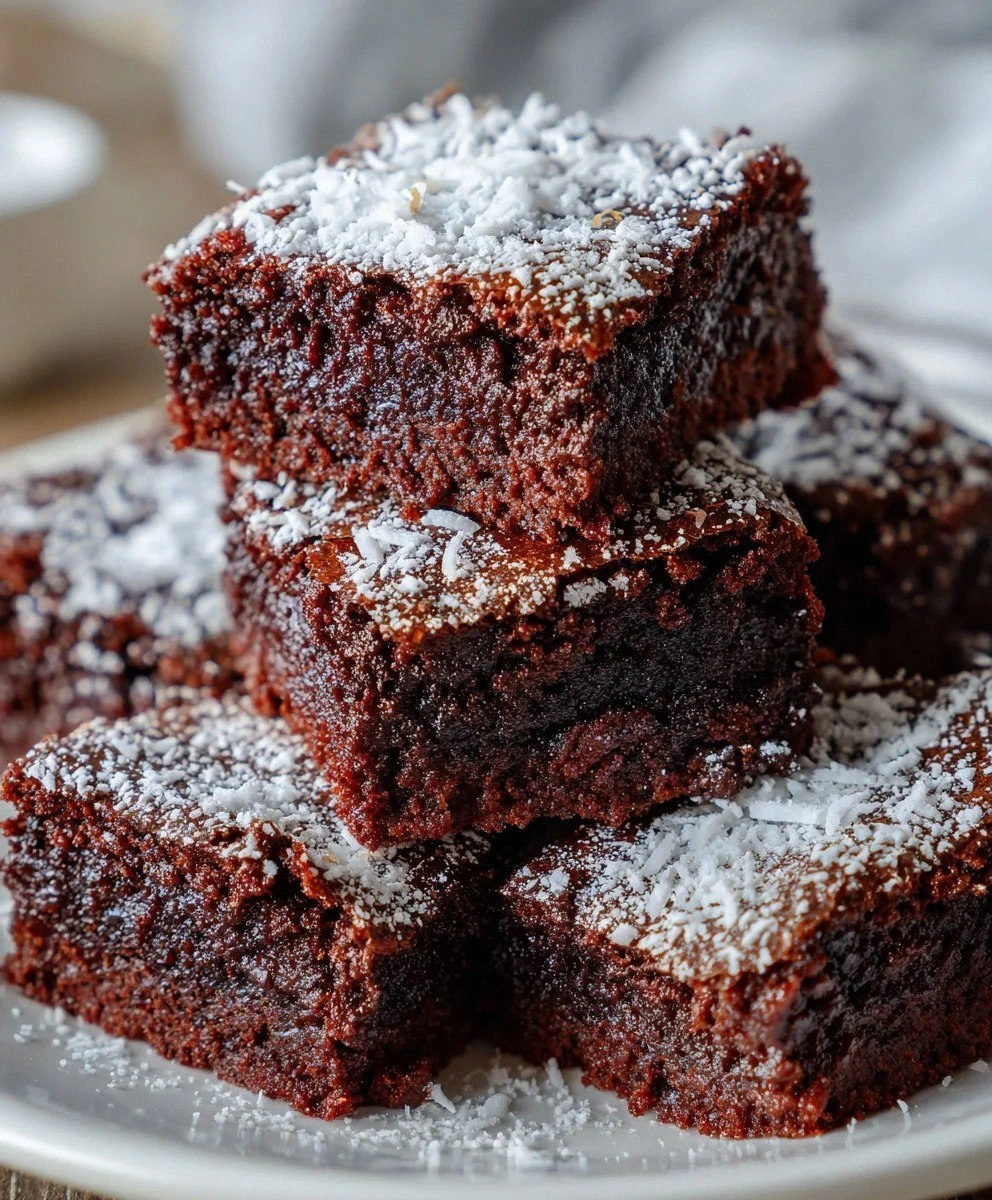
Picture this: it's raining outside, you've got your favorite playlist humming in the background, and the smell of melting chocolate and toasting coconut is drifting through your house like the world's most delicious air freshener. You pull a pan of these beauties out of the oven, and the top is this gorgeous mosaic of glossy chocolate and golden coconut that cracks slightly as it cools, revealing the fudgiest, most decadent brownie lurking underneath. The edges have that perfect chewiness that gives way to a center so rich and moist it makes bakery brownies look like sad, dry chocolate bricks. And here's the kicker — that coconut doesn't just sit on top like some kind of edible decoration. It becomes one with the brownie, creating these amazing pockets of tropical flavor that make each bite feel like a vacation in brownie form.
Okay, ready for the game-changer? Instead of just sprinkling coconut on top like every other recipe tells you to do, we're creating a coconut layer that seeps into the brownie as it bakes. Sweetened condensed milk acts like a coconut delivery system, carrying all that tropical flavor throughout every single bite. The result is a brownie where chocolate and coconut aren't just roommates — they're soulmates who've decided to spend the rest of their lives making each other better. Stay with me here — this is worth it. Let me walk you through every single step — by the end, you'll wonder how you ever made it any other way.
What Makes This Version Stand Out
- Double Coconut Power: We don't just toss some flakes on top and call it a day. We're creating a coconut layer that penetrates deep into the brownie, using both coconut flakes and sweetened condensed milk to create a flavor that's present in every bite, not just sitting on the surface like an afterthought.
- The Texture Trinity: We achieve three distinct textures in one pan — crispy coconut edges that shatter like thin ice when you bite them, a fudgy center that melts on your tongue like chocolate velvet, and those little chocolate chip pockets that provide delightful bursts of melted chocolate throughout.
- One-Bowl Wonder: Despite tasting like you spent hours in the kitchen, this entire recipe comes together in one bowl and one pan. No fancy equipment, no complicated techniques, no washing seventeen different mixing bowls while questioning your life choices.
- Make-Ahead Magic: These brownies actually get better after sitting for a day. The flavors meld and deepen, creating an even more complex taste profile that makes them perfect for dinner parties, potlucks, or those weeks when you need emergency chocolate therapy.
- Pantry-Friendly Ingredients: Everything you need is probably already in your kitchen right now. No hunting for obscure ingredients or spending twenty dollars on something you'll use once and forget about in the back of your spice cabinet.
- Crowd-Pleasing Adaptability: I've served these to coconut fanatics and coconut skeptics alike. The secret lies in how the coconut integrates into the brownie rather than sitting on top like a tropical invasion. Even my friend who claims to hate coconut devoured three pieces before realizing what he was eating.
Alright, let's break down exactly what goes into this masterpiece...
Inside the Ingredient List
The Flavor Base
All-purpose flour forms the structural backbone of these brownies, but here's what most recipes get wrong — they treat it like an afterthought. Too much flour and you've got chocolate cake. Too little and you're eating chocolate soup with coconut floating in it. The ratio we've landed on creates that perfect fudgy texture that holds together when you cut it but collapses slightly under your fork in the most satisfying way. We're using exactly one cup, no more, no less, and we're sifting it to avoid those little flour lumps that look like tiny white freckles in your finished brownies.
Unsweetened cocoa powder is where the real chocolate flavor lives, and quality matters here more than anywhere else. Skip the generic store brand and go for something that actually smells like chocolate when you open the container. The cocoa powder provides the deep, complex chocolate notes that balance the sweetness of the coconut and condensed milk. If you can only find the cheap stuff, add an extra tablespoon and thank me later when your brownies taste like they came from a Parisian bakery instead of a box mix.
Salt might seem like an odd addition to a sweet recipe, but leaving it out is like going to a concert and forgetting to charge your phone — technically possible, but why would you do that to yourself? Just a quarter teaspoon enhances every other flavor, making the chocolate taste more chocolatey and the coconut more coconutty. It's the difference between a good brownie and a brownie that makes people close their eyes when they take the first bite.
The Texture Crew
Granulated sugar does more than just make things sweet — it's a texture magician that creates that gorgeous shiny top crust that cracks when you cut into it. We're using exactly one and a half cups, which sounds like a lot until you remember that we're also adding unsweetened coconut and condensed milk. The sugar creates little air pockets as it melts, giving us that perfect balance between dense and cakey. Don't try to reduce it unless you want brownies that taste like they were made by someone who thinks joy is optional.
Salted sweet cream butter is non-negotiable here. I know, I know — you're thinking you could use oil or margarine and save a few calories. But butter provides the rich flavor that makes these brownies taste like they came from a bakery rather than a science experiment. We're melting it first, which creates a denser texture than creaming, perfect for that fudgy center we're after. Plus, the salt in the butter enhances all the other flavors in a way that unsalted butter plus added salt just can't replicate.
Eggs are the binding agents that hold our coconut-chocolate dreams together, but temperature matters more than you think. Cold eggs can cause your melted butter to seize up, creating little lumps of fat that refuse to incorporate. Room temperature eggs blend smoothly, creating an emulsion that stays stable during baking. We're using two whole eggs for structure plus one extra yolk for richness because we're not amateurs here.
The Unexpected Star
Sweetened condensed milk is usually reserved for key lime pie or Vietnamese coffee, but here it's our secret weapon for coconut distribution. When you pour it over the coconut flakes, it hydrates them and carries their flavor throughout the entire brownie. The milk proteins also help create that gorgeous chewy texture in the coconut layer while preventing it from turning into desiccated coconut shreds that get stuck in your teeth. Don't try to substitute evaporated milk — they're as different as heavy cream and skim milk.
Mini semi-sweet chocolate chips are our little pockets of molten chocolate joy, but size matters here. Regular chips are too heavy and sink to the bottom, creating a weird chocolate layer that throws off the brownie-to-coconut ratio. Mini chips stay suspended throughout the batter, creating those delightful bursts of melted chocolate in every bite. We toss them in a teaspoon of flour first to prevent them from all sinking to the bottom in a chocolate rebellion.
The Final Flourish
Sweetened coconut flakes are the star that most recipes treat like a backup dancer. The sweetened variety stays moist during baking, while unsweetened coconut turns into something resembling shredded cardboard. We're using the flakes, not the fine shredded stuff, because we want to see and taste the coconut. It should look like tiny white ribbons running through your brownie, not like someone accidentally dropped their morning granola on top.
Vanilla extract is the final note that ties everything together, but please — use the real stuff, not the imitation vanilla that tastes like it was made in a chemical plant. Real vanilla has over 250 flavor compounds that add warmth and complexity to our brownies. The imitation stuff has one compound that tastes like vanilla decided to phone it in. We're adding a full tablespoon because these are celebration brownies, not "what's the minimum I can get away with" brownies.
Everything's prepped? Good. Let's get into the real action...
The Method — Step by Step
- Preheat your oven to 350°F (175°C) and line an 8x8-inch baking pan with parchment paper, leaving an overhang on two opposite sides so you can lift the brownies out later. This isn't the time to get fancy with butter and flour — parchment paper is your insurance policy against brownie tragedy. If you've ever tried to pry brownies out of a pan with a spatula, creating a mosaic of broken chocolate squares that look like a baking crime scene, you know why we do this. The parchment should come up about an inch on each side, creating little handles that will make you feel like a professional baker when you effortlessly lift out a perfect slab of brownies.
- In a dry skillet over medium heat, toast your coconut flakes for 3-4 minutes, stirring constantly with a wooden spoon. Watch this part closely — coconut goes from perfectly golden to burnt disaster faster than you can say "tropical vacation." You're looking for a light golden color and a nutty aroma that makes you want to eat coconut straight from the pan. The flakes should smell like a beach vacation and look like they've been kissed by the sun, not like they spent too long in a tanning bed. Pour them onto a plate immediately to stop the cooking process, because they will continue toasting from residual heat and nobody wants coconut charcoal in their brownies.
- In a large microwave-safe bowl, melt your butter in 30-second bursts, stirring between each interval. You want it completely liquid but not boiling — think hot tub temperature, not lava. Let it cool for about 5 minutes while you gather the rest of your ingredients. This cooling period prevents the hot butter from scrambling your eggs later, which would create little white flecks of cooked egg throughout your brownies. Nobody wants to explain to their guests that those aren't coconut pieces, they're actually bits of accidental omelet.
- Whisk the granulated sugar into your cooled butter until the mixture looks like glossy wet sand. This step might seem unnecessary, but it's crucial for creating that shiny top crust that makes bakery brownies look so professional. The sugar needs to start dissolving in the fat before we add other ingredients. Keep whisking until you can't see individual sugar crystals anymore — it should look like satiny chocolate frosting that you definitely shouldn't eat with a spoon (but I won't tell if you do).
- Add your eggs one at a time, whisking each one in completely before adding the next. This isn't a race — take your time and let each egg emulsify with the butter-sugar mixture. The batter should get progressively smoother and more satiny with each addition. When you add the extra yolk, the batter should coat your whisk like liquid velvet. If you see any lumps or curdled-looking bits, your butter was probably too hot. Don't panic — just keep whisking vigorously and they'll usually smooth out.
- Stir in the vanilla extract and watch as the batter suddenly smells like a chocolate shop. The vanilla should incorporate immediately, turning your batter into something that smells so good you'll be tempted to skip the rest of the steps and just eat it with a spoon. Resist this temptation — I promise the finished product is worth the wait. The batter should be smooth and glossy, with a texture like thick chocolate sauce that you can't resist licking off the whisk when you're done.
- In a separate bowl, whisk together your flour, cocoa powder, and salt. This step ensures the cocoa powder doesn't clump up in your wet ingredients, creating those little dry pockets that taste like bitter chocolate bombs. The salt should be evenly distributed throughout, because nobody wants to bite into a salt crystal in their brownie. Sift everything together if your cocoa powder is particularly lumpy — it's worth the extra dish to avoid chocolate gravel in your finished product.
- Add your dry ingredients to the wet ingredients and fold them together with a spatula. The key here is to stop mixing as soon as the flour disappears — overmixing is the enemy of fudgy brownies. The batter will be thick and almost mousse-like, which is exactly what you want. It should hold its shape when you scoop it but still spread slightly. If it looks like brownie batter from a box mix, you've gone too far and your brownies will be cakey. We want dense and rich, not light and fluffy.
- Toss your chocolate chips with a teaspoon of flour in a small bowl, then fold them into the batter. The flour coating prevents them from all sinking to the bottom in a chocolate rebellion. The mini chips should be evenly distributed throughout, like little chocolate landmines waiting to surprise you with pockets of melty joy. Don't overmix here — just a few gentle folds to distribute them evenly without deflating your batter.
- Spread half the batter into your prepared pan, creating an even layer that reaches all the corners. This first layer should be about half an inch thick — use an offset spatula or the back of a spoon to smooth it out. The batter will be thick and might need some persuasion to reach the edges, but don't worry about making it perfect. Just get it relatively even, because this is the foundation for our coconut layer.
- Now for the magic part: mix your toasted coconut with the sweetened condensed milk until it looks like coconut candy. The milk should coat every flake, turning it into a glossy, tropical mixture that you'll want to eat with a spoon. Spread this coconut mixture evenly over the brownie base, leaving about a quarter-inch border around the edges. This border prevents the coconut from burning and creates those amazing crispy edges that people fight over.
- Dollop the remaining brownie batter over the coconut layer in small spoonfuls. Don't worry about covering every inch — the batter will spread as it bakes, creating beautiful marbled swirls. Use a butter knife to gently swirl the top, creating a pattern that looks like chocolate and coconut decided to dance together. The goal is distinct layers with some artistic swirls, not a homogenous mixture that looks like chocolate coconut concrete.
- Bake for 30-35 minutes, but start checking at 25 minutes. The edges should look set and slightly pulled away from the pan, while the center should still jiggle slightly when you shake the pan. That jiggle is crucial — it means your brownies will be fudgy, not cakey. If you wait until a toothpick comes out clean, you've gone too far and will have chocolate-flavored bricks. The coconut on top should be golden brown and toasty, like a tropical sunset in dessert form.
That's it — you did it. But hold on, I've got a few more tricks that'll take this to another level...
Insider Tricks for Flawless Results
The Temperature Rule Nobody Follows
Here's the thing that separates brownie masters from brownie disasters — temperature control at every stage. Your eggs need to be room temperature, your butter needs to be melted but not hot, and your oven needs to be properly preheated for at least 20 minutes. I learned this the hard way when I rushed the process and ended up with brownies that had the texture of chocolate-flavored rubber. A friend tried skipping this step once — let's just say it didn't end well, and she still blames me for her failed dinner party. If you forget to take your eggs out of the fridge (and we all do), float them in warm water for 5 minutes. Not hot water — we're not making breakfast here, just taking the chill off.
Why Your Nose Knows Best
Forget timers — your nose is the best brownie detector you have. When these are perfectly baked, your kitchen will smell like a chocolate factory had a baby with a tropical island. The aroma should be rich and complex, not sharp or burnt. About 5 minutes before they're done, you'll notice the smell intensifies and becomes almost intoxicating. That's when you should start checking every 2 minutes. The difference between perfect and overbaked is roughly the time it takes to check Instagram, so stay present. I've ruined more brownies by getting distracted by my phone than I care to admit.
The 5-Minute Rest That Changes Everything
After you pull these from the oven, let them rest in the pan for exactly 5 minutes — no more, no less. During this time, the carryover heat finishes setting the center while the edges start to pull away from the pan. This is crucial for getting clean cuts later. Then use the parchment paper handles to lift the entire slab onto a cutting board. Don't cut them yet — let them cool completely, about 2 hours. I know, I know — warm brownies are one of life's great pleasures. But these need time for the coconut layer to set properly. Cut too early and you'll have coconut goo oozing everywhere instead of defined layers.
Creative Twists and Variations
This recipe is a playground. Here are some of my favorite ways to switch things up:
Almond Joy Remix
Replace half the coconut with chopped almonds and add a teaspoon of almond extract to the batter. The nuts provide a satisfying crunch that plays beautifully against the chewy coconut, while the almond extract amplifies the tropical notes. Top with a drizzle of melted chocolate mixed with a teaspoon of coconut oil for that professional candy-bar finish. This version tastes like an Almond Joy got upgraded to first class and decided to never go back to economy.
Espresso Coconut Mocha
Dissolve 2 tablespoons of instant espresso powder in the sweetened condensed milk before mixing with the coconut. The coffee enhances the chocolate flavor while adding a sophisticated bitterness that balances the sweetness. If you've ever struggled with overly sweet coconut desserts, this is your solution. The espresso creates a mocha-coconut hybrid that tastes like your favorite coffee shop decided to start making brownies.
Salted Caramel Coconut
Drizzle homemade or store-bought caramel over the coconut layer before adding the top brownie layer, then sprinkle with flaky sea salt. The caramel seeps into the coconut, creating these amazing pockets of gooey sweetness that contrast with the salt. Pro tip: warm the caramel slightly so it spreads easily but isn't hot enough to cook the coconut. This variation is what happens when a Samoa cookie and a brownie have a beautiful baby.
Tropical White Chocolate
Replace the semi-sweet chocolate chips with white chocolate chips and add the zest of one lime to the coconut mixture. The white chocolate stays creamy during baking, creating little pockets of vanilla-scented joy, while the lime zest brightens everything and prevents the sweetness from becoming overwhelming. This version tastes like a tropical vacation in dessert form and pairs amazingly well with a cup of coconut-flavored coffee.
Peanut Butter Paradise
Drop spoonfuls of peanut butter over the coconut layer, then use a knife to create swirls. The peanut butter toasts slightly during baking, creating these amazing peanut-coconut pockets that taste like a candy bar from an alternate universe where everything is better. Use natural peanut butter for the best flavor — the kind you have to stir — and warm it slightly so it swirls easily.
Spiced Mexican Chocolate
Add a teaspoon of cinnamon, a quarter teaspoon of cayenne, and a pinch of nutmeg to your dry ingredients. The spices warm up the chocolate and create this complex flavor profile that makes the coconut taste more sophisticated. If you've ever had Mexican hot chocolate, imagine that flavor but in brownie form with tropical coconut notes. It's like taking your taste buds on a vacation where chocolate, coconut, and spices decided to start a band.
Storing and Bringing It Back to Life
Fridge Storage
These brownies will keep in an airtight container in the refrigerator for up to 5 days, but here's the key — let them come to room temperature before serving. Cold brownies are a crime against dessert, and the coconut layer becomes unpleasantly firm when chilled. Store them in a single layer if possible, with parchment paper between layers if you must stack them. The refrigerator actually helps the flavors meld and deepen, so day-three brownies often taste better than day-one. Just remember to take them out 30 minutes before you want to serve them, or your guests will wonder why you're serving chocolate-flavored coconut bricks.
Freezer Friendly
Cut these into individual squares and wrap each one tightly in plastic wrap, then store in a freezer bag for up to 3 months. The key is wrapping them individually so you can grab just one when you need emergency chocolate therapy. To thaw, leave them at room temperature for about an hour, or microwave for 20-30 seconds if you're impatient. The coconut layer actually holds up beautifully to freezing and thawing, maintaining its texture better than most brownie additions. Pro tip: freeze them in serving-size portions so you're not tempted to eat the entire batch in one sitting.
Best Reheating Method
If you must reheat these (though they're perfect at room temperature), wrap individual portions in foil and warm in a 300°F oven for 5-7 minutes. The foil prevents the coconut from burning while the gentle heat restores the fudgy texture. Add a tiny splash of water before reheating — it steams back to perfection and prevents the edges from drying out. The microwave works in a pinch, but use 50% power for 15-20 seconds max, or you'll end up with chocolate lava that burns your tongue and coconut that tastes like it was toasted by a blowtorch.