I remember the night it all went wrong. I was in a frantic rush to impress my friends after a long week, and the kitchen felt like a battlefield. I had just finished a pumpkin soup that tasted like a soggy blanket, and the air was thick with the smell of burnt sugar. A friend dared me to make something that could turn that disaster into a triumph. I laughed, grabbed my trusty pumpkin puree, and decided to create a dessert that would have everyone begging for seconds. That moment set the stage for what would become the most irresistible pumpkin ice cream you've ever tasted.
From the moment I poured the silky pumpkin into the mixing bowl, the kitchen filled with a sweet, earthy aroma that made my mouth water. The color was a warm, golden amber, promising a flavor that was both comforting and daring. As the mixture thickened, I could hear the gentle hiss of the pot, a sound that whispered “this is going to be good.” My senses were on high alert: the sweetness of sugar, the rich creaminess of heavy cream, the subtle spice of pumpkin pie seasoning, and the crunchy bite of toasted walnuts. I could almost taste the first scoop—smooth, velvety, and perfectly balanced.
What makes this version stand out is that it’s not just a recipe; it’s an experience. It’s about the way the pumpkin puree forms the backbone, the way the cream and milk create a silky texture that melts on your tongue, and the way the walnuts add a satisfying crunch that breaks the monotony of pure cream. I’ve spent years experimenting with pumpkin desserts, and this one is hands down the best version you'll ever make at home. I dare you to taste this and not go back for seconds. I’ve already eaten half the batch before anyone else got a chance to try it.
Picture yourself pulling this out of the freezer, the whole kitchen smelling incredible, and the first scoop sliding off the spoon like a smooth river. The moment you taste it, you’ll know you’re in the presence of something special. I’ll be honest—my friends never expected a pumpkin dessert to feel like a luxury treat, and they were blown away. If you've ever struggled with pumpkin desserts that end up too dry or too sweet, you're not alone—this is the fix. Let me walk you through every single step—by the end, you'll wonder how you ever made it any other way.
What Makes This Version Stand Out
- Flavor Depth: The blend of pumpkin puree, pumpkin pie spice, and vanilla extract creates a layered taste that feels like a cozy cabin in October, but with a modern twist.
- Texture Mastery: Heavy cream and whole milk combine to give a silky mouthfeel that’s thicker than a regular ice cream yet light enough to scoop.
- Ingredient Quality: Using real pumpkin puree instead of canned or pre-seasoned mixes ensures authenticity and a natural sweetness that can't be beat.
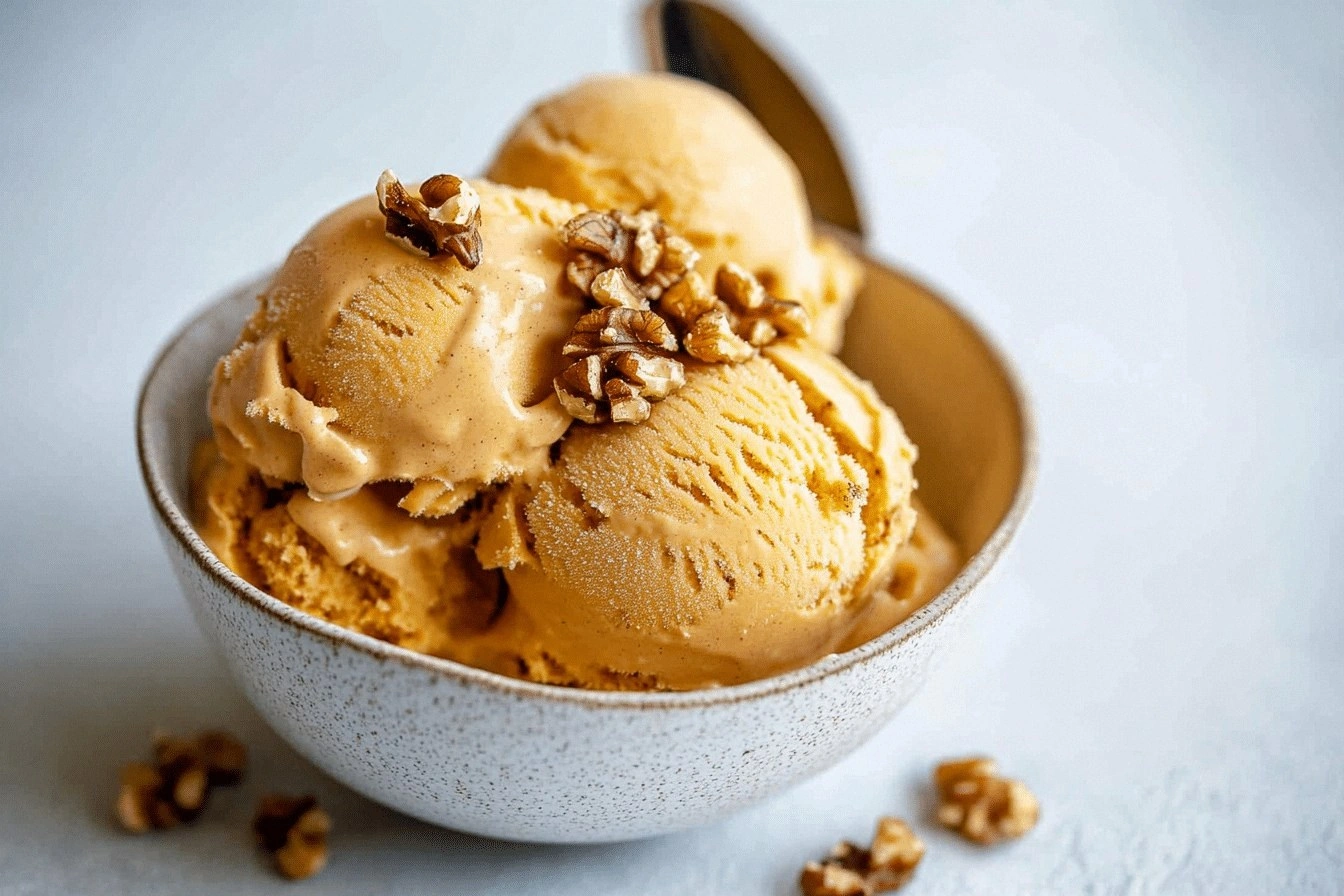
- Crunch Factor: Toasted walnuts add a delightful contrast, turning each bite into a dynamic experience.
- Make‑Ahead Friendly: This recipe can be prepared days in advance, allowing the flavors to meld and the texture to improve.
- Visual Appeal: The golden hue and specks of spice make it Instagram‑ready without any extra garnish.
Alright, let's break down exactly what goes into this masterpiece. But first, a quick kitchen hack to save you time.
Inside the Ingredient List
The Flavor Base
Pumpkin puree is the cornerstone of this ice cream. It provides that unmistakable pumpkin richness, a natural sweetness that balances the spices. If you skip it, the dessert loses its core identity and becomes just a sweet, spiced custard. For the best flavor, choose a puree made from fresh pumpkin or a high‑quality store‑bought variety that has no added sugars or preservatives. A small tip: if you’re using canned puree, drain it well to avoid excess liquid.
The Texture Crew
Heavy cream and whole milk work together to create that luscious, melt‑on‑tongue experience. The heavy cream brings fat content that gives body and richness, while the whole milk lightens the mixture, preventing it from becoming too dense. If you’re looking for a lower‑fat option, swap the heavy cream for a light cream and reduce the milk to half a cup. The result will still be creamy, but slightly lighter. Remember, the ratio of cream to milk is key—too much milk and the ice cream will be watery.
The Sweetener
Sugar is the engine that drives the flavor profile. It sweetens the mix just right, enhancing all the other flavors efficiently. Too little sugar, and the pumpkin will taste raw; too much, and you’ll drown the spices. A good rule of thumb is ¾ cup for four servings. If you prefer a natural sweetener, you can use honey or maple syrup, but adjust the quantity to account for the liquid content.
The Unexpected Star
Walnuts add a nutty crunch that complements the pumpkin spice beautifully. They’re toasted lightly to bring out their natural oils and give a subtle roasted flavor. If you’re allergic or simply don’t have walnuts, pecans or almonds work as great substitutes. The key is to toast them until they’re golden and fragrant—this step is crucial for that depth of flavor.
The Final Flourish
Pumpkin pie spice, vanilla extract, and a pinch of salt are the finishing touches that tie everything together. The spice blend infuses the ice cream with classic warmth, while vanilla adds depth and enhances the overall flavor profile. A pinch of salt is a secret weapon that balances sweetness and intensifies the flavors. Without it, the dessert can taste flat.
Everything's prepped? Good. Let's get into the real action.
The Method — Step by Step
- In a medium saucepan, combine the pumpkin puree, heavy cream, whole milk, sugar, pumpkin pie spice, vanilla extract, and a pinch of salt. Heat over medium heat, stirring constantly until the sugar dissolves and the mixture becomes silky. The mixture should smell toasty and aromatic. This step sets the foundation for a smooth custard.
- Whisk the egg yolks in a separate bowl until they’re pale and slightly thickened. Slowly pour about a cup of the warm pumpkin mixture into the yolks while whisking vigorously. This tempering step prevents the eggs from scrambling. Then, pour the yolk mixture back into the saucepan and continue cooking for another 2–3 minutes, stirring constantly until the custard thickens enough to coat the back of a spoon.
- Remove the saucepan from the heat and let it cool for 5 minutes. Then, strain the mixture through a fine sieve into a clean bowl to remove any lumps. This ensures a silky texture. At this point, you’ll see a smooth, glossy custard that’s ready for the next step.
- Stir in the toasted walnuts, reserving a few for garnish if you wish. The walnuts should be evenly distributed so that each bite has a crunch. If you prefer a smoother ice cream, you can blend the walnuts into small pieces before adding them.
- Cover the bowl with plastic wrap, pressing it directly onto the surface of the custard to prevent a skin from forming. Chill the mixture in the refrigerator for at least 4 hours, or overnight. This step allows the flavors to meld and the custard to thicken.
- Once chilled, pour the custard into an ice cream maker and churn according to the manufacturer’s instructions, usually 20–25 minutes. The custard should thicken to a soft‑serve consistency. If you’re using a manual churner, keep the mixture moving to avoid ice crystals.
- Transfer the churned ice cream into a freezer‑safe container and smooth the top with a spatula. Seal the container and freeze for at least 4 hours, or until firm. The final texture should be creamy, with a subtle crunch from the walnuts. Serve immediately, or store in the freezer for up to a month.
That's it — you did it. But hold on, I've got a few more tricks that'll take this to another level. Let’s dive into insider tricks that will make every scoop a masterpiece.
Insider Tricks for Flawless Results
The Temperature Rule Nobody Follows
The custard must be at the right temperature before churning. If it’s too warm, the ice cream will be runny; if it’s too cold, it won’t churn properly. Aim for 40–45°F. A kitchen thermometer is a game‑changer; it saves you from a batch of mush.
Why Your Nose Knows Best
When the custard begins to thicken, the aroma will shift from sweet to warm and spicy. Trust your nose; this scent indicates the perfect moment to remove the mixture from heat. A strong pumpkin aroma means the spices have fully integrated.
The 5‑Minute Rest That Changes Everything
After chilling, let the custard rest at room temperature for 5 minutes before churning. This small pause allows the fat to soften, giving you a silkier ice cream. I’ve seen people skip this step and end up with a grainy texture.
The Walnut Toasting Trick
Toast walnuts in a dry skillet over medium heat for 5 minutes, stirring constantly. The nuts should be golden and fragrant. If you toss them in a bit of brown sugar before toasting, you’ll get a caramelized crunch that elevates the flavor profile.
The Secret Salt
Adding a pinch of salt to the custard isn’t just about balance; it also helps to lower the freezing point, making the ice cream softer and easier to scoop. A tiny pinch, no more than 1/8 teaspoon, is all you need.
Creative Twists and Variations
This recipe is a playground. Here are some of my favorite ways to switch things up:
Caramel Swirl Edition
Fold in a swirl of homemade caramel sauce after churning. The caramel adds a buttery sweetness that complements the pumpkin’s earthiness. Great for a dessert that feels indulgent.
Chocolate Chip Surprise
Add dark chocolate chips during the last 5 minutes of churning. The chocolate melts slightly, creating pockets of molten chocolate that burst in your mouth.
Maple Walnut Delight
Replace the sugar with maple syrup and use maple‑toasted walnuts. The maple flavor pairs beautifully with the pumpkin, giving the ice cream a deeper, caramel‑like sweetness.
Coconut Cream Twist
Swap the heavy cream for coconut cream and use coconut milk instead of whole milk. This version is dairy‑free and offers a tropical undertone that’s surprisingly complementary.
Spiced Rum Infusion
Add a splash of spiced rum to the custard before chilling. The rum brings a warm, boozy note that’s perfect for a cozy evening.
Herbal Touch
Incorporate a pinch of dried rosemary or thyme into the spice blend for a herbal kick. The herb pairs unexpectedly well with the sweetness of pumpkin.
Storing and Bringing It Back to Life
Fridge Storage
If you need to store the ice cream in the fridge for a day or two, keep it in an airtight container. Let it sit at room temperature for 10–15 minutes before scooping to soften. A quick microwave burst of 10 seconds also works if you’re in a hurry.
Freezer Friendly
For long‑term storage, keep the ice cream in a freezer‑safe container with a tight seal. Label with the date. The ice cream can last up to a month without significant loss of flavor or texture.
Best Reheating Method
To revive frozen ice cream, let it sit at room temperature for 15–20 minutes. Add a tiny splash of milk or cream before serving to restore its silky texture. This trick steams the ice cream back to perfection.