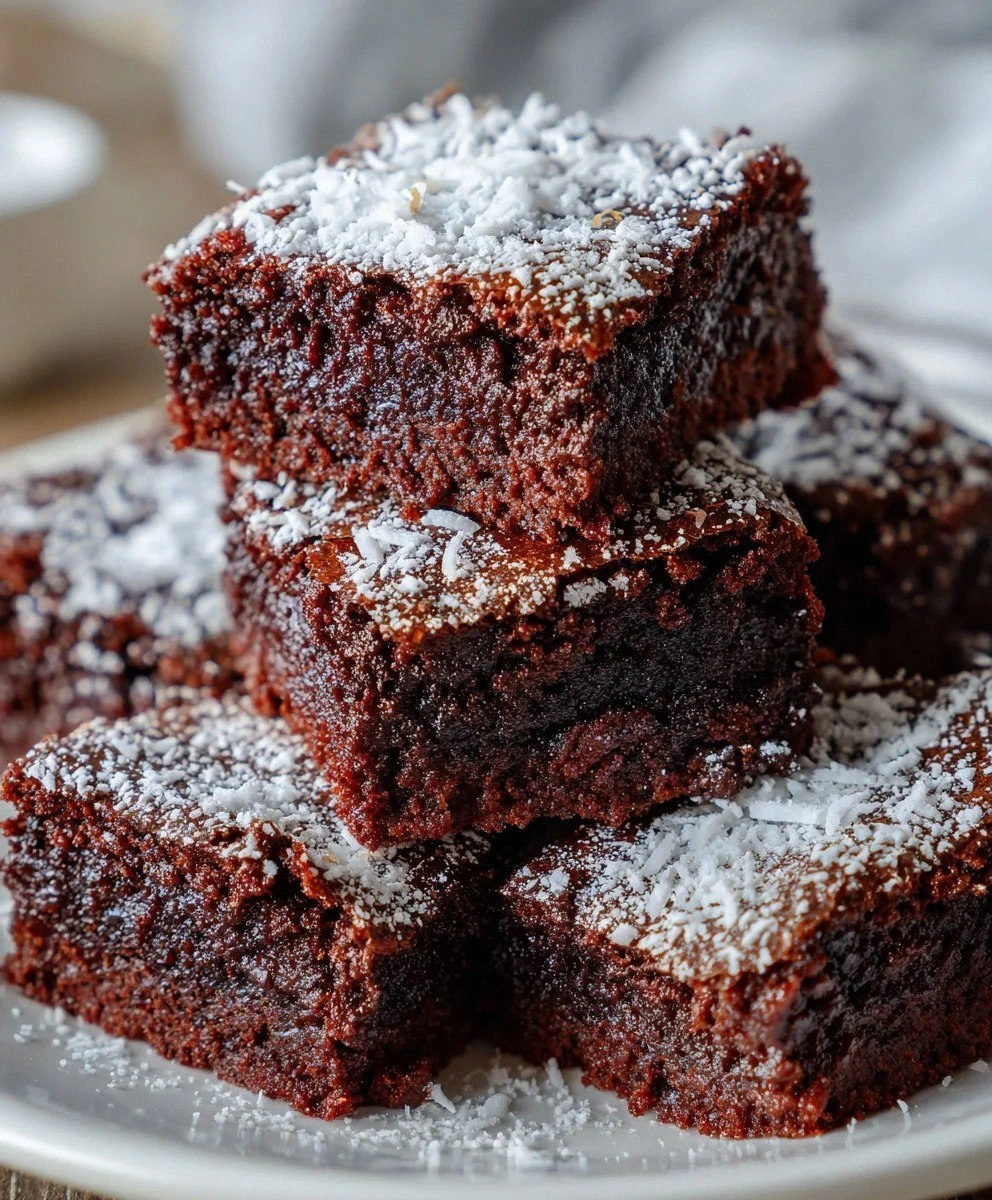
Why you'll love this recipe
- No-bake, set in hours not the oven
- 30-minute active prep time
- Crowd-pleaser for all ages
- Make-ahead, perfect for busy weeks
- Kid-approved chocolate indulgence
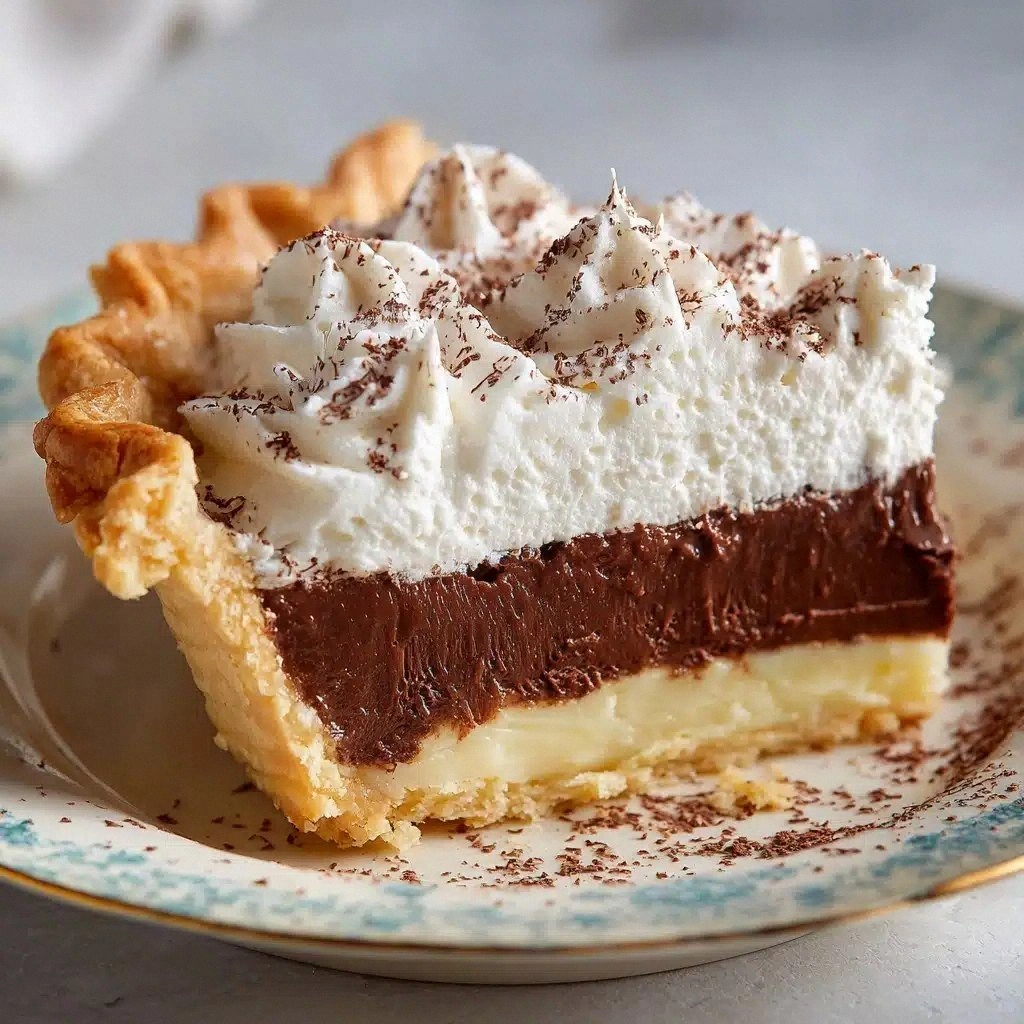
I first whipped up this chocolate pie on a stormy Sunday, the rain drumming on the windows while the kitchen filled with the scent of melting cocoa. My sister was visiting, and we both craved something sweet but didn’t want to turn on the oven. We tossed the pre‑made crust onto the counter, melted the chips, and within minutes the whole house smelled like a boutique chocolate shop. When we cut the first slice, the creamy interior oozed onto the plate, and we both laughed, a little chocolate on our noses. Since that rainy day, the pie has become my secret weapon for last‑minute gatherings. I keep a box of chocolate chips and condensed milk in the pantry, ready for a quick indulgence. Even my kids now ask for the ‘cold chocolate cake’ before dinner, and I love the look of pure delight on their faces. It’s simple, it’s fast, and it never fails to turn an ordinary evening into a celebration.
The story
The moment the chocolate mixture hits the pan, a glossy ribbon of dark velvet unfurls, filling the kitchen with a sweet, buttery perfume. A quick stir sends tiny bubbles dancing, and you can already taste the silky richness that will coat the crust. As the aroma deepens, anticipation builds for that first fork‑ful of melt‑in‑your‑mouth bliss.
I first discovered this pie on a rainy Saturday when my teenage daughter begged for something chocolatey yet fuss‑free. I grabbed the pre‑made crust from the pantry, melted the chips, and within an hour we were devouring cold slices straight from the fridge. The look on her face—eyes wide, a grin sticky with whipped topping—made me realize I had stumbled onto a family staple. Since then, it’s become our go‑to rescue dessert for unexpected guests.
What sets this version apart is the use of sweetened condensed milk as a natural stabilizer, eliminating the need for eggs or gelatin. The low‑heat melt preserves the chocolate’s natural sheen, while folding in chilled whipped topping creates a mousse‑like lightness. The result is a velvety filling that sets firm without ever touching the oven.
The base crust offers a buttery crunch that contrasts with the glossy chocolate core, which is sweet, slightly salty, and deeply cocoa‑forward. A whisper of vanilla lifts the flavor, while the airy whipped topping adds a cool, creamy finish that tempers the richness. Each bite balances dense chocolate with airy lightness, delivering layers of texture and taste.
Slice it onto a simple dessert plate and garnish with fresh berries, chocolate shavings, or a sprinkle of crushed cookies for added texture. It shines as a make‑ahead treat for potlucks, a quick weeknight indulgence, or a show‑stopping finale for a dinner party. Pair it with a cold glass of milk or a bold espresso for a perfect contrast.
Don’t be intimidated by the “no‑bake” label; the only heat you need is a gentle stovetop melt that takes five minutes. With just a whisk and a spoon, you’ll have a glossy filling that firms up while you’re sipping coffee. The whole process is under 30 minutes of active work, then a few hours of chilling.
I’ve tested this pie with three different chocolate brands and the kids always ask for seconds, proving the texture holds up even after a day in the fridge. My grandma, who swears by old‑fashioned chocolate mousse, gave this a thumbs‑up after the first bite. So grab your crust, and let’s get that chocolate bliss set.
Why This Recipe Works
- Gentle low‑heat melt prevents chocolate from seizing, keeping the filling silky.
- Sweetened condensed milk acts as a natural stabilizer, giving the pie structure without baking.
- Folding in chilled whipped topping incorporates air, creating a light, mousse‑like texture.
Ingredient notes & substitutions
1 (9-inch) pre-made graham cracker or chocolate pie crust
Provides a buttery, crunchy base that absorbs the silky filling without getting soggy.
1 ½ cups semi-sweet chocolate chips
Creates the rich chocolate flavor and smooth melt; semi‑sweet balances sweetness.
1 (14 oz) can sweetened condensed milk
Acts as a natural stabilizer and adds concentrated sweetness, giving the filling body.
1 ½ cups whipped topping (plus more for serving)
Incorporates air for a light, mousse‑like texture and balances richness.
2 tablespoons butter
Adds gloss and a subtle buttery depth to the chocolate mixture.
Equipment you'll need
Ingredients
- 1 (9-inch) pre-made graham cracker or chocolate pie crust
- 1 ½ cups semi-sweet chocolate chips
- 1 (14 oz) can sweetened condensed milk
- 2 tablespoons butter
- 1 teaspoon vanilla extract
- 1 ½ cups whipped topping (plus more for serving)
- Chocolate shavings
- Crushed cookies
- Fresh berries
Before You Start
- Soften butter to room temperature
- Measure chocolate chips precisely
- Chill whipped topping
- Gather crust and garnishes
Instructions
- 1Step 1
In a medium saucepan over low heat, combine chocolate chips, sweetened condensed milk, and butter. Stir until smooth.
- 2Step 2
Remove from heat, stir in vanilla extract. Cool slightly.
- 3Step 3
Fold in whipped topping until fluffy. Pour into pie crust.
- 4Step 4
Refrigerate for at least 4 hours until firm.
- 5Step 5
Top with whipped topping and desired garnishes before serving.
Pro tips
Keep heat low
Melt the chocolate over low heat to prevent scorching and maintain a glossy finish.
Stir constantly
A steady stir keeps the mixture uniform and stops the chocolate from seizing.
Cool before folding
Let the chocolate‑condensed milk blend cool slightly so the whipped topping doesn’t melt.
Use chilled topping
Whipped topping should be cold; it holds air better and keeps the filling light.
Garnish last minute
Add shavings or berries right before serving to keep textures fresh.
Refrigerate flat
Place the pie on a flat tray while chilling to ensure even setting.
Avoid overmixing
Fold the whipped topping just until combined; overmix will deflate the airy texture.
Variations to try
Mint Chocolate Twist
Stir ½ teaspoon peppermint extract into the chocolate mixture and top with crushed mint candies for a fresh finish.
Dairy-Free Version
Swap sweetened condensed milk for coconut condensed milk and use whipped coconut cream instead of dairy topping.
Nutty Crunch
Fold in ¼ cup toasted almond slivers after the filling sets for added bite and flavor.
Holiday Peppermint
Top the pie with crushed candy canes and a drizzle of white chocolate for a festive touch.
Serving Suggestions
Troubleshooting
Filling is grainy
Melt chocolate over low heat, stir continuously, and ensure butter is fully incorporated.
Filling is too runny
Cool the chocolate mixture longer before folding in whipped topping, or add a tablespoon more condensed milk.
Crust becomes soggy
Chill the filling completely before adding garnish and keep the pie refrigerated on a flat surface.
Whipped topping deflates
Use chilled topping and fold gently; avoid overmixing after addition.
Storage & make-ahead
Refrigerator
Store in an airtight pie container; keeps fresh up to 4 days.
Freezer
Freeze the whole pie wrapped tightly for up to 2 months; thaw overnight in the fridge.
Best way to reheat
Serve chilled, but if you prefer warm, microwave 10 seconds or let sit at room temperature 10 minutes.
Make-ahead
Assemble the pie up to 24 hours ahead; chill fully, then add fresh garnish just before serving.
Ingredients
- 1 (9-inch) pre-made graham cracker or chocolate pie crust
- 1 ½ cups semi-sweet chocolate chips
- 1 (14 oz) can sweetened condensed milk
- 2 tablespoons butter
- 1 teaspoon vanilla extract
- 1 ½ cups whipped topping (plus more for serving)
- Chocolate shavings
- Crushed cookies
- Fresh berries
Instructions
- 1In a medium saucepan over low heat, combine chocolate chips, sweetened condensed milk, and butter. Stir until smooth.
- 2Remove from heat, stir in vanilla extract. Cool slightly.
- 3Fold in whipped topping until fluffy. Pour into pie crust.
- 4Refrigerate for at least 4 hours until firm.
- 5Top with whipped topping and desired garnishes before serving.