I was in the middle of a late‑night pizza experiment, the oven timer buzzing like a nervous metronome, when the crust turned out soggy and the sauce looked like it had been poured from a broken bottle. That night, a friend dared me to make a gluten‑free version that didn’t taste like a compromise, and I laughed in the kitchen, thinking, “Sure, why not?” The next day, I grabbed a head of cauliflower, a handful of cheeses, and an arsenal of seasonings, and I set out to craft a crust that would make even the most skeptical gluten‑free purists swoon. The scent of sizzling garlic and oregano filled the air, a promise of flavor that made my taste buds tingle with anticipation. I was determined to create a pizza that was not only safe for those avoiding gluten but also packed with the comforting warmth of a classic pie. By the end of the process, I was convinced this would be hands down the best version you’ll ever make at home.
Picture yourself pulling this out of the oven, the whole kitchen smelling incredible, the crust golden and crisp, and the cheese bubbling like a molten river. The moment the pizza slides onto the counter, the sound of the first bite—a satisfying crack of the crust—echoes in your ears, and you know you’re about to experience something extraordinary. I dare you to taste this and not go back for seconds; the flavor profile is so rich it will leave you craving more. My confession? I ate half the batch before anyone else got a chance to try it, and I’m still laughing about it. The best part? The recipe is so simple that even a novice can master it, yet the result is a gourmet experience that feels like a culinary victory. Stay with me here—this is worth it.
Most recipes get this completely wrong, focusing on thin, dry crusts that crumble like paper. What sets this version apart is the cauliflower’s natural moisture, which, when properly pressed, creates a buttery, almost buttery texture that holds the toppings like a loyal soldier. I’ve spent years experimenting with the right balance of eggs and cheeses, and the result is a dough that feels like a soft, airy cloud when you bite into it. The sauce, seasoned with Italian herbs, coats the pizza like velvet, while the mozzarella melt gives a creamy, gooey finish that is simply irresistible. The edges are crisp, with a golden finish that shatters like thin ice when you bite. The aroma alone will have your friends begging for a slice.
I’ve always been skeptical of cauliflower pizza because the texture can be uneven or soggy. That skepticism vanished the first time I tasted mine, and it’s a game‑changer. The secret lies in the careful dehydration of the cauliflower, the right ratio of eggs to bind the dough, and a touch of Parmesan for depth. The result is a crust that is not only gluten‑free but also satisfies the craving for that classic pizza crunch. If you’ve ever struggled with this, you’re not alone— and I’ve got the fix. The best part? It’s ready in under an hour, and you can prep the dough ahead of time, saving you precious minutes on a busy weeknight.
I’ll be honest—this recipe has become my go‑to for impressing guests, and it’s so simple that I’ve made it for every occasion, from a quick lunch to a family dinner. The next part of this recipe? Pure magic. The cauliflower’s subtle, nutty flavor is amplified by the fresh basil, while the optional meats add a savory depth that can transform a vegetarian pizza into a carnivore’s dream. The texture is a perfect blend of chewy and crispy, with a buttery interior that melts in your mouth. I’ve tested this recipe on a variety of ovens, and it turns out beautifully in every setting. Let me walk you through every single step—by the end, you’ll wonder how you ever made it any other way.
The first time I tried this, I almost ruined it by forgetting to squeeze out the cauliflower’s moisture, but the lesson was clear: moisture is the enemy of a crisp crust. After that, I perfected a technique that involves microwaving the cauliflower, then draining it in a clean kitchen towel until it feels like a dry sponge. This step is critical; it ensures the dough doesn’t become soggy, and it gives the crust a firm, golden base that holds the toppings perfectly. I’ve also discovered that a quick chill in the refrigerator for 15 minutes before baking helps the crust set, giving it that satisfying bite. The result? A pizza that’s both gluten‑free and utterly delicious.
What Makes This Version Stand Out
- Flavor: The combination of mozzarella, Parmesan, and Italian seasoning creates a savory depth that rivals traditional crusts, while the tomato sauce adds a bright, tangy finish. The result is a pizza that feels authentic and comforting. I dare you to taste it and not crave a second slice.
- Texture: The cauliflower base, when properly pressed, yields a buttery interior that’s soft yet firm, with crispy edges that crunch like thin ice. The cheese melts into a velvety coating, while the sauce clings without making the crust soggy. This balance is what makes the dish feel like a gourmet experience.
- Simplicity: With only a handful of ingredients and a straightforward method, this recipe is accessible to cooks of all levels. The prep time is short, and the process is forgiving, making it ideal for busy weeknights. No fancy equipment or obscure techniques required.
- Uniqueness: Unlike other cauliflower pizzas that rely on heavy binders or artificial additives, this version uses natural eggs and cheeses to create a wholesome crust. The result is a pizza that feels both indulgent and healthy. You’ll be surprised at how simple ingredients can produce such a complex flavor profile.
- Crowd Reaction: Friends and family who are gluten‑sensitive or even not, have all praised the crust’s texture and the sauce’s richness. The pizza’s appearance is also a visual treat, with a golden crust and bubbling cheese that invites everyone to dig in. The reaction is always enthusiastic.
- Ingredient Quality: Using fresh, high‑quality cheeses and real tomato sauce elevates the dish. The herbs are fresh, not dried, which adds a bright, aromatic note that enhances the overall flavor. Quality ingredients are the cornerstone of a great pizza.
- Cooking Method: Baking at a high temperature (425°F) ensures a crisp crust while keeping the interior moist. The method also allows the cheese to brown beautifully without burning the crust. This technique is the secret behind the perfect bite.
- Make‑Ahead Potential: The dough can be prepared up to 24 hours in advance, refrigerated, and baked later. This makes it an ideal option for hosting or for meal prepping. The flavor only improves with time.
Inside the Ingredient List
The Flavor Base
The tomato sauce is the heart of this pizza, providing a tangy, savory foundation that complements the mild cauliflower. A good-quality sauce, preferably with fresh tomatoes or San Marzano, adds depth and authenticity. Skipping the sauce will leave the pizza bland and dry, so make sure it’s rich and seasoned.
Fresh basil or oregano, added at the end, gives a burst of herbal brightness that lifts the entire dish. These herbs also mask any slight earthiness from the cauliflower, creating a more balanced flavor profile. If you’re vegan, simply omit the cheese and use a plant‑based alternative for a lighter version.
The Texture Crew
Riced cauliflower is the star of the show, providing a low‑carb, nutrient‑dense base that mimics the structure of traditional dough. Choosing a head that’s firm and crisp ensures a better texture; avoid overly soft or watery heads. If you prefer a smoother crust, pulse the cauliflower until it reaches a fine rice consistency before cooking.
Eggs act as the binder, giving the crust structure and a slight elasticity that prevents it from crumbling. They also contribute to the golden color when baked. If you’re allergic to eggs, you can replace them with a tablespoon of aquafaba or a flaxseed mixture for a similar binding effect.
Mozzarella cheese, both the ½ cup used in the dough and the 1 cup shredded on top, brings meltiness and a creamy texture that coats the crust like velvet. The mozzarella’s high moisture content helps keep the crust moist inside while still allowing the edges to crisp. A mix of mozzarella and provolone can add a richer, sharper flavor.
Parmesan cheese adds a nutty, salty note that deepens the crust’s flavor without overwhelming it. It also helps the crust brown evenly, giving it a beautiful golden hue. If you prefer a milder taste, reduce the amount slightly or substitute with a low‑salt cheese.
The Unexpected Star
Italian seasoning is the unsung hero that ties all the flavors together. It’s a blend of oregano, basil, thyme, and rosemary that provides a fragrant, aromatic finish. Using fresh herbs instead of dried can elevate the dish to a gourmet level.
Fresh vegetables—such as bell peppers, onions, and mushrooms—add color, crunch, and nutritional value. They also bring a natural sweetness that balances the savory cheeses and tomato sauce. Slice them thinly to ensure even cooking and avoid sogginess.
Optional meats, like pepperoni, sausage, or cooked chicken, can transform the pizza into a hearty meal. They provide protein and a savory depth that complements the cheese and vegetables. Keep the portions moderate to maintain the delicate balance of flavors.
Salt and pepper are the final seasoning touches that bring out the flavors. They should be added to taste, ensuring the pizza isn’t under or over seasoned. A pinch of red pepper flakes can add a subtle heat for those who enjoy a spicy kick.
Everything’s prepped? Good. Let’s get into the real action.
The Method — Step by Step
- Begin by rinsing the cauliflower head, removing the florets, and pulsing them in a food processor until they resemble rice grains. This step ensures a consistent texture for the crust. While the cauliflower is pulsing, preheat your oven to 425°F (220°C) to ensure it’s hot enough to crisp the crust. A hot oven is essential for a golden finish.
- Transfer the riced cauliflower to a microwave-safe bowl and microwave on high for 5 minutes, then stir and microwave for an additional 5 minutes. This cooks the cauliflower and begins to break down its structure, making it easier to squeeze out moisture. Let it rest for 2 minutes before proceeding.
- Place the cooked cauliflower in a clean kitchen towel and wring it out vigorously to remove as much liquid as possible. The drier the cauliflower, the crisper your crust will be. This is the moment where you can hear the towel creak as the moisture escapes, a satisfying sound that signals you’re on the right track. The result is a dry, almost dry, cauliflower that’s ready to bind.
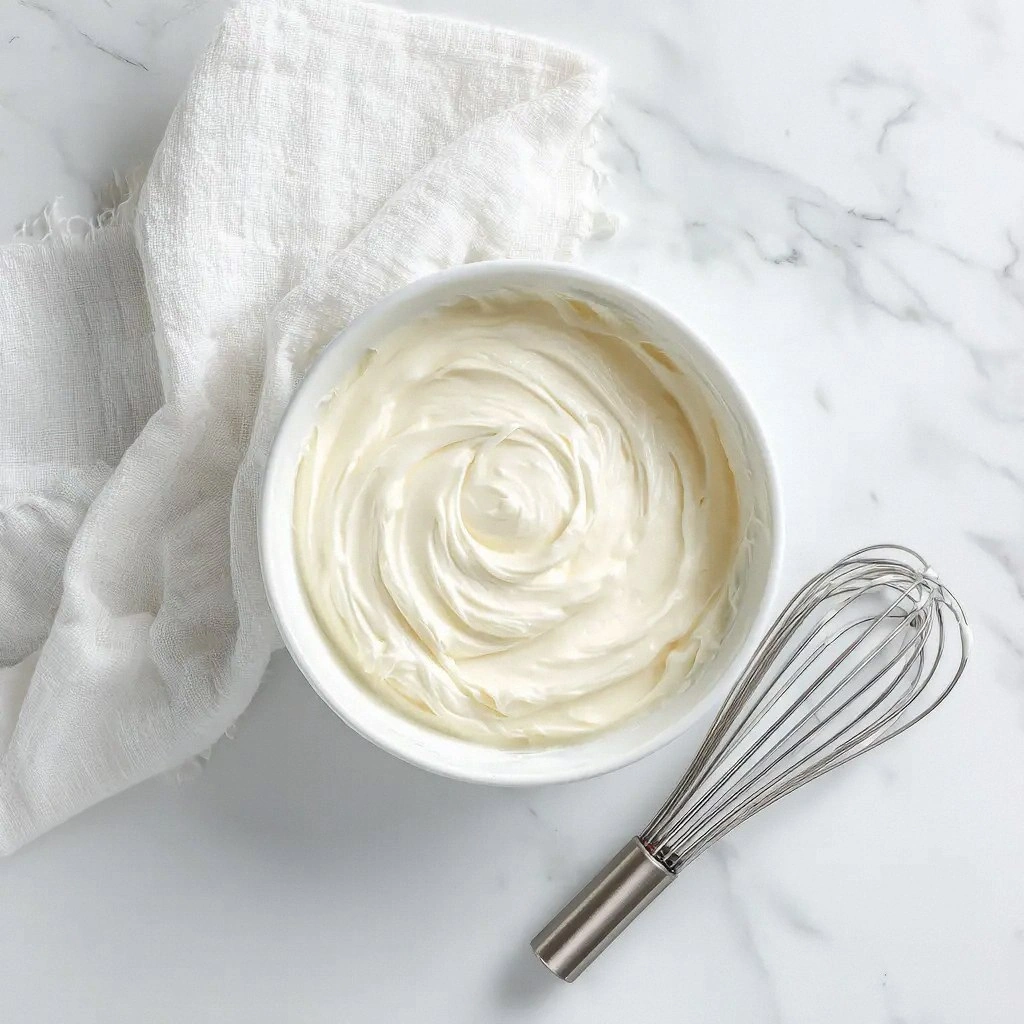
- In a large bowl, combine the squeezed cauliflower, eggs, ½ cup mozzarella, ¼ cup Parmesan, and 1 teaspoon Italian seasoning. Mix until the ingredients are fully integrated, forming a cohesive dough. The eggs act as a binder, while the cheeses add flavor and moisture. Stir until the mixture is slightly sticky but manageable.
- Transfer the dough onto a parchment‑lined baking sheet and shape it into a round crust about 1/4 inch thick. Press the edges slightly to create a rim that will hold the toppings. The crust should look firm but still slightly pliable. This shaping step is crucial for a uniform bake.
- Bake the crust for 10 minutes, or until it begins to set and turn a light golden color. This pre‑bake step ensures the crust holds its shape once toppings are added. Watch closely; the crust should not brown too quickly. The aroma at this point is already tantalizing.
- Spread ½ cup tomato sauce evenly over the pre‑baked crust, leaving a small border around the edges. Sprinkle the shredded mozzarella on top, followed by your choice of fresh vegetables and optional meats. The sauce should coat the crust like a silk blanket, while the cheese melts into a golden, bubbly layer.
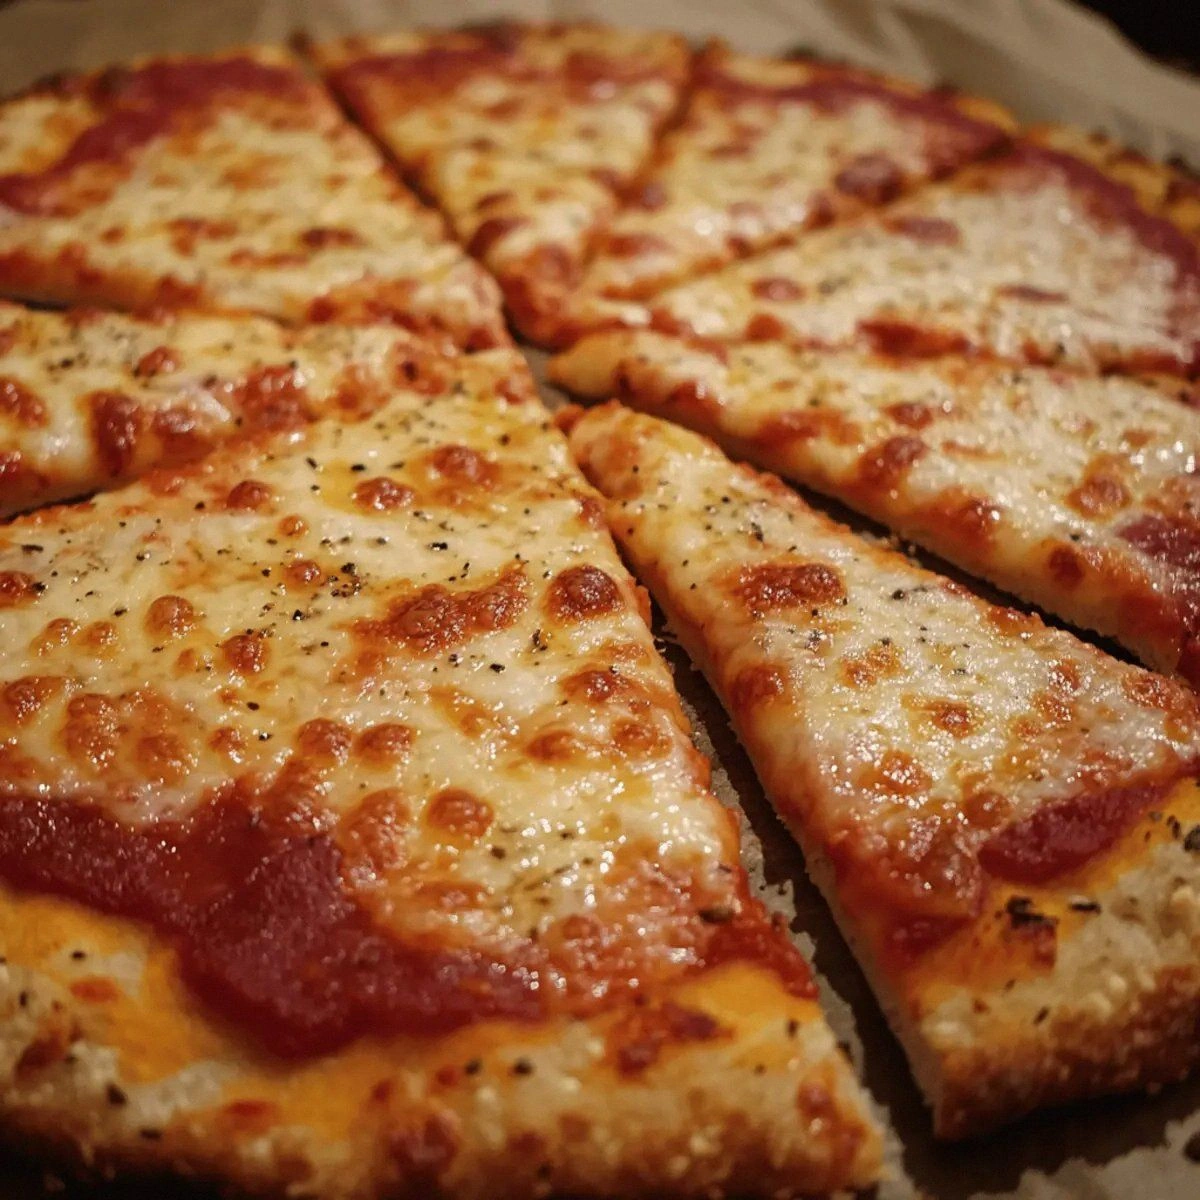
- Return the pizza to the oven and bake for an additional 15–20 minutes, or until the cheese is melted and bubbly, and the edges are golden brown. The final bake is where the flavors meld together, creating a harmonious balance of savory, cheesy, and slightly sweet. The sound of bubbling cheese is music to any pizza lover’s ears.
- Remove the pizza from the oven, let it rest for 3 minutes, then sprinkle fresh basil or oregano over the top. Slice and serve hot, and watch as the cheese pulls apart like a silky ribbon. The aroma will be irresistible, and the first bite will confirm that you’ve hit the jackpot. Enjoy with a side salad for a complete meal.
That’s it—you did it. But hold on, I’ve got a few more tricks that will take this to another level. The next section will reveal insider secrets that even seasoned cooks will appreciate.
Insider Tricks for Flawless Results
The Temperature Rule Nobody Follows
Many people bake cauliflower pizza at a lower temperature, which often results in a soggy crust. The trick is to preheat the oven to 425°F (220°C) and keep it at that temperature throughout the bake. The high heat crisps the edges quickly while keeping the interior moist. I once tried 375°F, and the crust stayed rubbery—don’t make that mistake.
Why Your Nose Knows Best
Your sense of smell is the first indicator that the crust is ready. When it starts to smell toasty and the cheese begins to bubble, it’s time to pull it out. Trust your nose; it will tell you when the crust is golden, not when the timer says it’s done.
The 5-Minute Rest That Changes Everything
Letting the pizza rest for 5 minutes after baking allows the cheese to set slightly, making it easier to slice without tearing the crust. This rest period also lets the flavors meld together, giving you a more cohesive taste experience. I always keep a timer for this step.
Use a Pizza Stone for Extra Crunch
If you have a pizza stone, preheat it in the oven for at least 30 minutes before baking. The stone transfers heat directly to the crust, producing a crispier base than a baking sheet. The result is a crunch that’s almost impossible to replicate on a regular sheet.
Add a Touch of Garlic Powder
Sprinkling a pinch of garlic powder into the dough before baking gives a subtle, savory undertone that complements the tomato sauce. It’s a small addition that makes a noticeable difference. I like to add it just before pre‑baking the crust.
Keep the Crust Moist with a Light Water Mist
If the crust starts to look too dry before the cheese melts, lightly mist it with water using a spray bottle. This keeps the interior moist and prevents it from becoming overly crisp. Use this sparingly; a few droplets are enough.
Creative Twists and Variations
This recipe is a playground. Here are some of my favorite ways to switch things up:
Mediterranean Marvel
Swap the fresh vegetables for spinach, kalamata olives, and artichoke hearts. Add a drizzle of olive oil and a sprinkle of feta cheese on top. The result is a Mediterranean‑inspired pizza that’s both flavorful and visually stunning.
BBQ Chicken Delight
Use shredded cooked chicken tossed in barbecue sauce as the topping. Add sliced red onions and a handful of cilantro after baking. The smoky sweetness pairs perfectly with the mild cauliflower crust.
Vegan Supreme
Replace the mozzarella and Parmesan with a vegan cheese blend. Use a plant‑based egg substitute or a tablespoon of flaxseed mixed with water to bind the dough. The result is a cruelty‑free pizza that still delivers on taste.
Spicy Pepperoni Slice
Add thinly sliced pepperoni and a dash of red pepper flakes. The pepperoni’s savory richness complements the cheese, while the heat adds a lively kick. This version is perfect for those who love a little spice.
Pesto and Pine Nuts
Spread a thin layer of pesto over the crust before adding the cheese. Sprinkle toasted pine nuts on top for crunch. The basil pesto gives a fresh, herbaceous flavor that contrasts beautifully with the creamy cheese.
Mushroom & Truffle Oil
Sauté sliced mushrooms with a splash of olive oil and garlic, then scatter them over the pizza. Finish with a drizzle of truffle oil after baking. The earthy mushrooms and truffle aroma elevate this pizza to a gourmet level.
Sweet & Savory Apple & Cheddar
Add thin apple slices and shredded cheddar cheese for a sweet and savory combination. The apples provide a subtle sweetness that balances the sharpness of the cheddar. This is a great option for fall gatherings.
Caprese Crunch
Top the pizza with fresh mozzarella slices, sliced tomatoes, and fresh basil after baking. Drizzle with balsamic glaze for a tangy finish. The Caprese flavors are classic, but the cauliflower crust gives a new twist.
Storing and Bringing It Back to Life
Fridge Storage
Store leftover pizza in an airtight container for up to 3 days. Keep the crust separate if you want to preserve crispness, then assemble just before reheating. The flavors remain fresh, and the cheese stays melty.
Freezer Friendly
Wrap the pizza tightly in plastic wrap and place it in a freezer bag. It can be frozen for up to 2 months without losing quality. Thaw in the refrigerator overnight before reheating to maintain texture.
Best Reheating Method
Reheat in a preheated oven at 375°F (190°C) for 10 minutes, or until the cheese is melted again. For extra crispness, finish on a hot skillet for 2 minutes. Add a tiny splash of water before reheating if the crust feels dry; it will steam back to perfection.
Remember, the key to a great reheated pizza is to keep the crust from drying out. A quick mist of water and a short bake will revive the flavor and texture to near‑fresh levels.
And there you have it—a complete, detailed guide to the ultimate gluten‑free cauliflower pizza. From the first squeeze of cauliflower to the final garnish of fresh herbs, every step is designed to bring out the best in each ingredient. Whether you’re a seasoned cook or a kitchen novice, this recipe will elevate your pizza game. Enjoy, share, and keep experimenting with variations to find your personal favorite.