Picture this: the kitchen lights flicker, the blender whirs, and you’re staring at two ripe avocados that look like they’re about to break apart. I was halfway through a frantic dinner prep, and the last thing I wanted was a greasy, soggy dessert that would make me feel like I’d just eaten a bowl of cereal. That night, a friend dared me to create a chocolate mousse that could actually live up to the hype of being both indulgent and wholesome. I stared at the avocados, the cocoa, and the maple syrup, and I knew I was about to invent something that would become the new standard for dessert in my household.
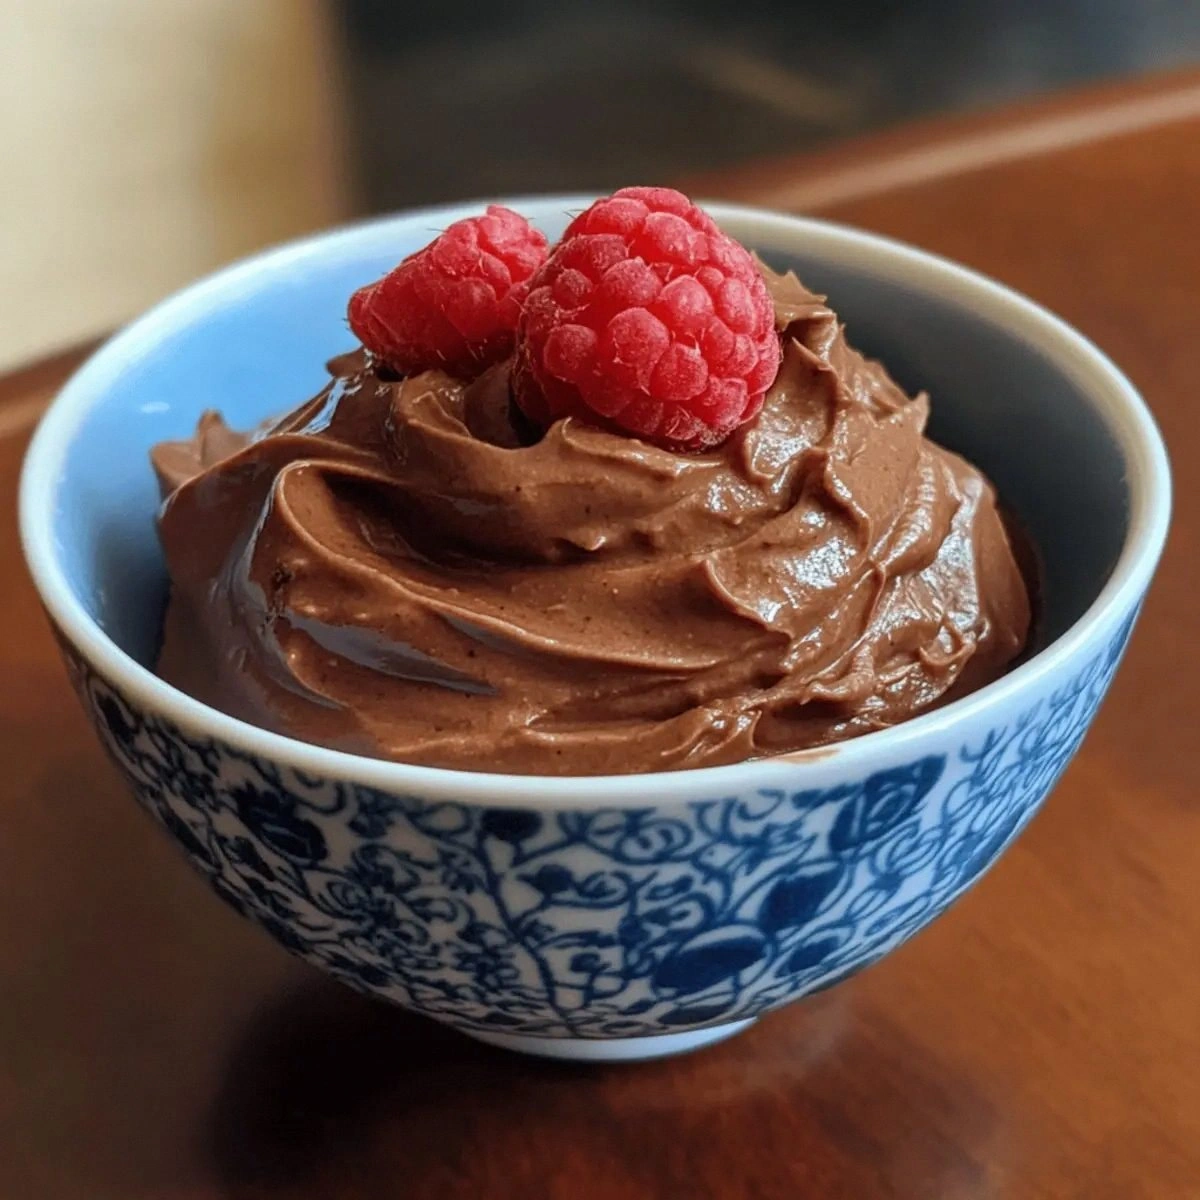
From the first bite, the texture feels like a cloud that settles in your mouth, with the buttery smoothness of avocado blending seamlessly into the deep, bittersweet notes of cocoa. The aroma is a warm, earthy chocolate scent that whispers of cocoa beans and a hint of vanilla, while the splash of maple syrup adds a subtle caramel undertone. The visual appeal is a glossy, dark green mousse that looks almost like a velvety chocolate ganache, but you know it’s packed with healthy fats and fiber. The taste is a perfect balance of sweet, rich, and slightly tart from the berries that crown the top, and the finish lingers with a faint nutty undertone.
This version stands out because it eliminates the need for heavy cream or dairy, making it both gluten-free and vegan, while still delivering that classic chocolate mousse experience. The key ingredient—avocado—provides a creamy base that keeps the mousse light and airy, unlike traditional recipes that rely on whipped cream or gelatin. I’ve experimented with dozens of chocolate mousse variations, and none have matched the silky mouthfeel or the depth of flavor this recipe offers. The secret? A precise blend of ripe avocados, high-quality cocoa, and a touch of maple syrup to sweeten without overpowering.
I dare you to taste this and not go back for seconds. The first spoonful will melt on your tongue, leaving you with a lingering, velvety aftertaste that’s both comforting and exhilarating. If you’ve ever struggled with finding a dessert that satisfies your chocolate cravings while staying on the healthy side, you’re not alone—and I’ve got the fix. This is hands down the best version you’ll ever make at home, and it’s so easy you’ll wonder why you ever bothered with more complicated recipes.
Let me walk you through every single step—by the end, you’ll wonder how you ever made it any other way.
What Makes This Version Stand Out
- Richness: The cocoa powder delivers a deep chocolate flavor that’s not sweetened, allowing the natural sweetness of the maple syrup to shine without cloying the palate.
- Creaminess: Avocados provide a buttery texture that rivals cream, making the mousse silky without any dairy.
- Healthfulness: Packed with heart‑healthy monounsaturated fats, fiber, and antioxidants, this mousse is a dessert that feels like a treat and a snack.
- Gluten-Free: No wheat, no gluten—just pure, clean ingredients that cater to those with sensitivities or dietary restrictions.
- Versatility: The base can be dressed up or down with berries, nuts, or chocolate shavings, making it suitable for casual or formal occasions.
- Quick Prep: Everything is ready in under 15 minutes, and the mousse can chill in the fridge while you finish dinner.
- Make-Ahead Friendly: Prepare it a day in advance; it stays fresh and even improves in flavor when the chocolate and avocado meld together.
- Scalable: The recipe scales perfectly, whether you’re feeding a crowd or just craving a single serving.
Alright, let’s break down exactly what goes into this masterpiece…
Inside the Ingredient List
The Flavor Base
At the heart of this mousse is the cocoa powder, a dark, unsweetened powder that gives the dish its signature chocolate depth. The cocoa’s natural bitterness is tempered by the maple syrup, which adds a gentle caramel note without any refined sugar. Vanilla extract is the final touch that rounds off the flavor, providing warmth and complexity that lingers on the palate. If you’re looking for an extra kick, a pinch of sea salt will highlight the sweetness and deepen the chocolate undertone.
Choosing the right cocoa is crucial; opt for an 85% dark cocoa for maximum flavor and antioxidant content. Avoid instant chocolate or chocolate chips, as they contain added sugars and dairy that will alter the texture. A high‑quality cocoa powder will also help keep the mousse’s consistency silky and prevent any gritty or chalky feel. When measuring, be sure to sift the cocoa to avoid clumps that can ruin the smoothness.
Swap tip: If you’re allergic to vanilla or want a different flavor profile, try a splash of almond or coconut extract. It will add a subtle nutty or tropical note that complements the avocado’s natural creaminess. Remember, the key is to keep the flavor base simple yet powerful—no unnecessary additives.
The Texture Crew
The avocados are the star of the texture crew, providing the body and richness that transforms this mousse into a dessert worthy of a five‑star rating. Ripe avocados are creamy, buttery, and naturally sweet, making them the perfect base for a chocolate mousse that feels indulgent without the heaviness of cream. The almond milk adds a splash of moisture, ensuring the mousse stays silky without becoming too runny.
When selecting avocados, look for fruit that yields slightly to gentle pressure and has a deep green skin. Avoid overly ripe or bruised avocados, as they can produce a mushy or off‑flavor. If you prefer a slightly lighter texture, reduce the almond milk to 1/8 cup; this will create a thicker mousse that holds its shape better when chilled.
Alternate: For a dairy‑free option, you can replace almond milk with oat milk or coconut milk. Each will impart a subtle flavor that can either enhance or slightly alter the final taste. Just keep the quantity consistent to maintain the correct consistency.
The Unexpected Star
The maple syrup is the unexpected star that sweetens the mousse without overpowering the chocolate or avocado. It’s a natural sweetener that adds a gentle, caramelized note, making the dessert feel indulgent yet balanced. Maple syrup also brings a slight hint of woodsy flavor that complements the earthy undertones of the cocoa.
If you’re looking for a lower‑glycemic option, try pure maple syrup or a small amount of stevia, but keep in mind that the sweetness level will change. A teaspoon of maple syrup can be enough for a more delicate sweetness, especially if you’re pairing the mousse with tart berries.
Fun fact: Maple syrup is one of the oldest natural sweeteners used by Native American cultures, harvested from the sap of maple trees and boiled into a thick, amber liquid that has been prized for centuries.
The Final Flourish
Fresh berries, chopped nuts, and shaved dark chocolate are the final flourish that brings the mousse to life, both visually and texturally. Berries provide a burst of tartness that cuts through the richness, while nuts add a crunchy contrast that keeps each bite exciting. Dark chocolate shavings give the mousse a decadent finish, adding an extra layer of chocolatey depth and a satisfying snap.
When choosing berries, seasonal options like strawberries or blueberries work best, but any fresh berry will do. For nuts, almonds or walnuts are classic choices; just make sure they’re finely chopped so they’re easy to mix into the mousse. The chocolate should be high‑percent dark chocolate, shaved finely to distribute evenly across the mousse.
Swap suggestion: If you’re allergic to nuts, replace them with seeds like pumpkin or sunflower seeds. They’ll still add crunch and a subtle nutty flavor without the allergens.
Everything's prepped? Good. Let's get into the real action...
The Method — Step by Step
- First, gather your ripe avocados, cocoa powder, maple syrup, vanilla extract, almond milk, and a pinch of sea salt. Slice the avocados in half, remove the pits, and scoop the flesh into a high‑speed blender. The goal is a smooth, lump‑free base—don’t rush it; let the blender do its thing for about 30 seconds.
- Add the cocoa powder to the blender. If you’re using a coarse cocoa, sift it beforehand to avoid any gritty texture. The cocoa should blend into the avocado until the mixture is a deep, chocolatey hue.
- Pour in the maple syrup, vanilla extract, and almond milk. Blend again until the mixture is silky smooth and glossy. If the mousse is too thick, add a splash more almond milk; if too thin, add a teaspoon more cocoa.
- Season with a pinch of sea salt. This might seem subtle, but it amplifies the chocolate flavor and balances the sweetness. Taste the mousse; it should have a rich, chocolatey depth with just the right amount of sweet.
- Transfer the mousse into serving glasses or ramekins. The containers should be shallow to allow the mousse to set evenly and present beautifully when served.
- Refrigerate the mousse for at least 30 minutes, or until it’s chilled and slightly firm. The cold will help the flavors meld and create that luxurious mouthfeel you’re after.
- Before serving, garnish each portion with fresh berries, a sprinkle of chopped nuts, and shaved dark chocolate. The berries add a burst of acidity that cuts through the richness, while the nuts provide a delightful crunch.
- Serve immediately, or keep the mousse chilled until ready to serve. If you’re making it ahead of time, let it sit at room temperature for about 10 minutes before serving to soften slightly.
- Enjoy the silky texture, the deep chocolate flavor, and the subtle sweetness that makes this mousse a standout dessert. Remember, the best part is that you can tweak the garnish to match any occasion—whether it’s a casual night in or a fancy dinner party.
That's it — you did it. But hold on, I've got a few more tricks that'll take this to another level...
Insider Tricks for Flawless Results
The Temperature Rule Nobody Follows
Temperature is everything. When blending the avocados, let them sit at room temperature for 10–15 minutes before processing. This ensures they break down smoothly and don’t form lumps. If you’re in a hurry, a quick 30‑second pulse at high speed can also work, but the longer wait yields a silkier base.
Why Your Nose Knows Best
Before you even taste the mousse, give it a sniff. A faint aroma of cocoa and vanilla signals that the flavors have blended perfectly. If you notice a slight burnt or metallic smell, it’s likely the cocoa is too old or the blender was too hot. Trust your nose—it’s a reliable guide to the mousse’s quality.
The 5-Minute Rest That Changes Everything
After blending, let the mousse rest for five minutes before refrigerating. This short pause allows the ingredients to settle and the flavors to marry. Think of it as a brief rehearsal before the final performance; the mousse will taste more harmonious when you serve it.
Garnish Timing Is Key
Add the berries, nuts, and chocolate shavings right before serving. This keeps the berries fresh and crisp, and the chocolate shavings from melting into the mousse. A well‑timed garnish elevates the dessert from simple to spectacular.
Storage Secrets for the Best Texture
Store the mousse in an airtight container to keep it from drying out. If you’re using a glass jar, line the bottom with parchment paper to prevent sticking. When you’re ready to serve, let it sit at room temperature for 5 minutes to soften slightly before scooping.
Serving Size Flexibility
This recipe is naturally portionable. If you’re feeding a large group, simply multiply the ingredients by the number of servings you need. The mousse scales linearly, so a 2‑cup batch will still taste the same as a 1‑cup batch.
Creative Twists and Variations
This recipe is a playground. Here are some of my favorite ways to switch things up:
Minty Madness
Add a teaspoon of fresh mint extract to the base. The mint gives a refreshing lift that pairs beautifully with the chocolate. Top with crushed peppermint candies for an extra burst.
Spiced Surprise
Stir in a pinch of cayenne pepper or smoked paprika. The heat and smokiness add depth and a surprising kick that balances the sweetness. It’s a perfect dessert for those who like a little edge.
Berry‑Burst Variation
Replace the fresh berries with a handful of frozen mixed berries. Blend them in with the mousse for a thicker, fruit‑laden texture. This version works great for summer gatherings.
Nut-Free Delight
Omit the nuts entirely and replace them with a sprinkle of coconut flakes. The coconut adds a tropical note and a pleasant chewiness without the allergens.
Chocolate Lover’s Dream
Double the cocoa powder and add a tablespoon of cocoa nibs for crunch. The extra chocolate intensity turns the mousse into a decadent chocolate cake alternative.
Storing and Bringing It Back to Life
Fridge Storage
Store the mousse in a sealed container in the refrigerator for up to 48 hours. The cold keeps the texture firm and the flavors fresh. When you’re ready to serve, let it sit at room temperature for a few minutes to soften slightly.
Freezer Friendly
Freezing works surprisingly well. Pour the mousse into a freezer‑safe container and freeze for up to two weeks. Thaw overnight in the fridge, then let it sit at room temperature for 10 minutes before serving.
Best Reheating Method
If the mousse has hardened, gently warm it in the microwave at 20‑second intervals, stirring between bursts. A splash of water before reheating will steam the mousse back to its silky perfection.