I still remember the first time I tasted a perfectly crisp chicken tender, the kind that shatters with a gentle press of the fork, releasing a cloud of garlic‑parmesan aroma that instantly transports you to a bustling Italian kitchen. It was a rainy Saturday in my hometown, and I was watching my grandmother coax a batch of golden nuggets out of a sizzling pan while the scent of melted cheese and fresh herbs danced through the kitchen. That moment sparked a lifelong love affair with comfort food that feels both indulgent and wholesome.
Garlic Parmesan Chicken Tenders belong to a lineage of beloved finger foods that have traveled from the streets of New York to family dinner tables across the globe. Though the concept is simple—tender pieces of chicken coated in a crunchy, cheesy crust—the balance of flavors and textures makes it a timeless classic. The dish marries the richness of Parmesan with the aromatic punch of garlic, while a light, airy breadcrumb coating ensures every bite is a satisfying crunch.
In this guide, I’ll walk you through every nuance of the recipe, from selecting the right cut of chicken to mastering the perfect fry. You’ll learn how to create a coating that stays crisp even after a brief rest, how to build a quick dip that amplifies the flavor, and why a few small tricks—like chilling the coated chicken before frying—make a world of difference. By the end, you’ll have a reliable, repeatable method that delivers restaurant‑quality tenders at home.
I’m thrilled to share this recipe with you, and I hope it becomes a staple in your kitchen as it has in mine. Let’s get cooking!
🌟 Why This Recipe Will Capture Your Heart
There’s a reason these tenders have become a crowd‑pleaser at parties, game nights, and family dinners alike.
- ✨ Irresistible Crunch: The double‑coating technique—flour, then a seasoned breadcrumb‑Parmesan mix—creates a texture that stays crisp even after a short rest.
- ✨ Flavor Harmony: Garlic and Parmesan are a match made in culinary heaven, delivering a savory depth that balances the mildness of chicken.
- ✨ Speedy Preparation: With a total time under 30 minutes, this dish fits perfectly into busy weeknights without sacrificing quality.
- ✨ Versatile Pairings: Serve them with a simple dip, a fresh salad, or even as a protein‑rich topping for tacos—the possibilities are endless.
- ✨ Kid‑Friendly: The mild seasoning and familiar flavors make these tenders a hit with younger palates while still satisfying adult cravings.
- ✨ Nutrient Boost: Using lean chicken breast and a modest amount of butter keeps the dish relatively light while still delivering indulgent flavor.
🥗 Ingredients
📝 Complete Ingredient List
For the Chicken & Coating:
For Cooking:
For the Garlic Parmesan Dip (optional):
For Garnish:
🔍 Focus on Key Ingredients
Chicken Breast Tenders
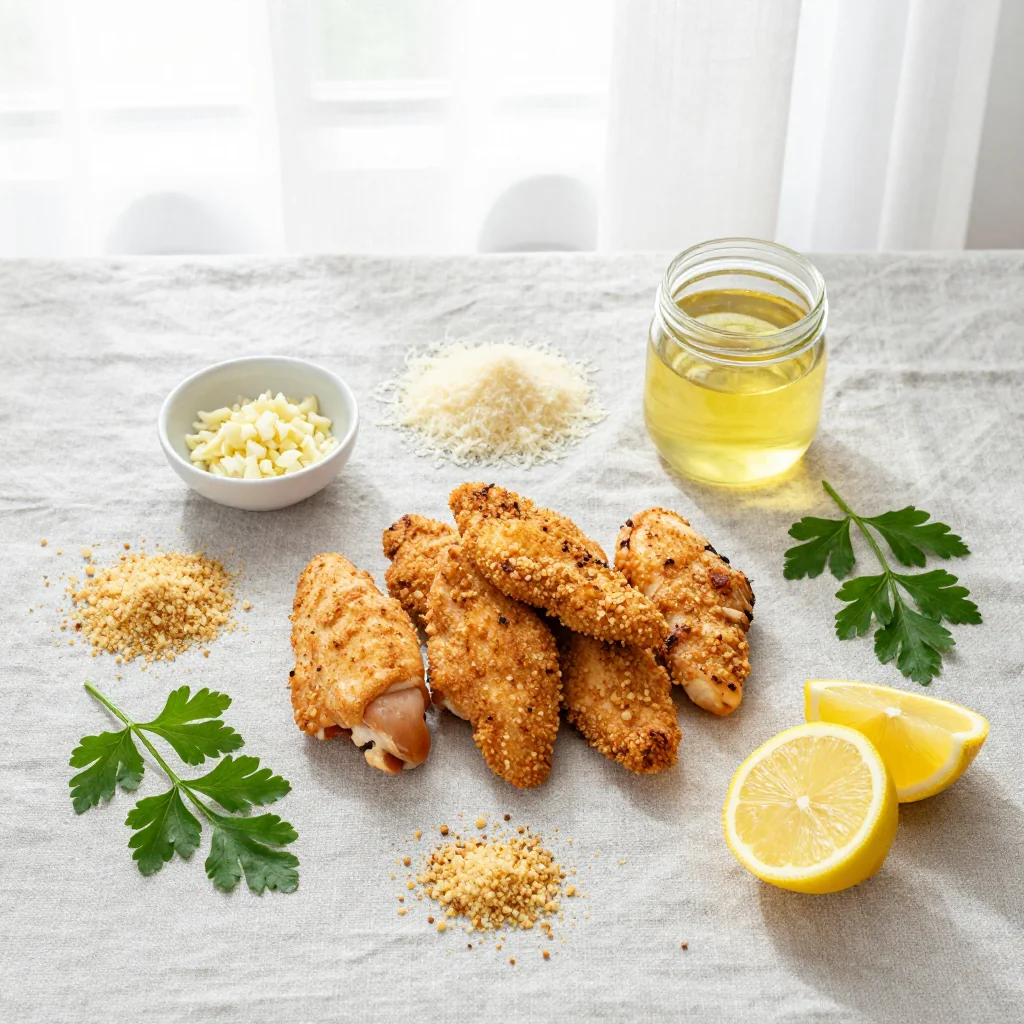
Chicken breast is a lean protein that provides a neutral canvas for the bold garlic‑parmesan coating. Look for pieces that are uniform in size; this ensures even cooking and consistent texture. If you can, ask your butcher to slice the breast into strips about 1‑inch thick, or do it yourself with a sharp knife.
Parmesan Cheese
Authentic Parmigiano‑Reggiano brings a nutty, salty depth that powdered cheese cannot match. Grate it fresh just before use to maximize its meltability and flavor release. The cheese also contributes to the golden crust, creating those coveted caramelized flecks.
Garlic Powder
While fresh garlic offers a pungent bite, garlic powder distributes flavor more evenly throughout the coating. It dissolves into the breadcrumb mixture, ensuring every bite carries that aromatic hint without overwhelming the palate.
🔄 Quick Substitutions
| If you don’t have... | Use instead... |
|---|---|
| Panko breadcrumbs | Regular breadcrumbs, toasted lightly |
| Parmesan cheese | Pecorino Romano or grated Asiago |
| Garlic powder | 1 clove fresh garlic, minced (add to dip) |
👨🍳 Step‑by‑Step Instructions
Follow these detailed steps to achieve perfectly golden, crunchy tenders every time. Take your time with the preparation phase; the magic happens before the pan even heats up.
📋 Phase 1: Preparation & Mise en Place
Getting everything ready ensures a smooth cooking process.
Prepare the chicken
Pat the chicken tenders dry with paper towels. This removes excess moisture, which can cause the coating to slide off during frying. Cut any larger pieces into uniform strips, about 1‑inch thick, to guarantee even cooking. Place the pieces in a shallow bowl and set aside.
Set up the coating stations
In three separate shallow dishes, arrange flour, the breadcrumb‑Parmesan mixture, and a beaten egg (optional for extra adhesion). For the breadcrumb mixture, combine panko, grated Parmesan, garlic powder, salt, and black pepper. Mix thoroughly to distribute the seasonings evenly.
🔥 Phase 2: Frying the Tenders
Now we’ll bring the heat and create that coveted crunch.
Coat the chicken
Dredge each chicken strip first in flour, shaking off excess, then dip it into the beaten egg (if using), and finally press it into the breadcrumb‑Parmesan mixture. Ensure each piece is fully covered; a generous coating yields the best crunch. Place the coated tenders on a tray lined with parchment paper and refrigerate for 10 minutes. This chilling step helps the crust adhere during frying.
Heat the pan
In a large skillet, melt the butter with olive oil over medium‑high heat. The combination of butter and oil raises the smoke point, allowing a high temperature without burning. When the mixture foams and begins to shimmer, it’s ready.
Fry the tenders
Carefully add the chilled chicken strips in a single layer, making sure not to overcrowd the pan. Fry for 3‑4 minutes per side, or until the crust turns a deep golden‑brown and the interior reaches 75 °C (165 °F). Use tongs to turn the pieces gently, preserving the coating.
✨ Phase 3: Finishing Touches & Plating
The final steps bring everything together.
Check doneness
Insert a meat thermometer into the thickest part of a tender; it should read at least 75 °C (165 °F). If you don’t have a thermometer, cut one piece open—the juices should run clear, and the meat should be opaque.
Drain and garnish
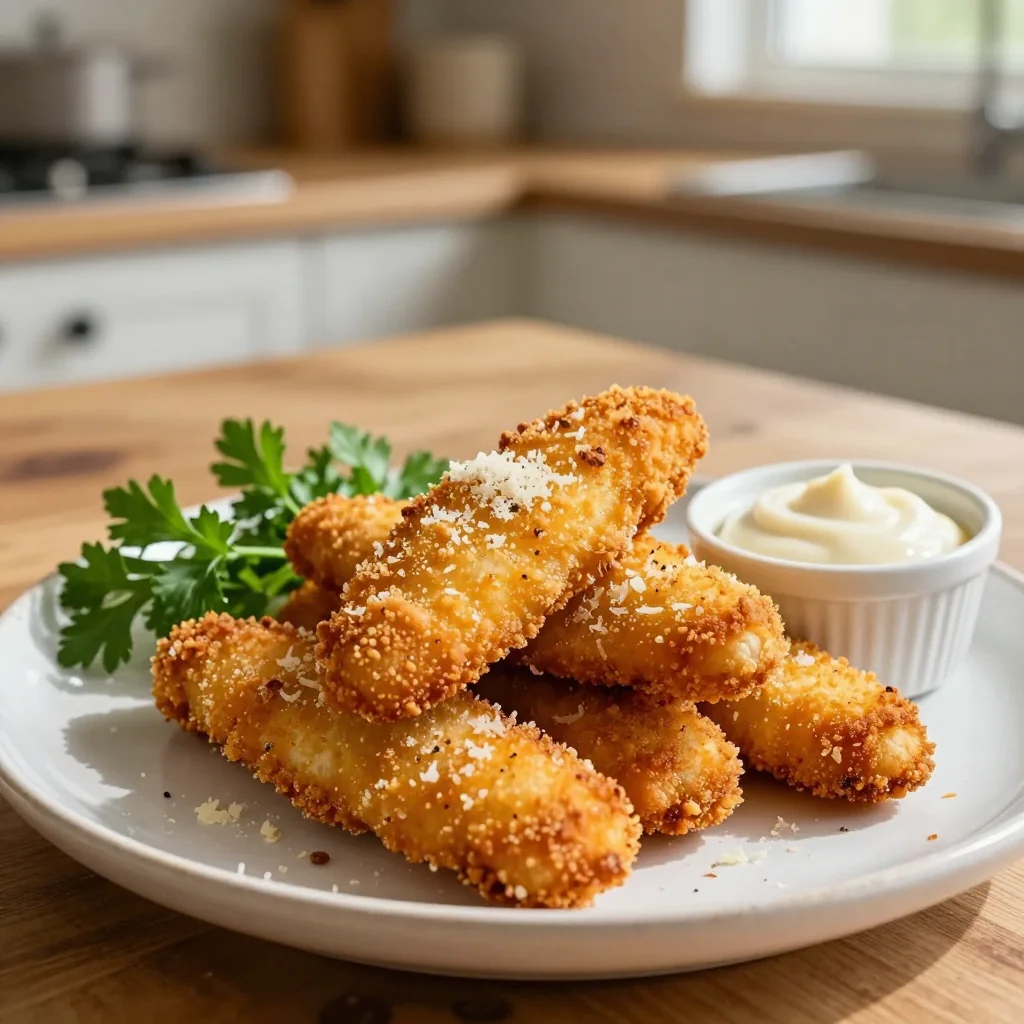
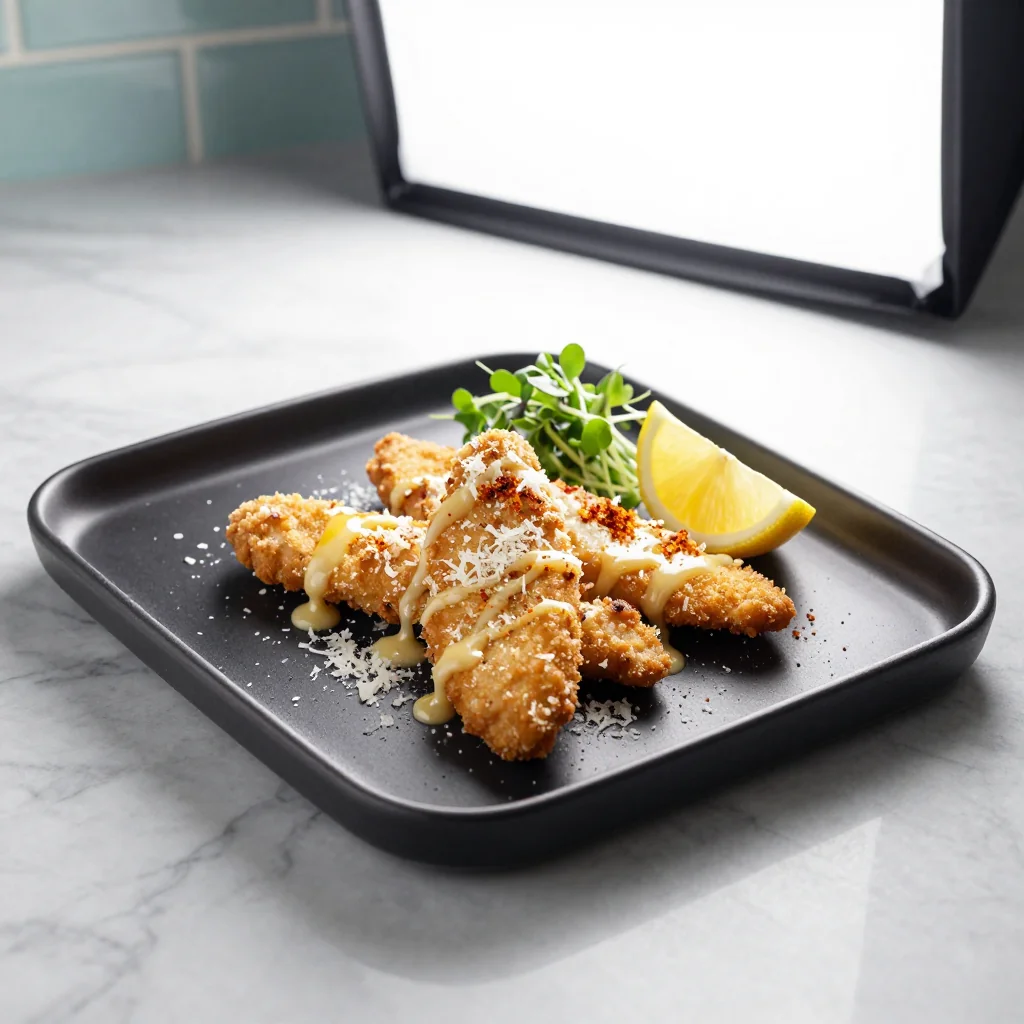
Transfer the cooked tenders onto a plate lined with paper towels to absorb excess oil. Sprinkle chopped fresh parsley over the top for a pop of color and a fresh herbal note. Arrange lemon wedges alongside for a bright, acidic contrast.
Serve with dip
If you prepared the garlic Parmesan dip, serve it in a small bowl. The creamy dip complements the crunchy tenders and adds an extra layer of garlic‑parmesan richness.
💡 Expert Tips & Tricks
🛒 Choosing the Right Ingredients
Opt for organic, free‑range chicken breasts when possible; they tend to be more tender and flavorful. When selecting Parmesan, look for a wheel or a block rather than pre‑grated varieties, which often contain anti‑caking agents that affect meltability. Fresh panko provides a lighter, airier crust compared to traditional breadcrumbs, which can become dense.
🔪 Preparation Techniques
Patting the chicken dry is crucial—moisture is the enemy of a crisp coating. After coating, let the tenders rest in the fridge; the cold temperature firms the coating, reducing the chance of it slipping off during frying. If you’re short on time, a quick 5‑minute chill in the freezer works as well.
🌡️ Mastering the Cooking Process
Maintaining a steady temperature is key. Butter alone burns quickly, so the blend with olive oil raises the smoke point. Use a heavy‑bottomed skillet (cast iron or stainless steel) for even heat distribution. If you notice the crust darkening before the interior cooks through, lower the heat and finish cooking a bit longer.
🍽️ Presentation & Service
Serve the tenders on a rustic wooden board or a white platter for contrast. A drizzle of melted butter infused with a pinch of garlic and fresh herbs adds a glossy finish. Pair with a simple arugula salad dressed with lemon vinaigrette to balance the richness.
🏆 Pro Tips
Elevate your tenders from great to restaurant‑level with these professional insights.
- 🎯 Double Dredge Method: After the first flour dip, dip the chicken in a thin layer of beaten egg, then coat with breadcrumbs, and repeat the flour‑egg‑breadcrumb sequence once more. This creates a thicker, more resilient crust that stays crisp longer.
- 🎯 Use a Thermometer: Precise internal temperature ensures food safety without overcooking. A quick read of 75 °C (165 °F) guarantees juicy meat while preserving the delicate coating.
- 🎯 Rest After Frying: Let the cooked tenders rest on a wire rack for 2‑3 minutes. This allows excess oil to drip away and prevents steam from sogging the crust.
- 🎯 Flavor‑Infused Butter: Melt butter with a crushed garlic clove and a sprig of thyme before adding oil. The infused butter imparts subtle aromatics that seep into the crust.
- 🎯 Light Dusting of Flour: A very fine dusting of flour before the breadcrumb coat helps the crumbs adhere better, especially when using a wet batter.
- 🎯 Finish with a Squeeze of Lemon: A quick drizzle of fresh lemon juice just before serving brightens the flavor profile and cuts through the richness.
“The secret to a perfect fried chicken is a cold crust and a hot pan—never compromise on either.” — Chef Massimo Bottura
🔄 Variations & Adaptations
This recipe is a versatile canvas. Below are several ways to tailor it to different dietary preferences, flavor profiles, and occasions.
🥬 Vegetarian / Vegan Version
Substitute the chicken with firm tofu or cauliflower florets. For tofu, press it to remove excess water, cut into strips, and follow the same coating process. For cauliflower, break into bite‑size florets and increase frying time slightly.
- Use plant‑based Parmesan (nutritional yeast mixed with cashew flour) for the coating.
- Replace butter with vegan margarine while keeping the olive oil blend.
🌶️ Flavor Variations
Play with the seasoning base to suit different cuisines.
Spicy Version
Add 1 tsp smoked paprika and ½ tsp cayenne pepper to the breadcrumb mixture. Serve with a sriracha‑yogurt dip for an extra kick.
Mediterranean Version
Mix dried oregano, crushed rosemary, and a pinch of lemon zest into the coating. Pair with tzatziki sauce and a cucumber‑tomato salad.
Asian‑Inspired Version
Replace Parmesan with finely grated Pecorino and add 1 tsp five‑spice powder. Finish with a drizzle of soy‑ginger glaze and garnish with toasted sesame seeds.
⚠️ Dietary Adaptations
Gluten‑Free
Use almond flour in place of all‑purpose flour and gluten‑free panko or crushed rice crackers for the breadcrumb layer.
Lactose‑Free
Substitute butter with lactose‑free margarine and use a dairy‑free Parmesan alternative made from cashews and nutritional yeast.
Low‑Calorie
Bake the coated tenders at 200 °C (400 °F) on a wire rack for 20‑22 minutes, turning halfway, instead of frying. This reduces oil absorption while preserving crispness.
👶 Family / Kids Version
Reduce the amount of garlic powder to ½ tsp for a milder flavor. Offer a honey‑mustard dip alongside the garlic Parmesan dip for kids who prefer sweeter sauces. Cut the tenders into smaller, bite‑size pieces for tiny hands.
📦 Storage & Reheating
🧊 Conservation
In the Refrigerator:
- Duration: 3 days
- Recommended container: airtight glass or BPA‑free plastic
- Tip: Place a paper towel on top to absorb excess moisture.
In the Freezer:
- Duration: 2 months
- Method: Lay the cooled tenders on a parchment sheet, freeze until solid, then transfer to a zip‑lock bag.
- Defrosting: Thaw overnight in the refrigerator or use the microwave’s defrost setting.
💡 For best texture, reheat from frozen using the oven method; microwaving can make the coating soggy.
♨️ Reheating
🔥 In the Oven (Recommended):
- Preheat to 190 °C (375 °F).
- Place tenders on a wire rack over a baking sheet; cover loosely with foil.
- Reheat for 8‑10 minutes.
- Remove foil and continue for 3‑4 minutes to restore crispness.
⚡ In the Microwave (Quick):
- Cover with a microwave‑safe lid.
- Heat on medium power for 1 minute.
- Check and continue in 30‑second bursts until hot.
🍳 In a Skillet:
Add a splash of oil to a non‑stick skillet over medium heat. Cook the tenders for 2‑3 minutes per side, pressing gently to revive the crust.
🍷 Perfect Pairings
🥗 Side Dishes
- Arugula Lemon Salad: Peppery arugula tossed with a light lemon vinaigrette balances the richness of the tenders.
- Garlic Parmesan Roasted Potatoes: Echoes the main flavor while adding a hearty element.
- Steamed Broccoli with Olive Oil: Provides a fresh, crisp contrast.
🍷 Wine / Beverage Pairings
- Chardonnay (oaked): Its buttery notes complement the Parmesan crust.
- Prosecco: The bright bubbles cut through the richness.
- Non‑alcoholic: Sparkling apple cider with a splash of ginger.
🍰 To Complete the Meal
Start with a simple tomato bruschetta, follow with the garlic Parmesan chicken tenders, and finish with a light lemon ricotta cheesecake. The citrus thread ties the whole menu together.
❓ Frequently Asked Questions
Q: Can I bake the tenders instead of frying?
Absolutely. Preheat the oven to 220 °C (425 °F), place the coated tenders on a parchment‑lined sheet, and bake for 20‑22 minutes, flipping halfway. The result is slightly less crisp but considerably lower in fat.
Q: How do I avoid soggy coating?
Pat the chicken dry, chill the coated pieces before frying, and maintain a consistent pan temperature. Also, avoid crowding the pan; fry in batches if necessary. After cooking, let the tenders rest on a wire rack rather than paper towels alone.
Q: What if I don’t have a meat thermometer?
Cut one of the thicker strips open; the juices should run clear and the meat should be opaque. The internal color should be uniformly white with no pink. If you’re uncertain, add an extra minute per side.
Q: Can I use a different cheese?
Yes. Pecorino Romano, aged Asiago, or even a sharp cheddar can replace Parmesan, though the flavor profile will shift. For a milder taste, use a blend of mozzarella and Parmesan.
Q: How can I make the dip dairy‑free?
Substitute the mayonnaise with a vegan mayo, sour cream with coconut‑milk yogurt, and use a dairy‑free Parmesan alternative made from cashews and nutritional yeast. The flavor remains creamy and garlicky.
Q: Is it possible to prepare the coating ahead of time?
Yes. Mix the dry coating ingredients and store them in an airtight container for up to three days. Add the fresh Parmesan just before coating to preserve its flavor.
🎉 To Your Kitchen!
Garlic Parmesan Chicken Tenders embody the perfect marriage of comfort and sophistication. By following the detailed steps, you’ll achieve a dish that dazzles with a golden crust, fragrant garlic, and a cheesy bite that keeps everyone reaching for more. Whether you’re feeding a family, hosting friends, or simply treating yourself, this recipe delivers flavor, texture, and visual appeal in equal measure.
I encourage you to experiment with the variations, try the pro tips, and make the recipe truly your own. Share your creations, ask questions, and let the community know how you’ve personalized this classic.
Have you tried this recipe?
Leave a comment and rating below! Share your photos on Instagram with #GarlicParmesanTenders for a chance to be featured.
Garlic Parmesan Chicken Tenders
Crispy, golden chicken bites drenched in garlic‑parmesan goodness.
📝 Ingredients
Chicken & Coating
Cooking
Garnish
👨🍳 Instructions
- 1 Pat chicken dry, season lightly, and set aside.
- 2 Prepare three coating stations: flour, beaten egg, breadcrumb‑Parmesan mix.
- 3 Dredge chicken in flour, dip in egg, coat with breadcrumb mix; repeat for double coating.
- 4 Chill coated chicken on parchment for 10 minutes.
- 5 Heat butter and oil in a skillet over medium‑high heat until shimmering.
- 6 Fry tenders 3‑4 minutes per side until golden and internal temp reaches 75 °C.
- 7 Drain on a wire rack, sprinkle with parsley, and add lemon wedges.
- 8 Serve with garlic Parmesan dip or your favorite sauce.
- 9 Store leftovers as described in the storage section.
- 10 Enjoy and share with friends!
🥗 Nutrition per Serving
*Values are estimates based on standard ingredient data.
📚 You Might Also Like

Lemon Herb Chicken Wings

Crispy Baked Zucchini Fries

Spicy Buffalo Chicken Bites

💬 Comments & Reviews
Leave a Comment
No comments yet. Be the first to share your thoughts!