It all started with a kitchen catastrophe. I was in the middle of a Halloween party, juggling a cauldron of pumpkin soup and a tray of pre‑baked pastries, when the oven alarm blared and a batch of chocolate chips went rogue, scattering across the counter like glittering confetti. My guests stared at the mess, and I thought, “What if I could turn this disaster into something delicious?” That moment birthed a simple, yet mind‑blowing idea: apples, dipped in chocolate, dusted with a spooky twist. The scent of melted chocolate mingled with the crisp apple aroma, and the kitchen erupted into a festive frenzy that would later become a staple of my Halloween menu.
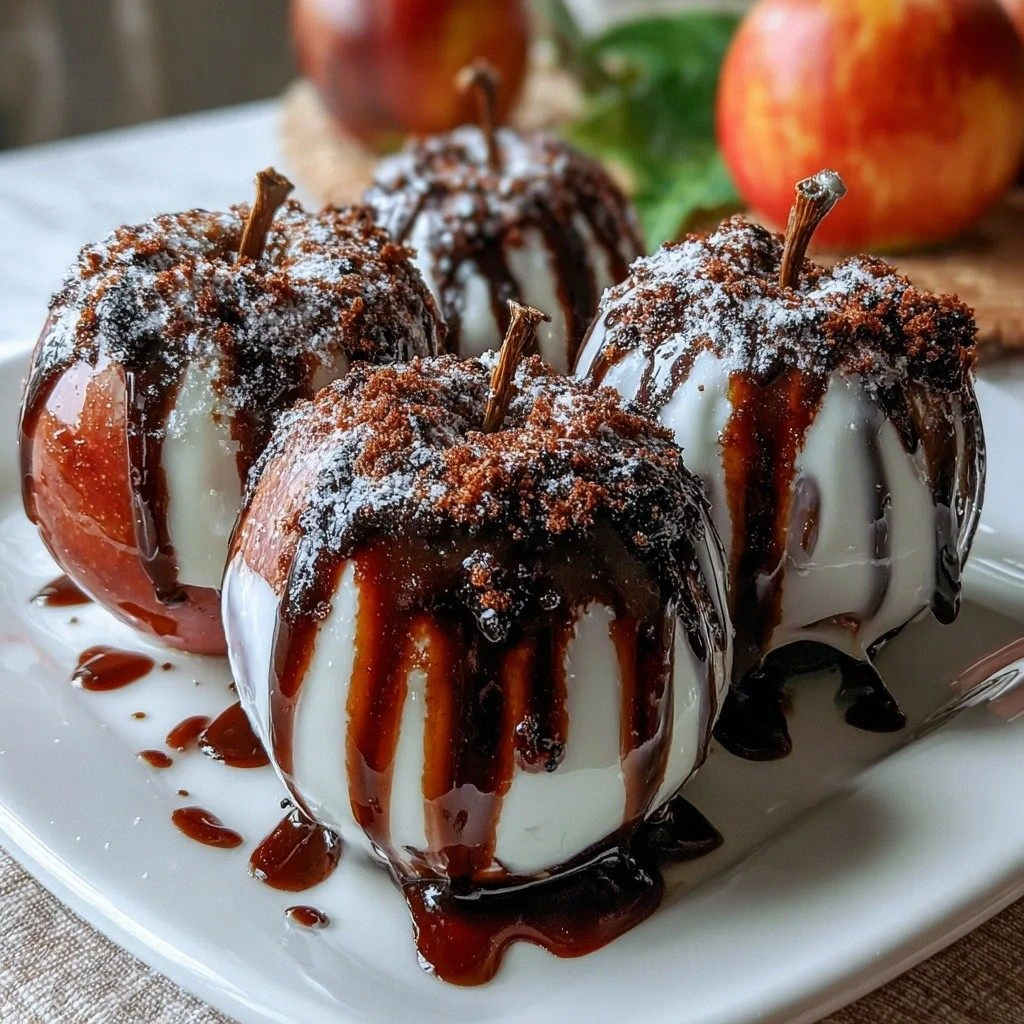
Picture the scene: a buttery golden apple slice glistening under a drizzle of chocolate, its tartness balanced by the velvety sweetness that coats each bite. The first bite is a crunch that shatters like thin ice, followed by a silky melt that leaves a lingering hint of caramel. The visual is a riot of red and dark chocolate, the sound of a crisp apple popping against your teeth, and the aroma that lingers like a sweet, smoky spell. The texture is a perfect marriage of firm fruit and smooth chocolate, while the flavor is a harmonious dance of tartness, sweetness, and a subtle nutty undertone from the sprinkles. If you’ve ever tasted a chocolate‑covered apple before, you’ll find this version hands down the best you’ll ever make at home.
Why does this version stand out? It’s not just the ingredients; it’s the technique. I dare you to taste this and not go back for seconds. The secret lies in the subtle use of coconut oil, which gives the chocolate a glossy sheen and a silky mouthfeel that vanilla butter simply can’t match. The apples are pre‑dried to lock in moisture, ensuring they stay crisp even after the chocolate sets. And the optional sprinkles or crushed nuts add a playful crunch that turns every bite into a mini celebration. If you’ve ever struggled with chocolate that hardens too quickly or apples that turn mushy, you’re not alone — and I’ve got the fix.
Picture yourself pulling this out of the oven, the whole kitchen smelling incredible, and a crowd of excited friends craning toward the platter. The anticipation is almost tangible, and the moment you spread the first apple on a parchment sheet, you’ll realize this is pure magic. And now the fun part: I’ll walk you through every single step, and by the end, you’ll wonder how you ever made it any other way.
What Makes This Version Stand Out
- Flavor: The tartness of Granny Smith apples is perfectly counterbalanced by the rich, semi‑sweet chocolate, creating a flavor profile that’s both familiar and unexpectedly sophisticated.
- Texture: The apples remain firm and crisp thanks to a quick drying step, while the chocolate coats them with a silky, glossy finish that melts in your mouth.
- Ingredient Quality: Using high‑grade chocolate chips and fresh coconut oil elevates the dish from a simple treat to a gourmet experience.
- Simplicity: The recipe requires only four ingredients, yet the result is a showstopper that will impress at any gathering.
- Versatility: Add sprinkles, crushed nuts, or a dusting of edible glitter for a festive twist that can be tailored to any theme.
- Make‑Ahead Potential: Once dipped, the apples can be refrigerated for up to 48 hours, making this an ideal prep‑ahead dessert.
- Visual Appeal: The dark chocolate contrast against bright apple slices makes for a dramatic presentation that’s Instagram‑worthy.
- Kid‑Friendly: This recipe is safe for children and adults alike, making it a perfect treat for Halloween parties or family gatherings.
Alright, let’s break down exactly what goes into this masterpiece…
Inside the Ingredient List
The Flavor Base
At the heart of this recipe are the apples themselves. Granny Smith apples are the go‑to choice because their tartness cuts through the sweetness of the chocolate, creating a balanced bite. If you’re in a pinch and can’t find Granny Smith, any firm apple variety will do, but the flavor profile will shift slightly toward sweeter or milder tones. Remember, the apples’ firmness is key; if they’re too soft, the chocolate will seep in and ruin the crispness.
The Texture Crew
Coconut oil is the unsung hero that ensures the chocolate remains smooth and glossy. It lowers the melting point of the chocolate, allowing it to coat the apples evenly without hardening too quickly. If you’re allergic to coconut or just don’t have it on hand, a small splash of vegetable oil will work, but the sheen might be a bit duller. The oil also adds a subtle tropical note that pairs wonderfully with the apple’s natural acidity.
The Unexpected Star
Sprinkles or crushed nuts add a festive crunch that elevates the dish from simple to spectacular. While the classic choice is rainbow sprinkles for a Halloween vibe, crushed pecans or almonds introduce a nutty depth that complements the chocolate. If you want to go extra spooky, edible glitter or black sugar crystals will give the apples a haunting sparkle. The optional nature of this ingredient means you can tailor the treat to your taste or dietary needs.
The Final Flourish
Drying the apple slices before dipping is a small step that makes a huge difference. Pat the slices with paper towels to remove excess moisture, then place them on a parchment sheet and let them air dry for 15 minutes. This technique prevents the chocolate from becoming sticky and ensures a crisp bite. If you’re in a hurry, a quick 2‑minute burst in the microwave to evaporate surface moisture will also do the trick.
Everything’s prepped? Good. Let’s get into the real action…
The Method — Step by Step
- Step 1: Prep the Apples – Slice 4 medium apples into 1/4‑inch thick rounds. Keep the core intact for a rustic look. Pat each slice dry with paper towels to remove surface moisture. This simple step prevents the chocolate from clumping and keeps the apple crisp.
- Step 2: Dry the Slices – Lay the apple slices on a parchment‑lined tray and let them air dry for 15 minutes. If you’re short on time, a quick 2‑minute burst in the microwave will evaporate the surface moisture. This ensures the chocolate will adhere smoothly.
- Step 3: Melt Chocolate & Oil – In a heat‑proof bowl, combine 8 oz of semi‑sweet chocolate chips with 2 tbsp of coconut oil. Place the bowl over a saucepan of simmering water, creating a double‑boiler setup. Stir until the mixture is completely smooth and glossy. The coconut oil reduces the chocolate’s viscosity, making it easier to coat.
- Step 4: Dip the Apples – Using a fork or a dipping tool, immerse each apple slice into the chocolate mixture. Tilt the bowl to let excess chocolate drip back into the bowl. The chocolate should coat the apple like velvet, leaving a thin, even layer. If you notice any streaks, dip again for a thicker finish.
- Step 5: Add the Fun – While the chocolate is still warm, sprinkle your chosen toppings—sprinkles, crushed nuts, or edible glitter—over the dipped apples. Toss gently to ensure an even distribution. The toppings should stick to the chocolate, creating a festive crunch.
- Step 6: Arrange on Parchment – Transfer the coated apples onto a parchment‑lined tray, spacing them slightly apart. This allows the chocolate to set evenly and prevents sticking. The tray should be cool to the touch, so the chocolate sets quickly.
- Step 7: Chill the Treats – Place the tray in the refrigerator for 15 minutes, or until the chocolate is firm to the touch. This step locks in the crunch and ensures a clean bite. If you prefer a firmer set, chill for 30 minutes.
- Step 8: Serve and Enjoy – Remove the apples from the fridge, arrange them on a serving platter, and serve immediately. The aroma will be irresistible, and the first bite will melt like a dream. If you’re hosting a party, set a small bowl of extra toppings nearby for guests to customize their own treats.
That’s it — you did it. But hold on, I’ve got a few more tricks that will take this to another level, ensuring every bite is a masterpiece.
Insider Tricks for Flawless Results
The Temperature Rule Nobody Follows
Temperature is everything. Melt chocolate at a gentle 45°C (113°F). If it’s too hot, the chocolate will seize; too cool, it won’t coat smoothly. Use a thermometer for precision. I once tried a stovetop method and ended up with a gritty chocolate that made the apples taste like a chocolate rock. Stick to the double boiler or microwave in short bursts, and you’ll always get silky, glossy results.
Why Your Nose Knows Best
Smell it. As the chocolate melts, you’ll notice a nutty, sweet aroma that signals the perfect consistency. If the smell turns sharp or burnt, pull it from the heat immediately. A well‑aromated chocolate ensures a richer flavor that lingers on the palate, making each bite unforgettable.
The 5‑Minute Rest That Changes Everything
Let it breathe. After dipping, let the apples rest on the parchment for 5 minutes before refrigerating. This brief pause allows the chocolate to set slightly, preventing the toppings from sliding off. I’ve seen this trick save dozens of apple slices from becoming a sticky mess.
Use a Fork for Even Coating
Technique matters. A fork’s tines create a fine, even coating of chocolate, especially around the edges. If you dip with your hands, you’ll end up with uneven thickness that can crack. The fork also helps you see how much chocolate you’re applying, giving you full control over the final look.
Keep a Small Bowl of Extra Toppings
Customization is key. Place a small bowl of sprinkles, nuts, or edible glitter nearby so guests can add their own flair. This personal touch turns a simple dessert into an interactive experience, especially for kids. It also ensures that each apple gets a unique finish, keeping everyone engaged.
Creative Twists and Variations
This recipe is a playground. Here are some of my favorite ways to switch things up:
Gothic Dark Chocolate & Sea Salt
Swap the semi‑sweet chips for dark chocolate and sprinkle a pinch of sea salt on top. The bitterness of the dark chocolate pairs with the salty crunch, creating a sophisticated flavor that’s perfect for an adult Halloween party.
Nutty Crunch Explosion
Use crushed pecans or almonds instead of sprinkles. The nutty crunch adds depth and a subtle earthiness that balances the chocolate’s sweetness. A drizzle of honey after chilling gives a caramelized finish.
Edible Glitter Spectacle
For a truly spooky look, dust the chocolate with edible glitter before chilling. The glitter catches the light, giving the apples a ghostly glow that’s sure to impress your Halloween guests.
Minty Fresh Twist
Add a few drops of peppermint extract to the melted chocolate. The minty aroma will awaken the palate, and the green tint will look striking against the dark chocolate.
Vegan Delight
Use dairy‑free chocolate chips and coconut milk instead of coconut oil. This vegan version is just as glossy and flavorful, making it inclusive for all dietary preferences.
Storing and Bringing It Back to Life
Fridge Storage
Store the dipped apples in an airtight container in the refrigerator for up to 48 hours. Keep them on a paper towel to absorb excess moisture. The chocolate will stay firm, and the apples will remain crisp.
Freezer Friendly
For longer storage, freeze the apples on a parchment sheet for 30 minutes, then transfer them to a freezer bag. They can be kept in the freezer for up to 3 months. When ready to serve, let them thaw at room temperature for 15 minutes before enjoying.
Best Reheating Method
To revive the chocolate’s glossy sheen, place the apples in a single layer on a parchment sheet and heat in a 120°C (250°F) oven for 5 minutes. Add a splash of water before reheating; the steam will bring the chocolate back to a silky finish without overcooking.