Homemade Swiss Pretzel Rolls:
I still remember the night I tried to make a batch of pretzels for a potluck and ended up with a dough that looked more like a soggy pancake than a golden roll. The kitchen smelled of yeast, but the texture was disappointing—soft, flat, and utterly forgettable. I dared myself to find the secret to that unmistakable Swiss twist: a chewy core, a crisp, salty crust, and a buttery finish that melts in your mouth. That night, I discovered a recipe that turned a kitchen mishap into a culinary triumph, and now I’m here to share every detail so you can replicate the magic.
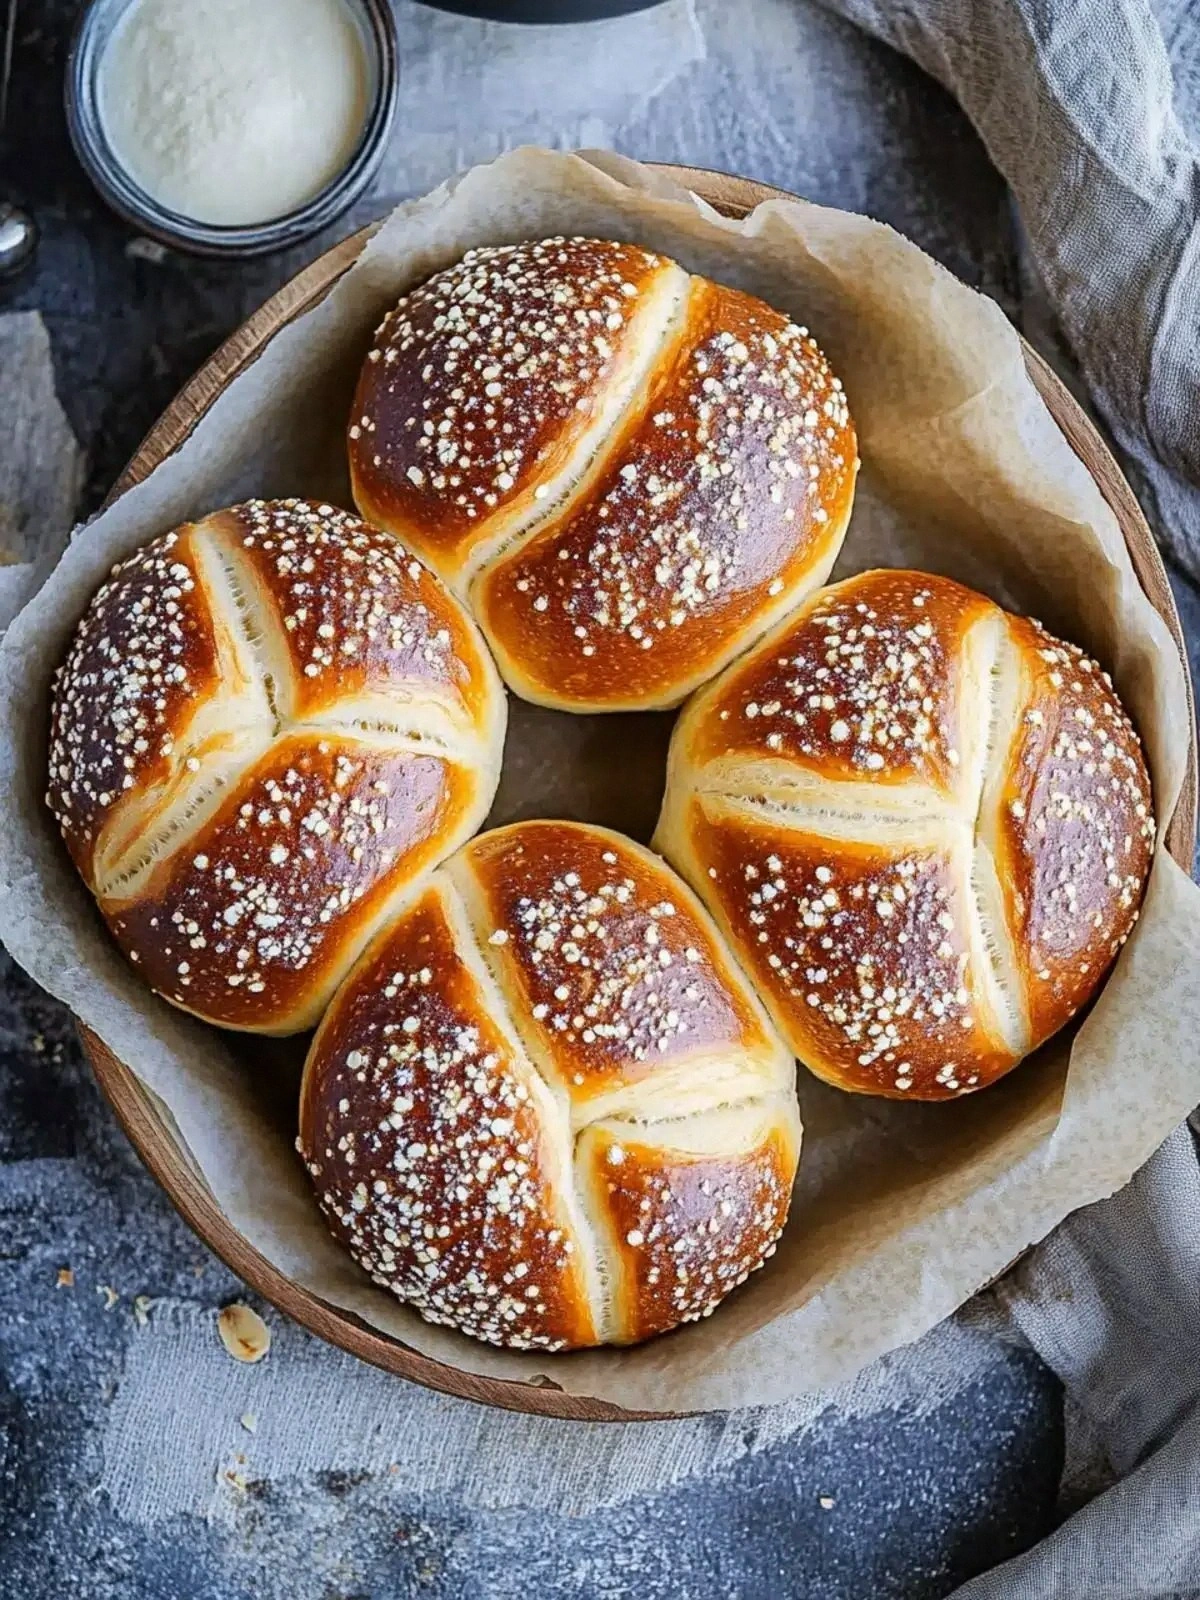
Picture this: a steaming rack of pretzel rolls just out of the oven, their tops dusted with coarse sea salt that crackles when you bite into them. The aroma of freshly baked dough mingles with a buttery, slightly sweet scent that makes the whole house feel like a bakery. The first bite delivers a satisfying crunch that gives way to a soft, airy interior that practically dissolves. It’s that rare combination of textures that makes these rolls irresistible—soft on the inside, crisp on the outside, and a flavor profile that dances between savory and sweet.
What sets this version apart from every other pretzel recipe you’ve seen is the meticulous layering of flavors and the precise technique that locks in moisture while achieving that coveted crunch. I’ve spent hours tweaking the ratios, experimenting with water temperatures, and perfecting the soda bath to get that signature Swiss chew. I dare you to taste this and not go back for seconds—once you try them, you’ll never settle for store-bought again. And if you’ve ever struggled to get pretzel rolls that rise properly or that come out too dense, you’re not alone—this recipe is a cure for that frustration.
I’m going to walk you through every single step, from the initial proofing to the final bake, so by the end of this post you’ll wonder how you ever made them any other way. Let’s dive in and unlock the secret to Swiss pretzel rolls that are soft, chewy, and absolutely unforgettable.
What Makes This Version Stand Out
- Texture: The dough’s unique hydration level and the soda bath create a chewy interior that feels like a cloud, while the baking process yields a crisp, golden crust that snaps delightfully when bitten.
- Flavor: A subtle sweetness from the sugar balances the savory salt, and the butter infusion gives a rich, buttery finish that lingers on the tongue.
- Ease: The method is straightforward, with no complicated techniques—just a few precise steps that even novice bakers can master.
- Versatility: These rolls can be served as an appetizer, a side, or a snack, and they pair perfectly with cheese, dips, or even a simple butter spread.
- Crowd Appeal: At parties or gatherings, these pretzel rolls become the centerpiece of the table, with guests clamoring for the next bite.
- Quality Ingredients: Using all-purpose flour, unsalted butter, and fine salt ensures a clean, pure taste that lets the pretzel’s character shine.
- Make‑Ahead Friendly: Once baked, the rolls keep fresh for several days when stored properly, making them ideal for meal prep or weekend baking sessions.
- Authentic Swiss Touch: The soda bath technique, borrowed from traditional Swiss pretzel-making, gives these rolls a distinct, internationally recognized flavor profile.
Alright, let's break down exactly what goes into this masterpiece…
Inside the Ingredient List
The Flavor Base
The foundation of these rolls starts with 1 1/4 cups lukewarm water and 2 1/4 teaspoons active dry yeast. The warm water activates the yeast, creating bubbles that will lift the dough during proofing. Adding a tablespoon of granulated sugar feeds the yeast, encouraging a gentle rise and a slightly sweet undertone that balances the salt. If you skip the sugar, the dough will rise, but it may taste a little flat and less complex.
The Texture Crew
All-purpose flour is the workhorse that gives these pretzel rolls their structure. Four cups of flour provide the right amount of gluten for a chewy interior while keeping the dough manageable. A pinch of fine salt (two teaspoons) enhances flavor and regulates yeast activity. Butter is the secret weapon for moisture—four tablespoons of unsalted butter, melted and folded into the dough, add richness and a tender crumb. If you prefer a dairy-free version, a plant-based butter works, but the flavor profile will shift slightly.
The Unexpected Star
The soda bath is what truly sets Swiss pretzel rolls apart. Eight cups of water and 1/2 cup baking soda create a highly alkaline solution that gelatinizes the dough’s surface, giving it that signature chewy, slightly caramelized crust. The soda bath also helps the rolls achieve a deeper color and a more complex flavor. If you skip this step, the rolls will be softer and less crisp, missing the classic pretzel bite.
The Final Flourish
An egg wash (one large egg beaten with one tablespoon of water) is brushed over the rolls before baking. This not only gives the rolls a glossy, golden finish but also adds a subtle savory depth. Finally, a generous dusting of coarse sea salt on top before baking delivers a salty crunch that’s impossible to resist. If you’re watching sodium, reduce the salt slightly, but you’ll lose some of that signature snap.
Everything's prepped? Good. Let's get into the real action…
The Method — Step by Step
- Activate the Yeast: In a large mixing bowl, combine the lukewarm water, active dry yeast, and a tablespoon of sugar. Stir gently until the yeast dissolves, then let the mixture sit for 5 minutes. You should see a frothy layer form on top—if not, the yeast may be dead. This froth is the promise of a good rise and a light, airy interior.
- Mix the Dry Ingredients: In a separate bowl, whisk together the all-purpose flour and fine salt. Pour this dry mix into the yeast mixture and stir until a shaggy dough forms. The dough will be slightly sticky; this is normal. The key is to let the flour absorb the liquid fully before proceeding.
- Incorporate the Butter: While the dough is still in the bowl, add the melted unsalted butter. Fold it in until the dough becomes smooth and elastic. The butter should be warm enough to blend without cooling the dough, which could slow yeast activity. At this point, the dough should feel tacky but not overly sticky.
- First Proof: Cover the bowl with a clean kitchen towel or plastic wrap and let the dough rise in a warm spot for about 45 minutes, or until it has roughly doubled in size. The dough will puff up, and you’ll see small air pockets forming. If it doesn’t rise, give it a little more time; yeast can be temperamental.
- Prepare the Soda Bath: While the dough is proofing, bring 8 cups of water to a boil in a large pot. Carefully add 1/2 cup of baking soda—this will cause the mixture to fizz vigorously. Stir until the soda is fully dissolved, then reduce the heat to maintain a gentle boil. This bath is the secret to that chewy crust.
- Shape the Rolls: Once the dough has risen, turn it out onto a lightly floured surface. Divide it into 12 equal pieces. Roll each piece into a tight, elongated shape, about 8 inches long. The shape should be slender enough to fit into the soda bath without breaking.
- Second Proof: Place the shaped rolls on a parchment‑lined baking sheet, spaced about 2 inches apart. Cover them loosely with a towel and let them rest for 15 minutes. This brief proof allows the dough to relax before the final bake.
- Soak in the Soda Bath: Carefully lower each roll into the boiling soda bath for 30–45 seconds. Use a slotted spoon to lift them out and let the excess liquid drip off. The dough will puff up and darken slightly as it absorbs the alkaline solution. This step is crucial for that distinctive chewy texture.
- Egg Wash & Salt: In a small bowl, whisk the egg with one tablespoon of water. Brush the surface of each roll with this mixture, ensuring an even coat. Immediately dust the tops with coarse sea salt, pressing lightly so it adheres. The egg wash gives a glossy finish, while the salt provides a satisfying crunch.
- Bake to Perfection: Preheat your oven to 425°F (220°C). Place the baking sheet in the oven and bake for 20–25 minutes, or until the rolls are deep golden brown and the crust crackles when tapped. The aroma will fill your kitchen with an irresistible, buttery scent that makes you want to eat the rolls straight from the sheet.
- Cool & Serve: Transfer the rolls to a wire rack to cool for at least 10 minutes. This resting period allows steam to escape, ensuring a crisp exterior. Serve warm for the best experience, or let them cool completely before storing.
That's it—you did it. But hold on, I've got a few more tricks that'll take this to another level…
Insider Tricks for Flawless Results
The Temperature Rule Nobody Follows
Many bakers overlook the importance of water temperature. Using water that’s too hot can kill the yeast, while water that’s too cool can slow the rise. Aim for 105°F to 110°F (40°C to 43°C) for the yeast mixture; this range activates the yeast without compromising the dough’s integrity. If you’re unsure, a kitchen thermometer is a worthwhile investment for consistent results.
Why Your Nose Knows Best
During the second proof, pause and inhale the aroma of the dough. A pleasant, yeasty scent indicates that the dough has risen properly. If the scent is flat or sour, let it proof longer. Your nose is a reliable gauge that will save you from under‑baked rolls.
The 5-Minute Rest That Changes Everything
After shaping the rolls, let them rest for 5 minutes before the soda bath. This short pause allows the gluten to relax, making it easier to handle the dough and preventing it from shrinking when submerged. I once rushed this step and the rolls collapsed—lesson learned.
Egg Wash Timing
Apply the egg wash immediately after the soda bath. If you wait too long, the rolls will dry out and the glaze will not adhere properly. A quick brush ensures a shiny, golden crust that looks as good as it tastes.
Salt Distribution
When dusting with coarse sea salt, use a light hand but press the salt into the surface. Even distribution creates a uniform crunch. If you’re sensitive to sodium, reduce the amount by half, but keep the salt on the surface for that essential bite.
Creative Twists and Variations
This recipe is a playground. Here are some of my favorite ways to switch things up:
Cheesy Pretzel Rolls
Add 1 cup of shredded Swiss cheese to the dough before the first proof. The cheese melts into the interior, creating a gooey, melty center that pairs wonderfully with a tangy mustard dip.
Herb‑Infused Rolls
Stir 2 tablespoons of dried rosemary or thyme into the flour before mixing. The herbs infuse the dough with a fragrant, savory aroma, elevating the rolls into a gourmet appetizer.
Gluten‑Free Version
Swap the all-purpose flour for a 1:1 gluten‑free blend that includes xanthan gum. Keep the same hydration and baking soda ratio for a chewy texture, though the crust may be slightly softer.
Chocolate‑Dipped Pretzels
After baking, drizzle melted dark chocolate over the warm rolls and let it set. The chocolate coats the salty surface, creating a sweet‑savory bite that’s perfect for dessert or a sweet snack.
Spicy Kick
Add a pinch of cayenne pepper to the flour mixture for a subtle heat that balances the salt. The warmth lingers in the center, making the rolls a conversation starter at any gathering.
Apple Cinnamon Rolls
Fold in finely diced apples and a teaspoon of ground cinnamon before the first proof. The fruit adds moisture and a sweet, spiced flavor that turns pretzel rolls into a fall favorite.
Storing and Bringing It Back to Life
Fridge Storage
Place leftover rolls in an airtight container at room temperature for up to 3 days. The rolls stay chewy, but the crust may soften. For a fresher feel, store them in the refrigerator, wrapped in parchment paper and a paper towel to absorb moisture.
Freezer Friendly
Cool the rolls completely, then place them in a freezer bag. They’ll keep well for up to 3 months. When ready, thaw at room temperature for 30 minutes before reheating.
Best Reheating Method
Preheat your oven to 350°F (175°C). Place the rolls on a baking sheet and bake for 8–10 minutes, or until they’re heated through and the crust is crisp again. Add a tiny splash of water to the bottom of the pan to create steam, which keeps the interior moist and restores that soft, airy texture.