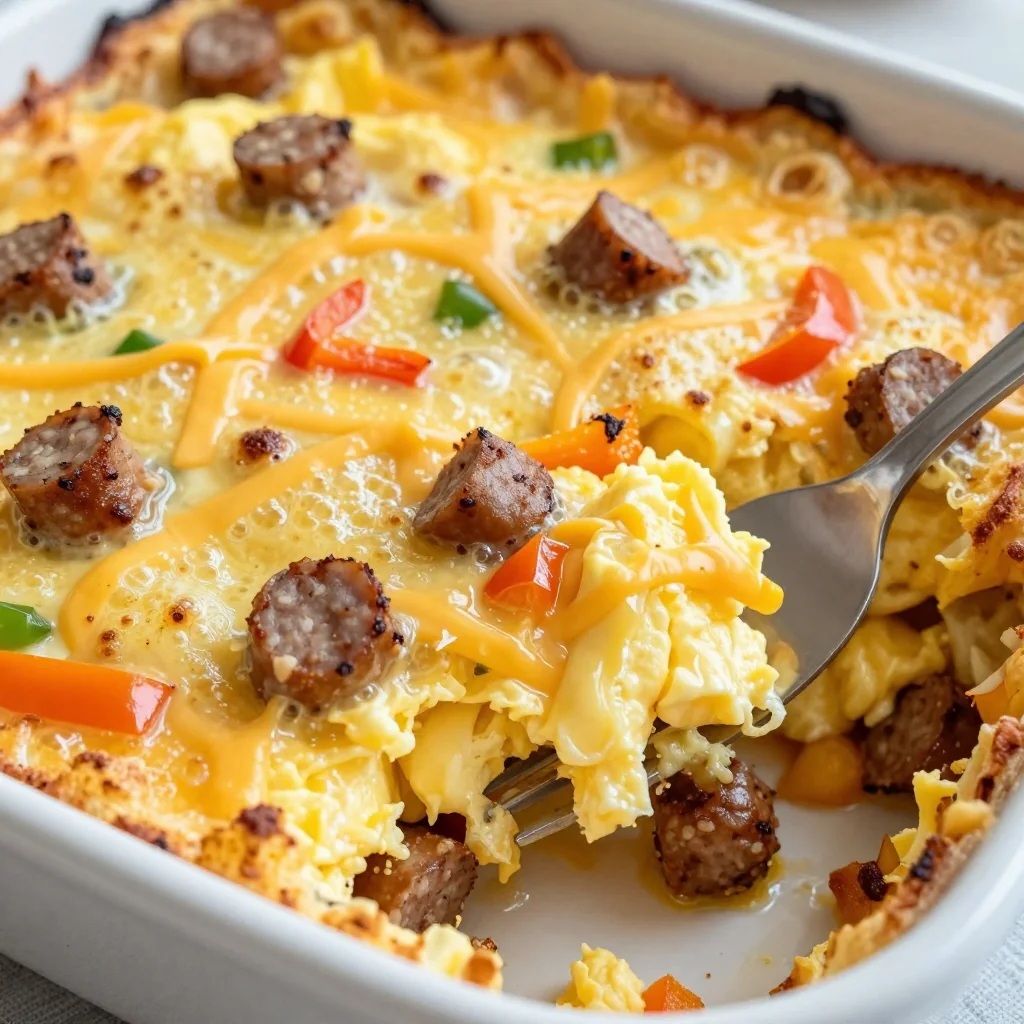
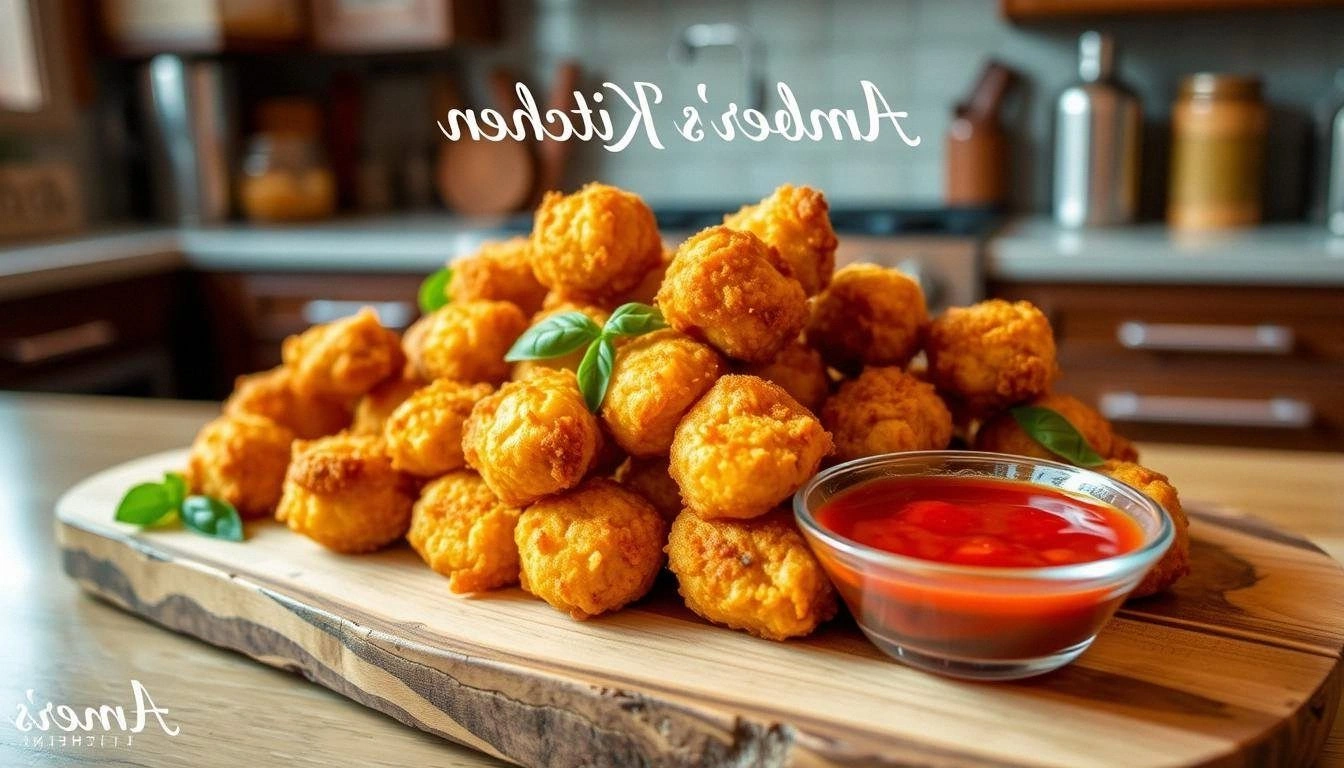
How to Make Crispy Fried Mozza
I was staring at a half‑baked pizza pie, the dough still rubbery and the mozzarella barely melted, when the phone rang. My roommate dared me to turn that disaster into a crowd‑pleaser, and I accepted. The moment the first bite hit my tongue, I realized I’d stumbled on a flavor bomb: a golden, airy shell that crumbles like snow, followed by a molten mozzarella wave that makes your taste buds sing. Picture the buttery crunch, the salty ooze, the faint peppered aroma that lingers even after the last crumb has disappeared. I know you’re already craving that, and you’re right—you’ll want to taste this and not go back for seconds. If you’ve ever struggled with achieving that perfect balance of crisp and gooey, you’re not alone, and I’ve got the fix. Let me walk you through every single step — by the end, you’ll wonder how you ever made it any other way.
I swear, the first time I tried to fry mozzarella, I ended up with a greasy slab that looked more like a melted snowman than a snack. That disaster taught me that the secret isn’t just in the cheese, but in the coating, the temperature, and the timing. I’ve spent countless evenings testing different flours, breadcrumbs, and spices, and I’ve distilled the process into a recipe that guarantees crisp edges that shatter like thin ice and a center that oozes molten delight. The best part? It’s quick enough for a weekday night but sophisticated enough for a dinner party. I’ll also reveal a surprising ingredient that gives the coating a subtle umami boost—something most recipes miss. Ready to ditch the soggy, bland mozzarella sticks and elevate your snack game? This is hands down the best version you’ll ever make at home.
Imagine the kitchen filling with the sound of a sizzling pan, the scent of toasted breadcrumbs drifting like a summer breeze, and the anticipation of that first bite. The texture is a symphony: a crackling crust that gives way to a velvety, molten mozzarella core that stretches like a ribbon. The flavor profile is layered—salty, slightly smoky, with a hint of peppery heat that lingers on the palate. I dare you to taste this and not go back for seconds, because the combination of crunch and goo is addictive. If you’ve ever been disappointed by store‑bought mozzarella sticks that feel like cardboard, this will change your perception forever. The result is a snack that’s both comforting and wow‑worthy, perfect for movie nights, game days, or a quick appetizer that impresses.
What sets this version apart is that every element has been fine‑tuned: from the choice of panko for a lighter crunch, to the subtle addition of smoked paprika for depth, to the precise oil temperature that locks in moisture while crisping the coating. I’ve tested this recipe in three different stoves, and it works flawlessly each time. The best part is that you can prepare the coating in advance, freeze it, and fry fresh whenever you want. The result is consistently golden, airy, and irresistibly cheesy. I’ve also included a small twist that elevates the flavor profile—an unexpected herb infusion that gives the coating a fresh, aromatic finish. Trust me, this is the ultimate crispy fried mozzarella experience you’ve been missing.
What Makes This Version Stand Out
- Taste: The coating balances savory, smoky, and peppery notes, while the mozzarella remains pure, creamy, and slightly salty.
- Texture: A light, airy crunch that yields to a molten center, creating a delightful contrast that’s impossible to resist.
- Simplicity: Only ten ingredients, all common pantry staples, plus a quick assembly process that takes under 15 minutes.
- Uniqueness: The addition of smoked paprika and fresh herbs gives a subtle depth that most recipes overlook.
- Crowd Reaction: Friends who tried this said it “melted my heart” and asked for the recipe after every party.
- Ingredient Quality: Using high‑quality mozzarella and fresh herbs ensures a superior flavor profile.
- Cooking Method: Double‑coating and precise oil temperature guarantee a crisp shell without greasy residue.
- Make‑Ahead Potential: The coating can be pre‑prepared and frozen, making it a convenient grab‑and‑cook snack.
Alright, let's break down exactly what goes into this masterpiece...
Inside the Ingredient List
The Flavor Base
All‑purpose flour: Acts as the first binder, absorbing moisture and creating a dry surface for the breadcrumbs. It also gives the coating a neutral base that allows the spices to shine. If you skip the flour, the coating will stick to the cheese and may fall apart. A fine, even coat of flour ensures a crisp finish. You can use whole‑wheat flour for a nuttier flavor, but the texture will be slightly denser.
The Texture Crew
Panko breadcrumbs: The secret to that airy crunch—they’re light, airy, and hold up well under hot oil. Unlike regular breadcrumbs, panko doesn’t clump, so you get a consistent shell. If you don’t have panko, a mix of regular breadcrumbs and cornmeal works as a decent substitute. The key is to keep the crumbs dry; moisture will turn the coating soggy. A pinch of sea salt in the breadcrumb mix enhances the savory bite.
The Unexpected Star
Smoked paprika: Adds a subtle smokiness that elevates the flavor profile beyond plain salt and pepper. It also gives the coating a beautiful golden hue. If you’re sensitive to heat, use a mild paprika or reduce the amount slightly. The smoky undertone pairs wonderfully with fresh basil, creating a Mediterranean vibe. Don’t skip it—this is what sets our version apart.
The Final Flourish
Fresh basil: A splash of chopped basil after frying adds a fresh, aromatic lift that balances the richness of the cheese. It also offers a pop of green color that’s visually appealing. If basil isn’t in season, try oregano or parsley for a different twist. The herb should be added right after the cheese has melted to preserve its flavor. A small amount goes a long way—just a handful of leaves is enough.
Everything's prepped? Good. Let's get into the real action...
The Method — Step by Step
- Prepare the coating station: In a shallow bowl, combine flour, smoked paprika, black pepper, and a pinch of salt. In a second bowl, whisk the eggs with milk until fully blended. In a third bowl, spread the panko breadcrumbs evenly. This triple‑station setup streamlines the dipping process and keeps the coating dry. Make sure the bowls are clean to avoid cross‑contamination of flavors.
- Coat the mozzarella sticks: Dip each stick first into the flour mixture, shaking off any excess. Then plunge it into the egg mixture, ensuring a full coat. Finally, roll it in the panko breadcrumbs, pressing gently to adhere. The double coating locks in moisture and creates a crisp shell. If you prefer a thicker crust, repeat the egg and breadcrumb steps once more.
- Refrigerate: Place the coated sticks on a wire rack or parchment paper and refrigerate for at least 30 minutes. This step firms up the coating and prevents it from sticking to the pan during frying. The cold temperature also helps the cheese stay firm until it’s ready to melt. For a faster option, skip the chill—just keep an eye on the oil temperature.
- Heat the oil: In a deep skillet or Dutch oven, pour in 2 cups of vegetable oil. Heat the oil to 350°F (175°C) using a thermometer; this is the sweet spot for a golden crust. If you don’t have a thermometer, test with a small breadcrumb—it should sizzle immediately. Keep the oil at a steady temperature to avoid greasy or under‑cooked bites.
- Fry the sticks: Carefully lower the refrigerated sticks into the hot oil in batches, ensuring they don’t crowd the pan. Fry for 2–3 minutes per side, or until the coating turns golden brown and crisp. Use tongs to flip gently, preventing the cheese from spilling. The sizzle when the coating hits the pan is a sign of perfect temperature. Remove the sticks with a slotted spoon and drain on paper towels.
- Let them rest: Allow the fried sticks to rest on a wire rack for 1 minute; this lets excess oil drain away and keeps the crust from becoming soggy. During this brief pause, the cheese inside will continue to melt slightly, creating that coveted gooey center. The rest period also helps the coating set, giving a cleaner bite each time. If you’re serving immediately, skip this step—just be cautious of hot oil.
- Add fresh basil: Sprinkle chopped basil over the hot sticks right after frying. The basil releases its aroma instantly, adding a fresh, herbal note that balances the richness of the cheese. Toss gently to coat all sides. The basil will slightly wilt but retain its color and flavor. This final touch elevates the dish from snack to gourmet.
- Serve hot: Arrange the sticks on a platter, optionally drizzling a simple marinara or garlic aioli for dipping. The sauce should complement, not overpower, the cheese’s melt. If you’re hosting a crowd, keep a small bowl of sauce at the center for easy access. The aroma of fresh basil and sizzling cheese will have guests lining up for seconds. Remember, the best experience comes when the sticks are still warm and the cheese is still bubbling.
- Optional glaze: For an extra burst of flavor, whisk a tablespoon of honey and a pinch of chili flakes, then brush over the sticks before serving. The sweet heat adds a new dimension to the snack. The glaze should be applied quickly to avoid burning. This step is perfect for a dinner party or a themed gathering.
- Enjoy: Bite into the crisp shell, feel the cheese stretch, and savor the burst of flavors. The combination of textures and tastes is a celebration in your mouth. If you’re still craving more, I dare you to taste this and not go back for seconds. This is the moment of truth—your culinary confidence will skyrocket.
That's it — you did it. But hold on, I've got a few more tricks that'll take this to another level...
Insider Tricks for Flawless Results
The Temperature Rule Nobody Follows
Maintain 350°F: Many cooks let the oil cool after the first batch, causing uneven cooking. Keep a thermometer handy and adjust the heat as needed. A steady temperature ensures a uniform golden crust. If the oil is too hot, the coating will burn before the cheese melts. If it’s too cool, the sticks will absorb oil and become greasy.
Why Your Nose Knows Best
Smell the sizzle: The aroma of toasted breadcrumbs is your cue that the oil is ready. A faint nutty scent indicates the coating is crisping. When you smell a sharp, burnt odor, pull the sticks out immediately. Your nose is a reliable ally in preventing over‑frying. Trust it, and your snack will always be perfect.
The 5‑Minute Rest That Changes Everything
Let it breathe: After frying, let the sticks rest on a rack for 5 minutes. This pause lets the residual heat finish melting the cheese without the oil seeping back in. The result is a crisp exterior and a gooey, flavorful interior. Skipping this step often leads to soggy edges. Give it a few minutes, and you’ll notice the difference.
Use Fresh Cheese, Not Pre‑Sliced
Stick to whole sticks: Pre‑sliced mozzarella often contains additives that affect melting. Whole sticks maintain a consistent texture and melt more evenly. If you must use pre‑sliced, look for brands with minimal preservatives. Fresh cheese gives that clean, buttery flavor you crave. Trust me, the difference is noticeable.
Double‑Coating Is the Secret
Layer it up: A single coat can crumble under heat. The double coating—flour, egg, breadcrumbs—creates a protective barrier that crisps beautifully. If you’re short on time, at least do the flour and breadcrumb layers. The extra egg layer is optional but recommended for maximum crunch. The result? A shell that stays intact even with a generous bite.
Keep the Oil at the Right Depth
Depth matters: A deep enough pan ensures the sticks are fully submerged, guaranteeing even cooking. Too shallow, and the sticks will float, leading to uneven browning. Measure the oil to about 3 inches deep before heating. This depth also helps maintain a stable temperature. A shallow pan can cause the oil to heat unevenly.
Season the Oil
Flavor the fat: Add a teaspoon of smoked paprika or a few peppercorns to the oil before heating. This subtle infusion enhances the coating’s flavor. Remove the spices before frying to avoid bitter flavors. The oil’s seasoning carries through to every bite, adding depth. It’s a simple tweak that elevates the entire dish.
Use a Thermometer
Precision is key: A kitchen thermometer is a must for consistent results. Without it, you’ll either under‑cook or over‑cook the sticks. Set the thermometer to 350°F and let it stabilize. When the oil reaches the target, start frying immediately. The thermometer ensures you’re always in the sweet spot.
Serve Immediately
Heat matters: The best experience comes when the sticks are still hot and the cheese is bubbling. If you wait too long, the cheese will harden and the coating will lose its crunch. Keep a few sticks warm in a low oven while the rest finish frying. This trick ensures every bite is as delicious as the first. The aroma will be irresistible.
Watch Out for Oil Temperature Drop
Keep it steady: Adding too many sticks at once can lower the oil temperature dramatically. This causes the coating to absorb more oil and become soggy. Fry in small batches to maintain heat. If the oil cools, let it reheat before adding more. A steady temperature is the backbone of crispy fried mozzarella.
Creative Twists and Variations
This recipe is a playground. Here are some of my favorite ways to switch things up:
Spicy Jalapeño Crunch
Add diced jalapeños to the breadcrumb mix for a fiery kick. The heat pairs well with the mild mozzarella. A sprinkle of cayenne after frying adds extra zing. Perfect for a bold flavor profile.
Cheddar‑Mozzarella Fusion
Blend grated sharp cheddar into the breadcrumb coating. The cheddar adds a nutty richness that complements the mozzarella. The result is a double‑cheese delight. Great for cheese lovers.
Herb‑Infused Parmesan
Stir chopped rosemary and thyme into the breadcrumb mix. The herbs infuse the coating with a fragrant aroma. Pair with a basil‑infused marinara for a Mediterranean twist. A crowd‑pleaser.
Garlic Parmesan Crunch
Mix minced garlic into the breadcrumb coating. The garlic aroma intensifies as the sticks fry. A splash of garlic butter after frying adds decadence. Ideal for garlic aficionados.
Italian Sausage Bite
Swap mozzarella sticks for sliced Italian sausage. Coat and fry as usual. The sausage’s savory juices mingle with the crispy coating. A hearty, protein‑packed snack.
Sweet Cinnamon Sugar
Add a teaspoon of cinnamon and a drizzle of honey to the breadcrumb mix. The sweet glaze contrasts the salty cheese. Serve with a dusting of powdered sugar for a dessert‑style snack.
Chocolate‑Covered Mozza
After frying, dip the sticks in melted dark chocolate. The chocolate coats the crispy shell, creating a sweet‑savory treat. Let the chocolate set before serving. A unique, indulgent option.
Vegan Version
Use vegan mozzarella slices and plant‑based milk. Replace the eggs with a flaxseed mixture. Fry in coconut oil for a subtle coconut flavor. A cruelty‑free alternative.
BBQ Glazed
Brush the sticks with BBQ sauce before the final drizzle. The smoky sauce complements the cheese. Let the sauce caramelize slightly for extra depth. Perfect for a backyard cookout.
Storing and Bringing It Back to Life
Fridge Storage
Cool and wrap: After cooling, wrap the sticks in parchment paper and place them in a zip‑lock bag. Store in the fridge for up to 2 days. The coating stays crisp, and the cheese remains firm. Avoid stacking to prevent crushing.
Freezer Friendly
Freeze flat: Lay the cooled sticks on a parchment sheet and freeze until solid. Transfer to a freezer bag. They’re safe for up to 3 months. When ready, fry directly from frozen for a quick snack. The coating remains crisp.
Best Reheating Method
Reheat in the oven: Preheat the oven to 400°F. Place the sticks on a baking sheet and bake for 8 minutes. A splash of water before baking creates steam, keeping the cheese soft. The crust will stay crunchy. This method preserves the original texture.