I was halfway through a chaotic Sunday brunch when the kitchen turned into a battlefield. My skillet had been overcooked, the eggs had exploded, and my apple pie—well, it was a soggy disaster. The only thing that could salvage the afternoon was a craving for something sweet, comforting, and, dare I say, almost rebellious. That craving led me straight to the pantry and the idea of a cinnamon apple custard that could turn a kitchen mishap into a culinary triumph.
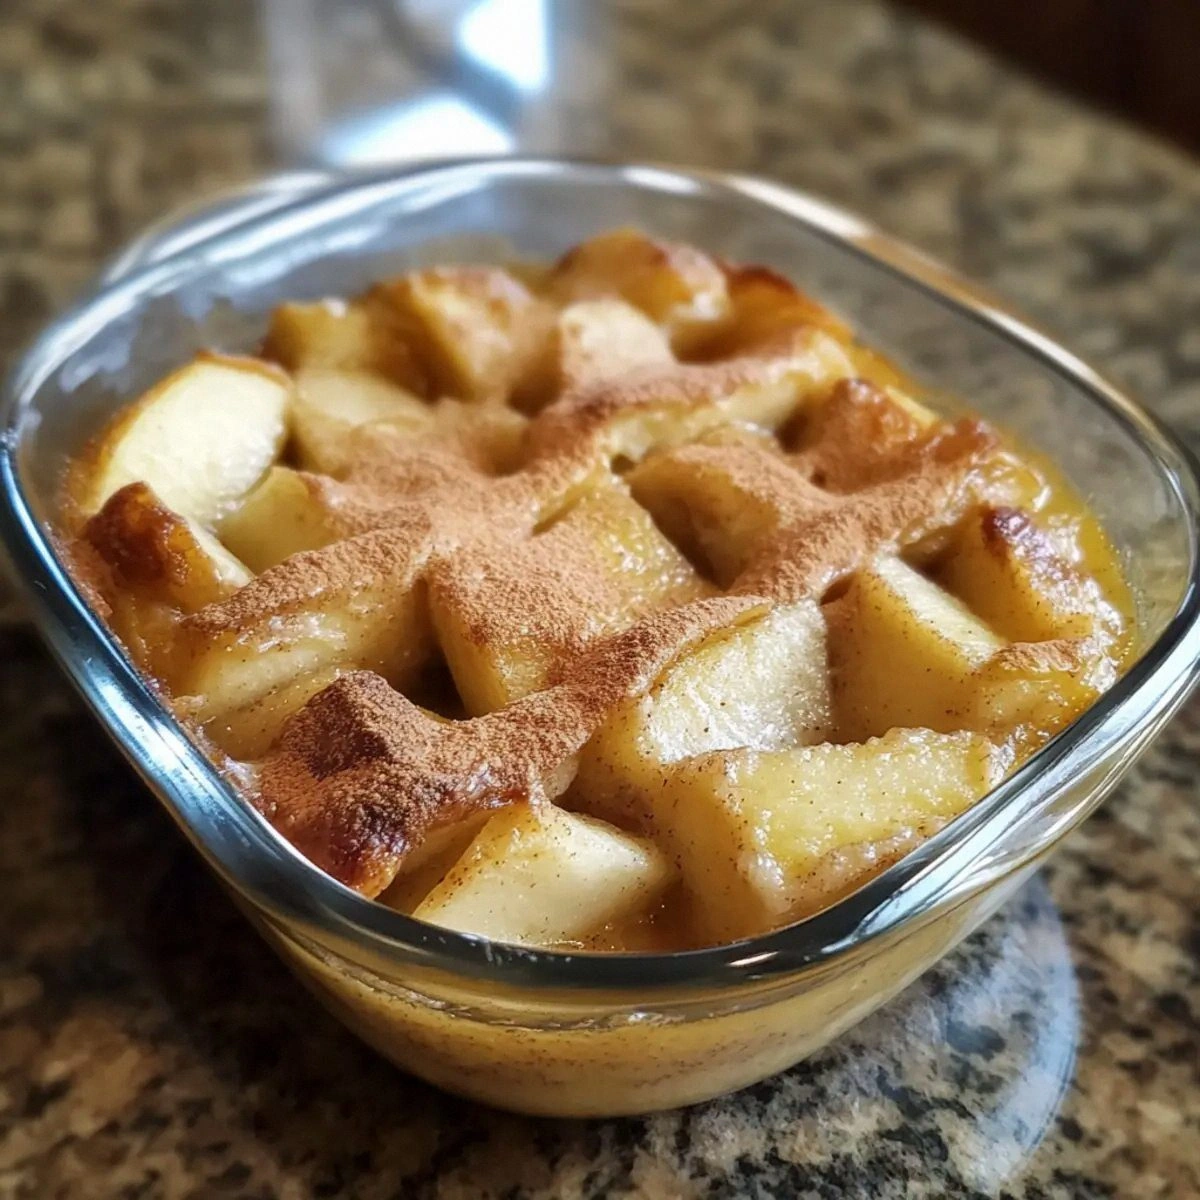
Picture this: a golden crust forming over a glossy apple layer, the scent of warm cinnamon drifting through the air, the sound of a gentle bubbling custard, and the first bite that feels like a hug from the inside out. The texture is a dance between silky custard and the tender crunch of caramelized apples, while the aroma is so rich it makes the whole house feel like a bakery. You’ll hear the faint sizzle as the apples caramelize, feel the gentle rise of the custard, and taste the subtle sweetness that lingers on the palate. It’s a multisensory experience that makes your taste buds sing.
What sets this version apart is that it’s not just another apple custard recipe; it’s a perfected harmony of flavors and textures that turns a simple dessert into a showstopper. The apples are sliced thinly to maximize surface area for caramelization, the custard is thickened with eggs and milk for a velvety finish, and a dash of lemon juice balances the sweetness with a bright note. The result is a custard that coats the apples like velvet, with crispy edges that shatter like thin ice when you bite into it. It’s the kind of dish that makes you want to brag to every foodie you know.
And here’s the kicker: I discovered a secret technique that transforms ordinary apples into a caramelized masterpiece without burning them. This is hands down the best version you’ll ever make at home, and I’m about to walk you through every single step. By the end, you’ll wonder how you ever made it any other way.
What Makes This Version Stand Out
- Taste: The balanced sweetness of brown and granulated sugar with a citrus twist creates a flavor profile that feels both indulgent and fresh. The cinnamon adds warmth without overpowering the apples.
- Texture: A silky custard that clings to each apple slice, paired with a caramelized crust that offers a satisfying crunch. The contrast keeps every bite interesting.
- Ingredient Quality: Using Granny Smith apples ensures tartness that cuts through the sweetness, while whole milk provides a creamy richness that’s hard to beat.
- Simplicity: Only nine ingredients, no complicated steps, and everything you need is likely already in your pantry.
- Crowd Reaction: Friends and family rave about how the dish feels like a dessert and a comfort food rolled into one. It’s perfect for dinner parties and cozy nights.
- Make‑ahead Potential: The custard can be baked ahead of time and reheated, making it ideal for busy schedules.
- Versatility: You can serve it warm, at room temperature, or even chilled as a dessert parfait.
- Visual Appeal: The golden crust and glossy custard make it Instagram-worthy, while the apple slices add a pop of color.
Inside the Ingredient List
The Flavor Base
Granny Smith apples: The tartness of these apples cuts through the sweetness, providing a bright, fresh backbone to the custard. If you prefer a sweeter apple, try Fuji or Honeycrisp, but you’ll lose a bit of the classic tart edge. The acidity also reacts with the lemon juice to create a subtle tang that balances the richness. Skipping apples would turn this into a plain custard; the apple is the star that defines the dish.
The Texture Crew
Whole milk: It’s the base of the custard, giving it a silky mouthfeel and a subtle dairy sweetness. If you’re lactose intolerant, try oat milk or almond milk, but the custard will be lighter. The milk also helps the eggs coagulate smoothly, preventing a lumpy texture. Without milk, the custard would be too thick and clumpy.
The Unexpected Star
Lemon juice: A tablespoon of lemon juice adds a bright citrus note that lifts the overall flavor. It also prevents the apples from browning too quickly and keeps the custard from becoming too sweet. The acidity reacts with the sugar, creating a caramelized glaze on the apple slices. If you omit it, the custard will taste flat.
The Final Flourish
Ground cinnamon: This spice provides warmth and depth, complementing the apples and custard. Use a high-quality ground cinnamon for the best flavor; fresh ground can elevate the dish. Cinnamon also has natural anti-inflammatory properties, making this dessert a bit kinder to your body. Without cinnamon, the custard would feel like a plain custard with no character.
Everything’s prepped? Good. Let’s get into the real action...
The Method — Step by Step
- Preheat your oven to 350°F (175°C). Line a 9-inch square baking dish with parchment paper, leaving an overhang on the sides for easy removal. This step ensures even baking and makes cleanup a breeze. The parchment also adds a slight crisp to the bottom of the custard.
- Trim the apples, core them, and slice them into 1/8 inch rounds. Toss the slices in a mixture of 1 tsp ground cinnamon and 1/2 cup brown sugar until they’re evenly coated. Let them rest for 10 minutes; the sugar will draw out moisture and start caramelizing. If you’re in a hurry, skip the resting period and just bake immediately.
- In a medium saucepan, combine 2 cups whole milk, 1/2 cup granulated sugar, 1 tbsp lemon juice, and 1 tsp vanilla extract. Heat over medium heat until the sugar dissolves and the mixture is just about to simmer. This creates a fragrant base that will infuse the custard with subtle vanilla undertones.
- Whisk 3 eggs in a separate bowl. Slowly pour the warm milk mixture into the eggs, whisking constantly to temper the eggs and prevent scrambling. The goal is a smooth, velvety custard that won’t curdle. If you’re worried about curdling, add a small amount of cold milk to the eggs first.
- Stir in 1/4 tsp salt to the custard mixture. Salt enhances the sweetness and balances the flavors, making the custard feel more rounded. It also helps the custard set properly during baking. A pinch of salt is all you need.
- Arrange the coated apple slices in an even layer at the bottom of the prepared baking dish. The apples should be snug but not overlapping too much. This ensures each slice caramelizes evenly and the custard seeps into the gaps between them.
- Pour the custard mixture over the apples, making sure it’s evenly distributed. The custard should just cover the apples; if it’s too thick, the custard will set too hard. If it’s too thin, you’ll end up with a watery finish. The ideal consistency is like a light cream filling.
- Bake for 30 minutes, or until the custard is set and the top is golden brown. The custard should feel firm to the touch, and the apples should be tender yet still hold their shape. If the top browns too quickly, tent it with foil.
- Remove from the oven and let it cool for 10 minutes before serving. This resting period allows the custard to set fully and the flavors to meld. The custard will be slightly runny at first but will firm up as it cools.
- Serve warm, optionally dusted with powdered sugar or accompanied by a scoop of vanilla ice cream. The warm custard will melt into the ice cream, creating a decadent treat. You can also drizzle a bit of caramel sauce for an extra indulgent touch.
That’s it — you did it. But hold on, I’ve got a few more tricks that’ll take this to another level. These little adjustments will elevate the dish from good to unforgettable.
Insider Tricks for Flawless Results
The Temperature Rule Nobody Follows
Always bake at exactly 350°F. Too high, and the custard will seize; too low, and the apples won’t caramelize properly. The key is to keep the oven stable and avoid opening the door during the first 20 minutes, which can cause the custard to collapse.
Why Your Nose Knows Best
Smell the custard as it bakes; it should emit a warm, sweet aroma that signals the sugar is caramelizing. If the smell is faint, the oven might be too cool or the sugar might not be distributed evenly.
The 5-Minute Rest That Changes Everything
After baking, let the custard rest for exactly five minutes before cutting. This short rest allows the custard to set properly and prevents it from sliding off the dish when sliced. A friend once cut it too early and the custard splattered everywhere.
The Perfect Apple Slice
Use a mandoline to slice the apples uniformly. Uniform slices ensure even cooking and caramelization. If you don’t have a mandoline, a sharp knife and a ruler as a guide will do the trick.
The Secret to a Crispy Top
Sprinkle a thin layer of powdered sugar over the custard before baking. The sugar will form a slight crust that adds a delightful crunch. This is especially effective if you serve it warm.
Creative Twists and Variations
This recipe is a playground. Here are some of my favorite ways to switch things up:
Caramel Swirl Variation
Swirl a tablespoon of caramel sauce into the custard before baking. The caramel adds a buttery sweetness that complements the apples. It’s perfect for a holiday gathering.
Spiced Apple Compote
Add a pinch of nutmeg and a splash of bourbon to the apple layer before baking. The spices give a warm depth, while the bourbon adds a subtle kick. Serve it with whipped cream.
Nutty Crunch Variation
Fold chopped pecans into the custard mixture before pouring over the apples. The nuts add texture and a buttery flavor that pairs well with the caramelized apples. Toast them first for extra crunch.
Berry Fusion
Replace half of the apples with fresh blueberries or strawberries. The berries add a burst of color and a tart contrast to the sweet custard. Adjust the sugar slightly to balance the flavors.
Cheese Infusion
Stir in a tablespoon of cream cheese into the custard mixture. The cream cheese adds richness and a subtle tang that enhances the apple flavor. It also gives the custard a silky texture.
Gluten-Free Twist
Use a gluten-free baking dish or line a regular dish with parchment. The dish itself doesn’t need to be gluten-free, just the ingredients if you’re avoiding gluten. This keeps the dish safe for all guests.
Storing and Bringing It Back to Life
Fridge Storage
Cool the custard completely, then cover tightly and store in the refrigerator for up to 3 days. The custard will stay firm and the apple slices will retain their texture. When ready to serve, reheat gently on the stove or in the microwave.
Freezer Friendly
After cooling, wrap the custard in plastic wrap and place it in a freezer-safe container. Freeze for up to 2 weeks. Thaw overnight in the refrigerator before reheating.
Best Reheating Method
Add a splash of milk or water before reheating to restore moisture. Reheat on low heat or in a microwave, stirring every 30 seconds. This trick ensures the custard stays creamy and doesn’t dry out.