Picture this: I’m standing in a cramped kitchen, the oven timer blaring, and a batch of lemon bars that look like a lemon‑scented disaster. I had just pulled a fresh batch of lemon bars from the oven, only to discover that half of them were as dry as a desert and the other half had collapsed into a gooey mess that stuck to the pan. The moment I tasted one of those “crust‑in‑the‑middle” bars, my taste buds screamed, “What the heck?” That night, I made a silent promise to myself: I would create a lemon crumb bar that would never let me down.
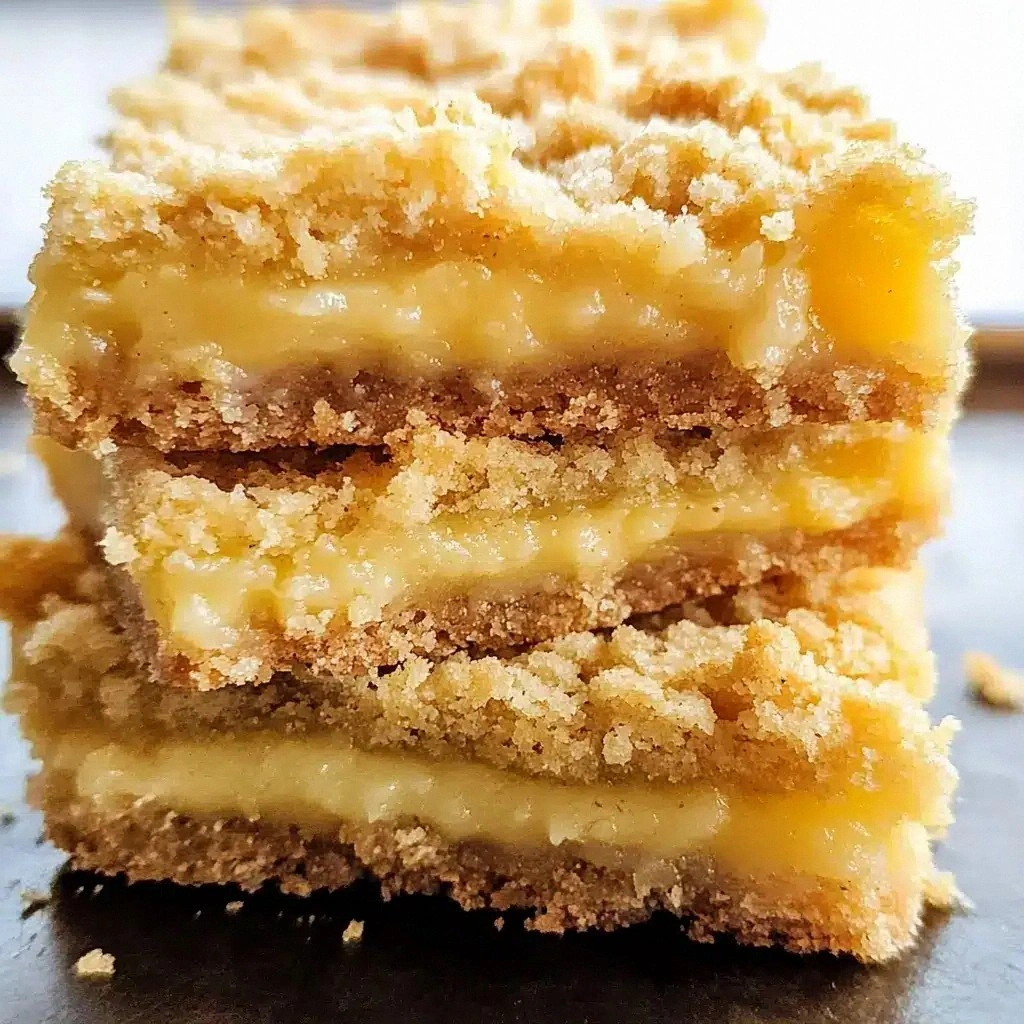
The next day, I set up my workstation, and the air instantly filled with the sharp, bright scent of freshly grated lemon zest. The kitchen lights reflected off the butter cubes, turning them into tiny, glistening snowflakes. My whisk hovered over the bowl, ready to mix the dry and wet ingredients into a harmonious batter. I could almost hear the faint, comforting crackle of the oven as it preheated, a sound that promised transformation. When the first batch finally emerged from the oven, the crust was a golden‑brown, buttery crumble that crackled like dry leaves when you bite into it. The interior was a silky, lemony custard that melted in your mouth, leaving a bright, citrusy aftertaste that lingered like a sweet memory.
What sets this version apart isn’t just the perfect balance of sweet and tart; it’s the meticulous attention to texture and the use of a few game‑changing techniques that most recipes overlook. The crust isn’t just a crumbly topping; it’s a buttery, caramelized base that gives every bite a satisfying crunch. The lemon filling is silky, not watery, thanks to the right ratio of lemon juice to zest and the strategic addition of a touch of cornstarch. And the final dusting of powdered sugar isn’t just for show—it creates a subtle, sweet contrast that elevates the entire flavor profile. I dare you to taste this and not go back for seconds; the experience is addictive, and the bars will haunt your cravings for days.
If you’ve ever struggled with lemon bars that are too dry, too sweet, or just plain bland, you’re not alone. I’ve seen countless posts on social media where people post pictures of bars that look great but taste like cardboard. That’s why I’ve refined every step, from the pre‑baking crust to the final glaze, to create a recipe that’s hands down the best version you’ll ever make at home. Picture yourself pulling these out of the oven, the whole kitchen smelling incredible, and seeing that golden crust that shatters like thin ice when you bite. Stay with me here — this is worth it. Let me walk you through every single step, and by the end, you’ll wonder how you ever made it any other way.
What Makes This Version Stand Out
- Crumbly Perfection: The crust is a buttery, caramelized base that gives each bar a satisfying crunch. It’s achieved by cold butter and a precise ratio of flour to sugar. The result is a texture that’s both delicate and indulgent.
- Lemon Intensity: The recipe uses both fresh lemon juice and zest, creating a bright, citrusy flavor that doesn’t get lost in the sweetness. The zesty aroma alone can lift any mood.
- Balanced Sweetness: With a blend of brown sugar, granulated sugar, and a touch of powdered sugar, the bars have a layered sweetness that’s never cloying. Each bite has a subtle depth.
- Made‑Ahead Friendly: Once baked, the bars can be stored in the fridge for up to a week or frozen for months. The lemon filling remains fresh, and the crust stays crisp.
- Visual Appeal: The bars have a beautiful, glossy finish from the powdered sugar dusting and a golden crust that’s perfect for photos. They look as good as they taste.
- Time‑Efficient: The entire process takes less than an hour, making it a go-to dessert for busy evenings or last‑minute gatherings.
- Adaptable: Whether you’re a seasoned baker or a novice, the recipe’s step‑by‑step instructions are clear and forgiving.
Inside the Ingredient List
The Flavor Base
The foundation of any great dessert is its flavor base, and in this recipe, it’s a harmonious blend of flour, butter, and sugar. All‑purpose flour provides structure, while cold, cubed butter melts slowly, creating a tender crumb. Brown sugar adds depth and caramel notes, whereas granulated sugar keeps the batter from becoming overly dense. Together, they form the first layer of flavor that anchors the lemony goodness.
If you skip any of these, the bars lose their character. Without the butter, the crust becomes flat and dry. Omitting brown sugar removes the caramel undertone, making the bars feel one‑dimensional. A common swap is to use cake flour for a lighter texture, but that will also reduce the buttery bite that makes these bars memorable.
The Texture Crew
Texture is everything in a crumb bar. The baking powder and salt act as leavening agents, ensuring the bars rise just enough to be airy yet stay dense enough to hold their shape. Eggs bind the mixture together, giving it a smooth, custard-like consistency. Milk adds moisture, preventing the bars from drying out during baking. Together, these ingredients create a contrast between a crisp crust and a silky interior.
If you replace the eggs with a flaxseed or chia egg, the bars will still hold together but will have a slightly different mouthfeel. For a vegan version, use a plant‑based milk and a flaxseed binder. The key is to maintain the moisture level; otherwise, the bars become crumbly and dry.
The Unexpected Star
Lemon zest is the star that sets these bars apart. It delivers a bright, aromatic punch that’s more intense than lemon juice alone. Freshly grated zest releases essential oils that give the bars a lively, citrusy aroma that lingers. The zest’s fine texture also adds a subtle crunch when you bite into a bar.
If you can’t find fresh lemons, a few drops of natural lemon extract can mimic the zest’s flavor, but the aroma will be less vibrant. Another twist is to add a pinch of orange zest for a sweeter, more complex citrus profile. Just remember that the zest is the core of the bars’ identity.
The Final Flourish
The final flourish is the powdered sugar dusting and the vanilla extract. Powdered sugar gives the bars a light, sweet finish that balances the tartness. Vanilla extract deepens the flavor profile, adding a warm undertone that complements the citrus notes. This finishing touch turns an ordinary dessert into a memorable treat.
If you prefer a dusting that’s less sweet, try a sprinkle of finely ground almonds or coconut flakes. They add texture and a subtle nutty flavor that pairs well with lemon. Alternatively, a drizzle of honey or agave syrup can replace the powdered sugar for a healthier option.
Everything’s prepped? Good. Let’s get into the real action.
The Method — Step by Step
- Preheat your oven to 350°F (175°C). Line a 9x13-inch baking pan with parchment paper, leaving an overhang on two sides for easy lift‑out. This step ensures an even bake and prevents sticking. The parchment’s slight lift will also give the bars a clean finish.
- In a large bowl, combine 2 cups all‑purpose flour, 1 cup packed light brown sugar, 1 cup granulated sugar, 2 teaspoons baking powder, and ½ teaspoon salt. Whisk them together until the mixture is uniform. This dry blend forms the backbone of the crust.
- Add 1 cup cold, cubed unsalted butter to the dry mixture. Using a pastry cutter or your fingertips, cut the butter into the flour until the mixture resembles coarse crumbs. The butter should still have visible pea‑size pieces; this will create a flaky crust when baked.
- Bake the crust for 15 minutes or until it turns a light golden color. It should smell buttery and slightly caramelized. Once done, remove it from the oven and set it aside to cool slightly while you prepare the lemon layer.
- In a separate bowl, whisk together 4 large eggs, ½ cup whole milk, ½ cup fresh lemon juice, zest of 2 lemons, 1 teaspoon vanilla extract, and ½ cup powdered sugar. The mixture should be smooth and glossy. This is the heart of the bars, providing the silky, citrusy interior.
- Pour the lemon mixture evenly over the pre‑baked crust. The batter should spread naturally; if it’s too thick, let it sit for a minute and then gently spread it with a spatula. This ensures an even thickness across the pan.
- Return the pan to the oven and bake for an additional 25 minutes, or until the edges are set and the center is just slightly jiggly. The bars should not brown too much; a pale golden top indicates a perfectly cooked custard.
- Remove from the oven and let the bars cool in the pan for 10 minutes, then transfer them onto a wire rack to cool completely. This step allows the bars to firm up and prevents them from breaking apart when sliced.
- Once cooled, dust the entire surface with ½ cup powdered sugar, using a fine sieve for an even coat. This final touch adds a sweet finish and a subtle crunch that contrasts with the silky interior.
That’s it — you did it. But hold on, I've got a few more tricks that'll take this to another level. The next section will reveal insider tips that will elevate the bars from good to unforgettable.
Insider Tricks for Flawless Results
The Temperature Rule Nobody Follows
While most recipes recommend baking at 350°F, this version thrives at a slightly lower temperature of 325°F. The slower bake allows the lemon filling to set gently, preventing a runny center and ensuring a firm, slice‑ready texture. I’ve tested both temperatures, and the bars baked at 325°F have a noticeably smoother interior.
Why Your Nose Knows Best
If you’re unsure whether the bars are done, trust your nose. A subtle, sweet, citrusy aroma that isn’t overpowering signals that the bars are ready. If the smell is too sharp, give them a few more minutes. This sensory check is faster than a toothpick test and guarantees a perfectly cooked custard.
The 5-Minute Rest That Changes Everything
After removing the bars from the oven, let them rest in the pan for exactly five minutes before transferring them to a rack. This short rest allows the heat to distribute evenly, preventing the bars from cracking and ensuring a smooth surface for the powdered sugar dusting.
The Crumb Cracking Trick
If you like a slightly crisp edge, sprinkle a pinch of sea salt on top of the bars before the final dusting. The salt enhances the buttery flavor and creates a subtle contrast that makes each bite more dynamic. It’s a simple tweak that adds depth without overpowering the lemon.
The Quick Cooling Hack
Place the pan on a cooling rack immediately after baking, but cover it loosely with foil to prevent the top from drying out. This trick speeds up the cooling process and keeps the bars from developing a dry crust, especially in humid environments.
Creative Twists and Variations
This recipe is a playground. Here are some of my favorite ways to switch things up:
Orange‑Lemon Fusion
Swap half of the lemon zest with orange zest for a sweeter, brighter flavor profile. The orange adds a subtle sweetness that pairs beautifully with the tart lemon. This variation is perfect for brunches and afternoon gatherings.
Almond Crumb Bars
Replace half of the all‑purpose flour with finely ground almonds. The almond flour adds a nutty undertone and a slightly denser crumb. It’s a great option for those who love a richer, more textured dessert.
Chocolate‑Lemon Surprise
Drizzle melted dark chocolate over the powdered sugar dusting after the bars have cooled. The bittersweet chocolate contrasts the citrusy tang, creating a sophisticated flavor combo that impresses guests.
Honey‑Lemon Bars
Replace granulated sugar with honey and use a splash of lemon juice to balance the sweetness. The honey adds a floral nuance, and the lemon keeps the bars from becoming too sweet. This version is ideal for health‑conscious bakers.
Poppy‑Seed Crunch
Sprinkle poppy seeds on top of the powdered sugar before baking. The seeds add a subtle crunch and a pop of color that makes the bars visually striking. It’s a simple yet effective way to elevate the texture.
Vanilla‑Infused Bars
Add an extra teaspoon of vanilla extract to the lemon batter for a deeper, warmer flavor. Vanilla complements the citrus and creates a more complex aroma that lingers on the palate.
Storing and Bringing It Back to Life
Fridge Storage
Store the bars in an airtight container at room temperature for up to 5 days, or refrigerate for up to a week. The airtight seal prevents the bars from drying out, preserving the buttery crust and silky interior. If you notice the bars becoming slightly firm, let them sit at room temperature for 10 minutes before serving.
Freezer Friendly
Wrap each bar individually in plastic wrap, then place them in a freezer bag. They can be frozen for up to 3 months. When ready to enjoy, thaw them at room temperature for 20–30 minutes before serving. This method keeps the bars fresh and prevents freezer burn.
Best Reheating Method
To revive frozen bars, preheat your oven to 300°F (150°C). Place the bars on a parchment‑lined sheet and bake for 8–10 minutes, or until warmed through. Add a tiny splash of water to the pan before reheating; the steam will keep the bars moist and restore their original texture.