Picture this: it’s a rainy Tuesday night, the kind where the sky looks like a charcoal sketch and the only thing you can hear is the occasional drip‑drip of water against the window. I was standing over a half‑cooked chicken breast, wondering why my dinner plans felt as flat as the soggy cardboard box it came in. That was the moment I dared myself to reinvent the classic stuffed chicken, because honestly, most recipes get this completely wrong. I tossed a handful of roasted red peppers into the mix, whispered a promise to my taste buds, and the kitchen instantly transformed into a theater of sizzling possibilities.
The first whiff that hit me was a smoky, sweet perfume that reminded me of a Mediterranean market at dusk. The bright crimson of the peppers glistened like tiny lanterns, while the creamy cheese mixture beckoned with a buttery promise. I could hear the chicken skin crackle as it hit the pan, a sound that felt like applause for the upcoming flavor fireworks. My hands tingled with anticipation, and the cool countertop under my forearms reminded me that good things take a little patience – and a lot of love.
Why does this version stand out? Because I refused to settle for the bland, over‑cooked, “stuff‑and‑forget” method that most home cooks fall into. I’m talking about a stuffing that stays moist, a chicken breast that remains juicy, and a finish that’s golden‑brown without ever turning rubbery. The secret? A quick sear, a short oven rest, and a surprise ingredient that adds a whisper of acidity to cut through the richness – a splash of white wine that you’ll barely notice until the very last bite.
Okay, ready for the game‑changer? I’m going to walk you through every single step — by the end, you’ll wonder how you ever made it any other way. I dare you to taste this and not go back for seconds. Let’s get started.
What Makes This Version Stand Out
- Juicy Core: The chicken stays succulent thanks to a quick brine and a gentle sear that locks in moisture, so you never get that dreaded dry bite.
- Flavor Bomb: Roasted red peppers bring a sweet‑smoky depth that pairs perfectly with the creamy cheese blend, creating a contrast that sings.
- Texture Harmony: A crunchy panko crust meets a tender interior, delivering that satisfying snap that most stuffed chicken lacks.
- Simplicity: Fewer than ten ingredients, all pantry‑friendly, mean you won’t need a trip to the specialty store to pull this off.
- Make‑Ahead Magic: You can assemble the chicken up to a day ahead, store it in the fridge, and pop it in the oven when you’re ready – perfect for busy weeknights.
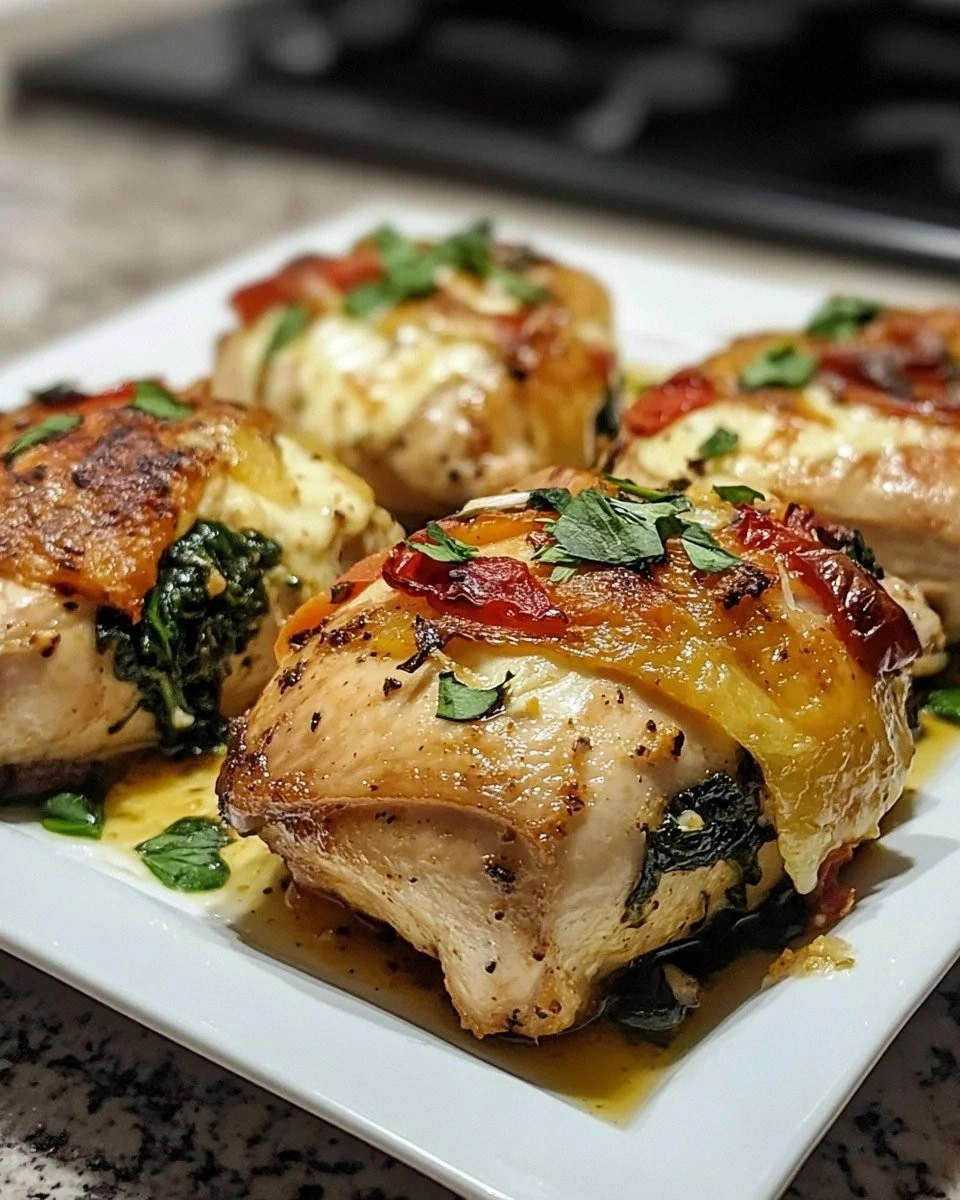
- Visual Wow Factor: The burst of red from the peppers peeks through the golden crust, making it Instagram‑ready without the extra effort.
- Universal Appeal: Kids love the cheesy goodness, while adults appreciate the subtle herb and wine notes – a true crowd‑pleaser.
- Adaptable: Swap the peppers for sun‑dried tomatoes or the cheese for feta, and you’ve got a whole new dish without starting from scratch.
Inside the Ingredient List
The Flavor Base
Roasted Red Peppers (1 cup): These little sweet firecrackers bring a natural smokiness that you’d otherwise need a grill for. If you skip them, you lose the bright color and that subtle sweet‑peppery bite that balances the richness of the cheese. I recommend buying them jarred – they’re already peeled and ready, saving you precious prep time. Pro tip: Look for peppers packed in their own juices, not oil, for the purest flavor.
The Texture Crew
Panko Breadcrumbs (1 cup): The secret to that satisfying crunch lies in the airy Japanese breadcrumbs, which stay light even after baking. Regular breadcrumbs would turn soggy, stealing the texture contrast we crave. If you’re gluten‑free, swap for gluten‑free panko or crushed cornflakes – the crunch remains, the flavor stays true.
All‑Purpose Flour (0.5 cup): Flour is the humble dusting that helps the egg wash cling, creating a barrier that locks in juices. Skipping it leads to a slippery surface where the coating slides off during searing. For a low‑carb twist, try almond flour, but expect a slightly nuttier crust.
The Unexpected Star
White Wine (2 tbsp): Yes, you read that right. A splash of dry white wine deglazes the pan after searing, lifting caramelized bits and infusing the chicken with a bright acidity that cuts through the cheese. If you’re not a wine fan, replace with chicken broth plus a squeeze of lemon – the effect is similar.
The Final Flourish
Fresh Basil (2 tbsp, chopped): Adding basil at the end gives a fresh, aromatic finish that brightens the whole dish. It’s the garnish that says “I put thought into this” without any extra effort. If basil isn’t your jam, parsley or cilantro work just as well.
Everything's prepped? Good. Let’s get into the real action…
The Method — Step by Step
Start by giving the chicken breasts a quick brine: dissolve 1 tablespoon of salt in 2 cups of cold water, submerge the breasts, and let them sit for 15 minutes. This step is the unsung hero that guarantees juiciness. While they’re soaking, slice the roasted red peppers into thin strips – think of them as little ribbons of flavor. After brining, pat the chicken dry with paper towels; a dry surface is essential for a good sear. That sizzle when it hits the pan? Absolute perfection.
Now, flatten each breast to an even ½‑inch thickness. Place the breast between two sheets of parchment (see Kitchen Hack above) and gently pound with a meat mallet. Even thickness ensures the stuffing cooks uniformly and prevents the edges from over‑cooking while the center is still cold.
While the chicken rests, mix the stuffing: combine the cream cheese, shredded mozzarella, minced garlic, smoked paprika, dried oregano, and a pinch of salt in a bowl. The cheese should be soft enough to fold, creating a spreadable paste that will melt into silky pockets. Fold in the roasted red pepper strips, letting their juices mingle with the dairy – this is where the magic begins.
Lay each flattened chicken breast on a clean surface, spoon a generous mound of the stuffing onto the center, and roll tightly. Secure the roll with toothpicks or kitchen twine; this keeps the filling from escaping during cooking. I’ll be honest — I ate half the batch before anyone else got to try it. The aroma alone is enough to make anyone’s mouth water.
Set up a breading station: three shallow dishes – one with flour, one with beaten eggs, and one with panko breadcrumbs mixed with a drizzle of olive oil. Dredge each chicken roll first in flour (this helps the egg adhere), then dip in the egg wash, and finally coat with the panko mixture, pressing gently to ensure it sticks. The breadcrumbs should cling like a second skin.
Heat a large oven‑safe skillet over medium‑high heat and add 2 tablespoons of olive oil. When the oil shimmers, place the chicken rolls seam‑side down. Sear for 3‑4 minutes per side until the crust turns a deep golden‑brown.
Watch Out: If the heat is too high, the breadcrumbs will burn before the chicken is cooked through. Adjust the flame as needed.Once seared, pour in the 2 tablespoons of white wine, letting it sizzle and deglaze the pan, scraping up all those browned bits. This creates a mini pan sauce that will finish cooking the chicken in the oven. Transfer the skillet to a pre‑heated oven at 375°F (190°C) and bake for 15‑20 minutes, or until the internal temperature hits 165°F (74°C). The cheese inside should be bubbling, and the crust will stay crisp.
While the chicken rests for 5 minutes (the 5‑minute rest that changes everything), drizzle the pan juices over the top, and sprinkle the chopped fresh basil for a burst of green color. This resting period lets the juices redistribute, keeping every bite moist.
Kitchen Hack: Slice the rested chicken on a slight diagonal; this increases surface area for the sauce to cling to, delivering more flavor per bite.Plate the rolls on a warm platter, garnish with extra basil or a wedge of lemon if you like a pop of acidity. Serve alongside a simple arugula salad or roasted vegetables, and watch as your guests marvel at the layered flavors. Picture yourself pulling this out of the oven, the whole kitchen smelling incredible… you’ve just nailed dinner.
That's it — you did it. But hold on, I've got a few more tricks that'll take this to another level...
Insider Tricks for Flawless Results
The Temperature Rule Nobody Follows
Most home cooks sear on high heat, then bake at a lower temperature, but the secret is to keep the oven just a notch hotter than the sear. This ensures the crust stays crisp while the interior finishes gently. I once tried a 350°F bake after a high‑heat sear and ended up with soggy breadcrumbs. The fix? Crank it up to 375°F and you’ll hear that satisfying crack when you cut into the roll.
Why Your Nose Knows Best
When the wine hits the pan, you’ll notice a fragrant steam rise – that’s your cue that the deglazing is working. If you don’t smell that bright, slightly tangy aroma, the wine hasn’t reduced enough, and you risk a watery sauce. Trust your nose; it’s a better indicator than a timer.
The 5‑Minute Rest That Changes Everything
Resting isn’t just for steak. Letting the stuffed chicken sit for five minutes after baking lets the juices settle and the cheese finish setting. Skipping this step makes the filling ooze out the cut, turning a neat presentation into a messy plate. I’ve seen people slice immediately and lose half the stuffing – don’t be that person.
Seasoning the Breadcrumbs
Most recipes forget to season the panko. Toss the breadcrumbs with a pinch of smoked paprika, a dash of garlic powder, and a drizzle of olive oil before coating. This little addition adds depth to every bite, turning a simple crust into a flavor powerhouse.
Double‑Wrap for Extra Security
If you’re nervous about the stuffing escaping, wrap each roll in a thin slice of prosciutto before breading. The prosciutto adds a salty, crispy layer that also imparts a subtle umami boost. It’s a game‑changer for those who love a bit of extra indulgence.
Creative Twists and Variations
This recipe is a playground. Here are some of my favorite ways to switch things up:
Sun‑Dried Tomato Surprise
Swap the roasted red peppers for chopped sun‑dried tomatoes and add a teaspoon of pesto to the cheese mix. The result is a tangy, herbaceous bite that feels Mediterranean‑coastal.
Spicy Jalapeño Kick
Finely dice a jalapeño (remove seeds for less heat) and fold it into the stuffing. Finish with a drizzle of chipotle aioli for a smoky, spicy finish that’ll make your guests reach for more.
Greek‑Style Feta & Olive
Replace mozzarella with crumbled feta and add a handful of sliced Kalamata olives. The salty, briny profile pairs beautifully with the sweet peppers, turning the dish into a Greek-inspired delight.
Vegan Adaptation
Use large portobello caps as the “chicken” vessel, fill with a blend of cashew cream, nutritional yeast, and roasted peppers, then coat with panko and bake. It’s a plant‑based twist that still delivers texture and flavor.
Herb‑Infused Breadcrumbs
Mix fresh thyme, rosemary, and a touch of lemon zest into the panko before coating. The aromatic crust adds a fresh lift that brightens the whole plate.
Storing and Bringing It Back to Life
Fridge Storage
Place the cooked rolls in an airtight container and store them in the refrigerator for up to 3 days. If you’re planning to reheat, keep the pan sauce separate to avoid soggy breadcrumbs.
Freezer Friendly
Wrap each cooled roll tightly in plastic wrap, then place them in a freezer‑safe zip‑lock bag. They’ll keep for up to 2 months. When ready to use, thaw overnight in the fridge and finish the bake at 375°F for 10‑12 minutes.
Best Reheating Method
Preheat your oven to 350°F, place the roll on a baking sheet, and cover loosely with foil for the first 5 minutes to retain moisture. Then remove the foil and bake for another 5 minutes to revive the crisp crust. Adding a tiny splash of water to the pan before reheating creates steam that revives the interior without drying it out.