I was in the middle of a snowstorm, the kind that makes you stare out the window and wonder if the world outside is just a giant, frosted cookie. My kettle boiled, my pantry looked like a desert, and I was craving something that would hug me from the inside out. I tried the usual instant cocoa packets, but they tasted like cardboard that had been left in the back of a cupboard for a decade. I dared a friend to a “best cocoa” showdown, and when she sipped my experiment, she actually said, “I’m not leaving this house until I finish the whole mug.” That was my light‑bulb moment: I needed a cocoa mix that was as warm and cozy as a knitted blanket, and that could be made with nothing more than water.
Picture this: a mug of steaming liquid, the aroma of roasted cocoa beans swirling with the faint sweetness of sugar, and a silky texture that slides over your tongue like silk sheets on a summer night. The sound of the water bubbling, the sight of the dark brown swirl forming, the feel of the mug warming your palms—everything aligns to create a multi‑sensory hug. I’ve tried everything from stovetop chocolate sauces to microwave mug mixes, and none of them delivered that perfect balance of richness and lightness. Most recipes either drown you in sugar or leave you with a gritty, under‑seasoned mess.
This version stands out because it uses dry powdered milk as the secret weapon. That little white powder turns water into a velvety base that carries cocoa flavor like a champion carrier pigeon. The result? A cup that feels indulgent but isn’t a calorie bomb, and you can make it in under ten minutes. I’ll be honest — I ate half the batch before anyone else got to try it, and I still have no regrets. The best part? You can stash the mix in a mason jar, and whenever the craving hits, just add hot water and you’re good to go.
I’m going to let you in on a technique that most “quick cocoa” recipes completely ignore: I toast the cocoa powder lightly before mixing it with the powdered milk. This tiny step unlocks a depth of flavor that makes the cocoa taste like it was brewed in a boutique European café. Okay, ready for the game‑changer? Let me walk you through every single step — by the end, you’ll wonder how you ever made cocoa any other way.
What Makes This Version Stand Out
- Flavor Depth: Toasted cocoa powder adds a subtle smokiness that ordinary mixes lack, turning a simple drink into a gourmet experience.
- Silky Texture: Powdered milk creates a creamy mouthfeel without any actual milk, making it perfect for those who are lactose‑intolerant or just don’t want extra dairy.
- Simple Ingredients: Only four pantry staples are needed, so you won’t have to run to the store at midnight.
- Customizable Sweetness: The sugar range lets you dial in the perfect level of sweetness for your palate.
- Zero Waste: Store the mix in an airtight jar and it stays fresh for months, cutting down on single‑serve packet waste.
- Instant Gratification: Just add hot water, stir, and you’ve got a café‑quality beverage in seconds.
- Kid‑Friendly: No boiling milk or heavy equipment—perfect for a quick after‑school treat.
- Make‑Ahead Potential: Batch‑prepare the mix once and enjoy it all winter long without any extra effort.
Inside the Ingredient List
The Flavor Base
Cocoa powder is the heart of any chocolate drink, but not all cocoa powders are created equal. I recommend a Dutch‑processed cocoa because its lower acidity lets the sugar shine without a sour edge. When you toast it gently over low heat for about two minutes, you coax out aromatic compounds that make the drink smell like a boutique chocolate shop. Skipping this step? You’ll end up with a flat, one‑dimensional flavor that feels like reheated chocolate syrup.
The Texture Crew
Dry powdered milk is the unsung hero. It’s essentially dehydrated dairy that rehydrates instantly, giving you that luscious body without the need for fresh milk. If you substitute regular milk powder with a plant‑based alternative, you’ll lose some of the natural creaminess, but you can still achieve a decent result with coconut milk powder. When choosing powdered milk, look for a brand that lists “non‑fat” and “no added sugars” to keep the mix clean.
The Sweetener
Sugar is the bridge between bitter cocoa and the comforting sweetness you crave. I like to keep the range flexible—½ cup for a modest sweet spot, or up to ¾ cup if you’re a self‑declared sweet tooth. Granulated white sugar dissolves quickly in hot water, but you can also experiment with raw cane sugar for a subtle caramel note. If you’re watching carbs, a sugar substitute like erythritol works, though you’ll notice a faint cooling effect on the tongue.
The Final Flourish
A pinch of salt may seem trivial, but it’s the secret that amplifies every other flavor. Salt balances the bitterness of cocoa and rounds out the sweetness, making the drink feel complete. Use a fine sea salt for even distribution; a coarse pinch can leave gritty pockets. If you happen to be low‑sodium, a dash of potassium chloride will do the trick without compromising taste.
Everything's prepped? Good. Let's get into the real action…
The Method — Step by Step
- Gather Your Tools. You’ll need a medium‑sized mixing bowl, a whisk, a small skillet, and a airtight container for storage. I like to use a glass bowl because you can see the colors blend, and the whisk helps break up any clumps. As you set everything out, take a moment to smell the cocoa powder—if it smells faintly bitter, it’s ready for the next step. Kitchen Hack: Use a small silicone spatula to scrape the sides of the bowl; it prevents powder from sticking and ensures an even mix.
- Toast the Cocoa. Place the cocoa powder in a dry skillet over low heat. Stir constantly with a wooden spoon; you’ll hear a faint crackle as the oils release. After about two minutes, the cocoa will turn a deeper, richer brown and emit a nutty aroma that makes your kitchen smell like a chocolate boutique. This step is pure magic, and if you skip it, you’ll end up with a bland cup that screams “instant packet.” Watch Out: Do not let the cocoa burn; burnt cocoa becomes bitter and ruins the entire batch.
- Combine Dry Ingredients. In your mixing bowl, whisk together the toasted cocoa, dry powdered milk, and sugar. The powder should look like a uniform, dark‑tan sand. This is the moment of truth—if you see any clumps, whisk a bit longer; the goal is a smooth, homogenous powder that will dissolve effortlessly in water. I dare you to taste this and not go back for seconds of the mix itself.
- Add the Pinch of Salt. Sprinkle the salt over the dry mixture and give it a final whisk. Salt is the silent conductor that brings all the flavors together, much like a maestro guiding an orchestra. If you’re on a low‑sodium diet, you can skip this, but expect a slightly muted flavor profile.
- Transfer to Storage. Spoon the blend into your prepared mason jar, then seal tightly. Store it in a cool, dark pantry; the mix will stay fresh for up to three months. For an extra layer of protection, place a small piece of parchment paper on top before sealing—this absorbs any stray moisture.
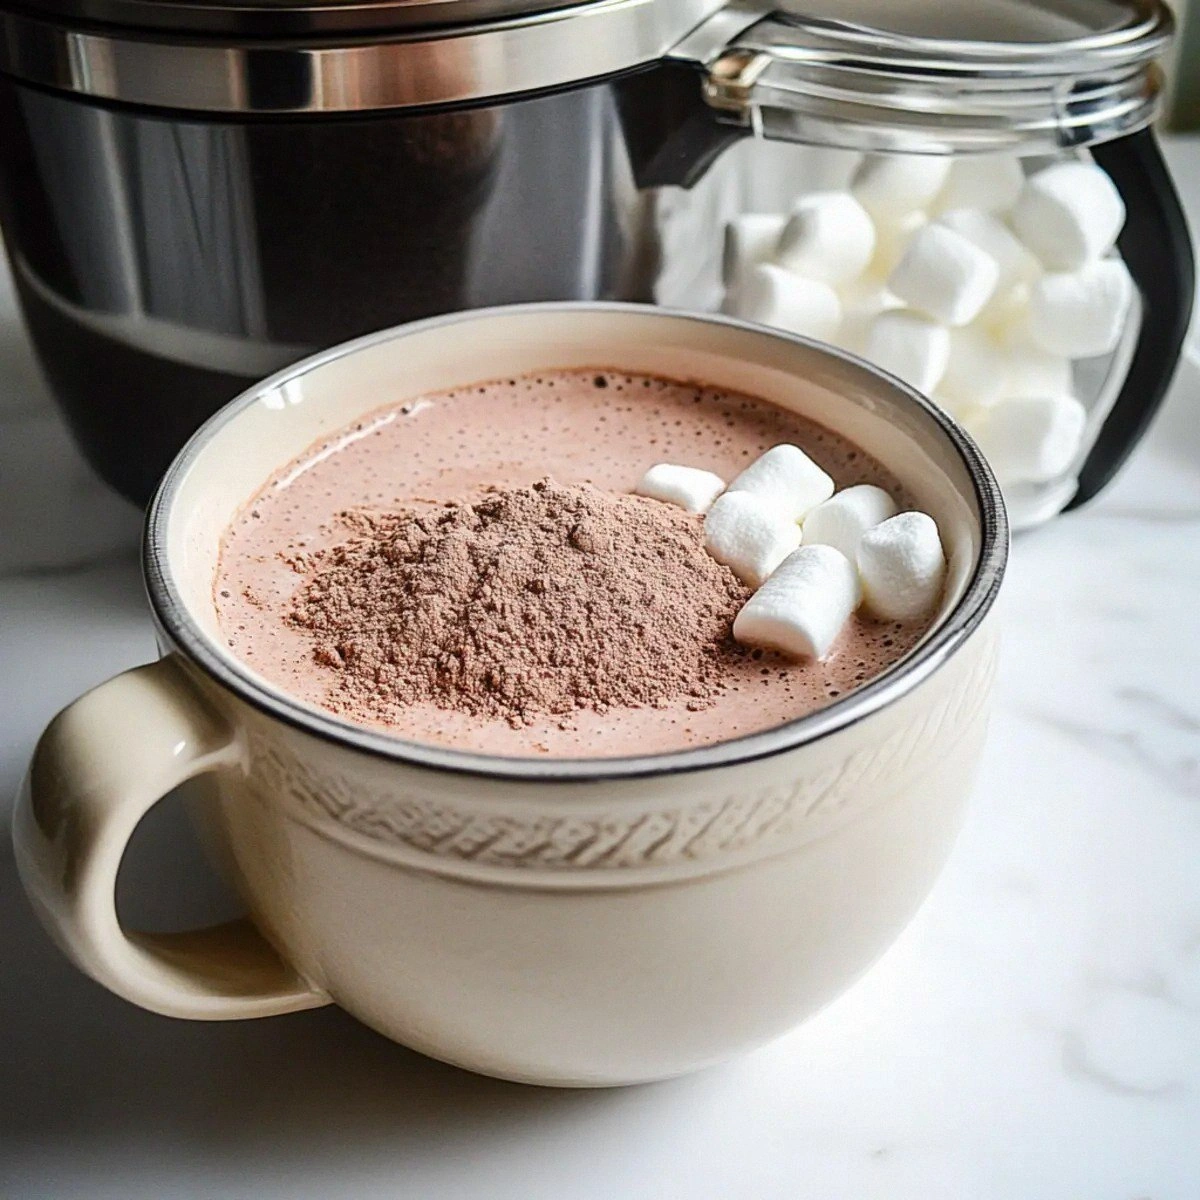
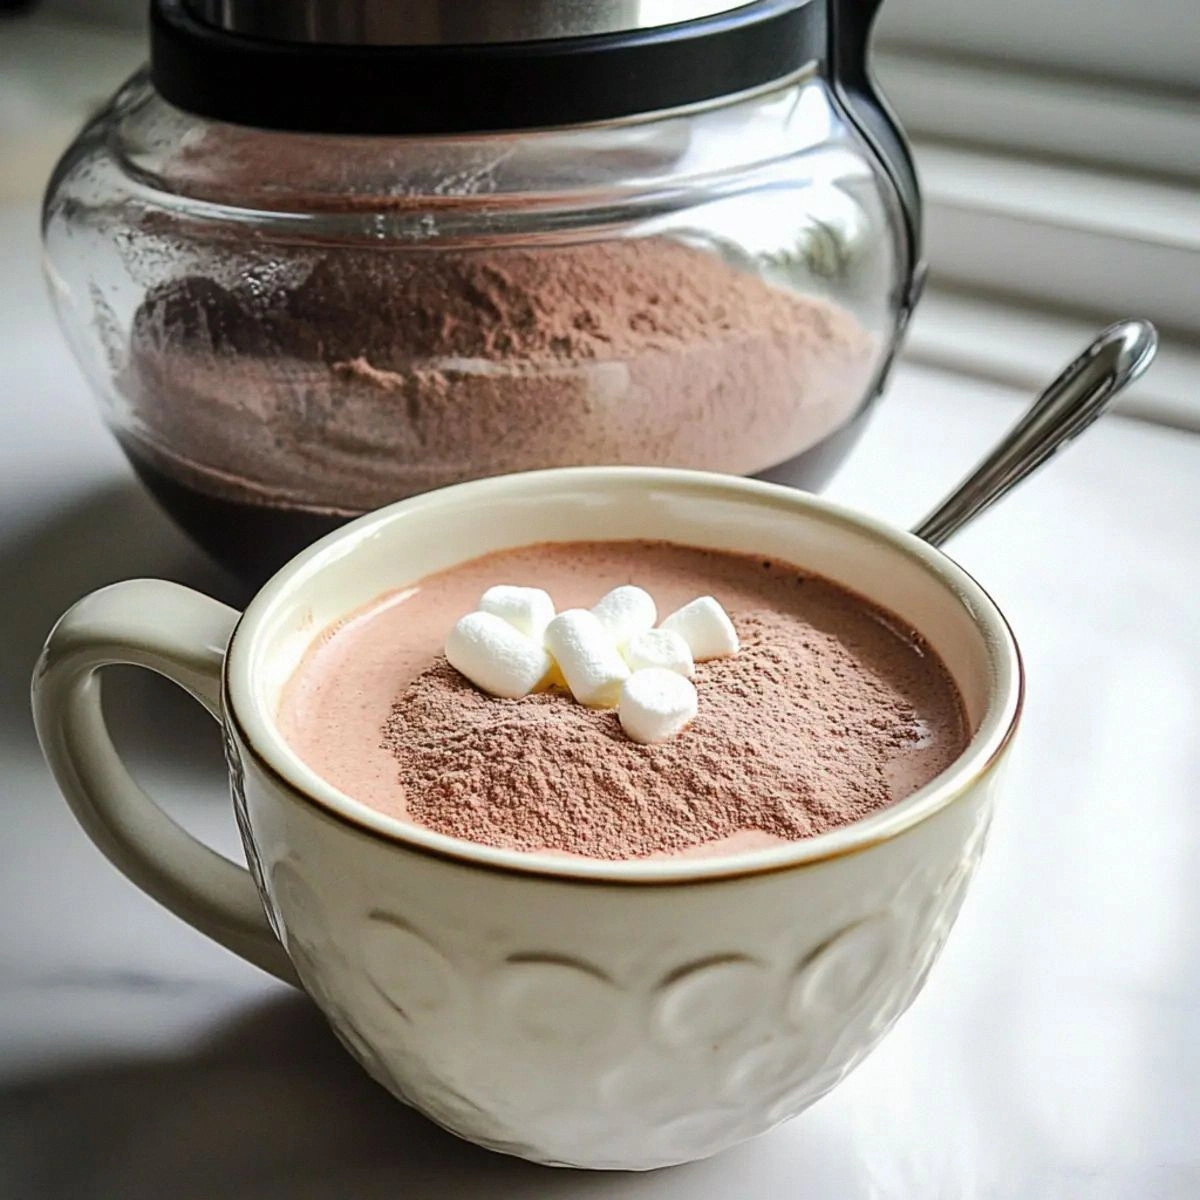
- Make a Cup of Cocoa. Heat water to just below boiling (around 190°F/88°C). Pour 2‑3 tablespoons of the mix into a large mug, then add the hot water. Stir vigorously with a whisk or a fork; you’ll notice the mixture instantly turning glossy and thickening. The steam should rise in a fragrant cloud—if it smells like burnt sugar, you’ve over‑heated the water.
- Final Touches. For a gourmet feel, top your cocoa with a light dusting of extra cocoa powder or a drizzle of melted dark chocolate. You can also add a dash of cinnamon or a splash of vanilla extract for an aromatic twist. This is the part where you get to feel like a barista, and it’s absolutely worth the extra 30 seconds.
- Enjoy and Share. Take a sip, close your eyes, and let the warmth spread from your throat to your fingertips. The texture should coat your tongue like a velvety blanket, and the flavor should linger just long enough to make you want another sip. That’s the magic of a well‑balanced cocoa—comfort, richness, and a hint of nostalgia all in one mug.
That's it — you did it. But hold on, I've got a few more tricks that'll take this to another level…
Insider Tricks for Flawless Results
The Temperature Rule Nobody Follows
Never pour boiling water directly onto the mix; it creates steam pockets that leave you with a grainy texture. Aim for 190°F (just shy of a rolling boil). The water is hot enough to dissolve everything smoothly, yet gentle enough to preserve the toasted cocoa’s delicate aromatics. A kitchen thermometer is cheap and makes a world of difference, especially on chilly mornings when you’re half‑asleep.
Why Your Nose Knows Best
Before you even taste, trust your sense of smell. When the cocoa mixture starts to emit a rich, slightly nutty perfume, you know the toasting step hit the sweet spot. If the scent is faint or smells raw, keep stirring for another 30 seconds. I once skipped the sniff test and ended up with a bland cup that tasted like watered‑down milk—lesson learned.
The 5‑Minute Rest That Changes Everything
After whisking the dry ingredients, let the bowl sit uncovered for five minutes. This allows any remaining moisture to evaporate and the powders to settle into a tighter, more uniform blend. The result? A smoother dissolve when you add water later. A friend tried to skip this rest once — let’s just say the cocoa clumped like a bad hair day.
The “Double‑Whisk” Technique
When you finally add hot water, whisk vigorously for ten seconds, pause, then whisk again for another ten seconds. This double‑whisk creates micro‑bubbles that give the cocoa a light, airy mouthfeel without adding any extra ingredients. It’s the secret behind that café‑style froth you see in Instagram videos.
Custom Sweetness Calibration
Start with 2 tablespoons of mix per cup, taste, then add an extra half‑tablespoon if needed. Because the sugar range is broad, this method ensures you never over‑sweeten. I dare you to try it with a pinch of sea salt added at the end; the contrast will make your taste buds do a little happy dance.
Creative Twists and Variations
This recipe is a playground. Here are some of my favorite ways to switch things up:
Spiced Chai Cocoa
Add a pinch of ground cinnamon, a dash of cardamom, and a tiny spoonful of ginger powder to the dry mix. The result is a warm, exotic brew that feels like a hug from a far‑away market. Perfect for chilly evenings when you want something a little more adventurous.
Peppermint Holiday Edition
Stir in ¼ teaspoon of peppermint extract into the final cup (not the dry mix). The cool mint cuts through the richness, making it a festive favorite for holiday gatherings. Pair with a candy cane garnish for extra flair.
Mocha Madness
Swap half of the powdered milk for instant coffee granules. You’ll get a bold, espresso‑infused cocoa that’s perfect for a mid‑day pick‑me‑up. The coffee’s bitterness balances the cocoa’s sweetness beautifully.
Vegan Coconut Dream
Replace the dry powdered milk with coconut milk powder. The coconut adds a subtle tropical note and a richer mouthfeel, while keeping the drink dairy‑free. Top with toasted coconut flakes for texture.
Protein Power Boost
Mix in a scoop of unflavored whey or plant‑based protein powder after the cocoa has dissolved. This turns your cozy drink into a post‑workout recovery beverage without compromising flavor.
Storing and Bringing It Back to Life
Fridge Storage
If you prefer to keep the mix in the refrigerator to avoid any possible humidity, store it in an airtight glass jar with a rubber seal. It will stay fresh for up to three months, but remember to let the jar come to room temperature before opening to avoid condensation.
Freezer Friendly
For ultra‑long storage, portion the mix into zip‑top freezer bags (one cup per bag) and freeze. When you need a batch, simply thaw at room temperature for 10 minutes, give it a quick whisk, and you’re ready to go. The freezer locks in flavor and prevents clumping.
Best Reheating Method
When reheating a leftover cup, add a tiny splash (about a tablespoon) of water before microwaving. This creates steam that revives the silky texture, preventing the drink from turning grainy. Heat in 30‑second bursts, stirring in between, until it reaches your desired temperature.