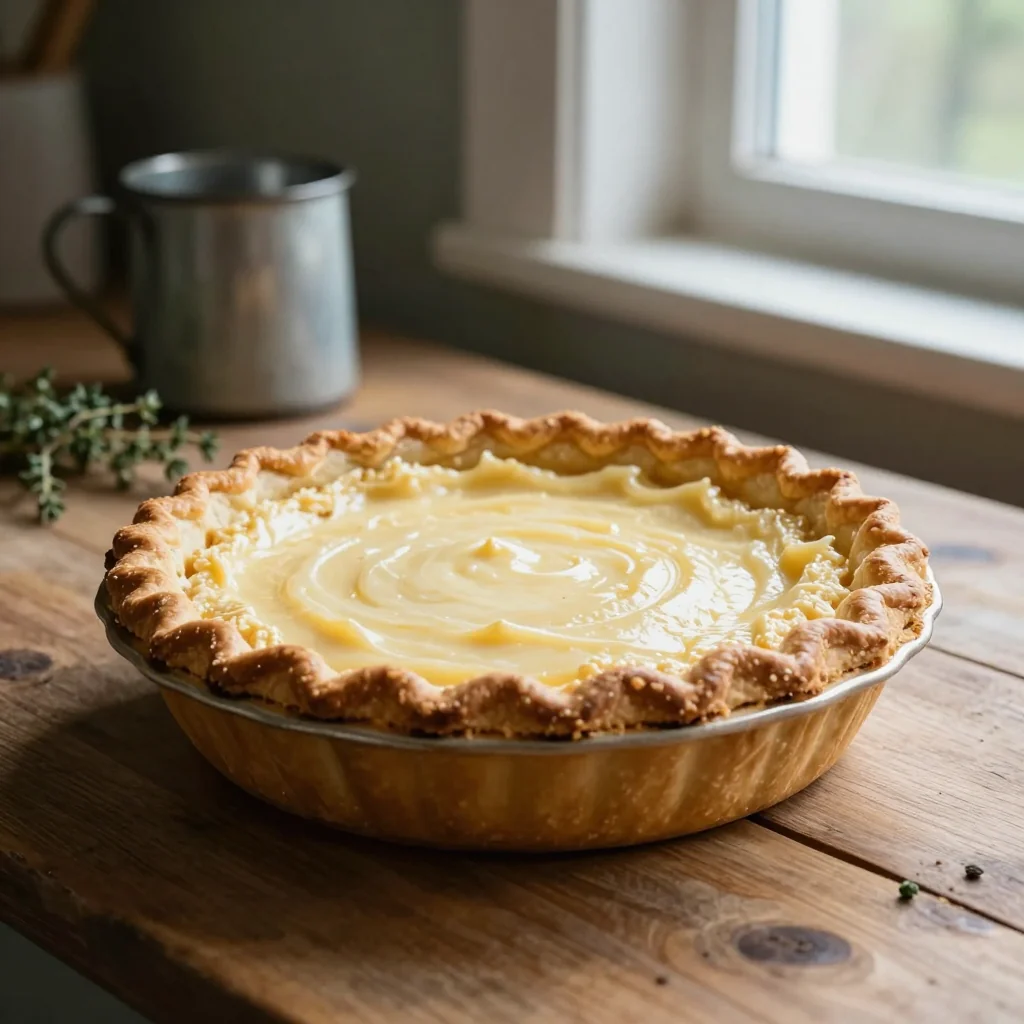
A timeless Southern classic that blends creamy tang with a buttery crust, perfect for any gathering.

When I was ten, my grandmother would pull a humble buttermilk pie from the oven just as the first autumn leaves began to fall. The kitchen would fill with a sweet, tangy aroma that seemed to whisper stories of Southern afternoons spent on porch swings, lemonade in hand, and laughter echoing through the yard. That memory has stayed with me, a warm reminder that comfort can be as simple as a slice of pie.
This pie traces its roots back to the early 20th‑century American South, where resourceful cooks turned surplus buttermilk—a by‑product of butter making—into a custard‑like filling that set beautifully in a flaky crust. Over the decades, the recipe evolved, gaining a reputation for its silky texture and subtle caramel notes, making it a staple at family gatherings, church potlucks, and holiday tables.
In this article, I’ll walk you through every step, from making a perfectly tender crust to achieving that signature glossy top. You’ll learn why each ingredient matters, how to avoid common pitfalls, and the secrets that turn an ordinary pie into an unforgettable centerpiece.
Grab your apron, preheat the oven, and let’s bring a slice of Southern heritage to your kitchen.
🌟 Why This Recipe Will Captivate You
Whether you’re a seasoned baker or a curious beginner, this buttermilk pie offers a perfect blend of tradition, flavor, and ease.
- ✨ Timeless Flavor Profile: The tang of buttermilk balances sweet sugar and warm vanilla, creating a custard that’s both comforting and sophisticated.
- ✨ Foolproof Crust: Our butter‑flour‑sugar crust stays tender yet sturdy, preventing sogginess while providing a buttery bite.
- ✨ Minimal Equipment: No fancy mixers or special pans—just a mixing bowl, a rolling pin, and a standard 9‑inch pie dish.
- ✨ Adaptable Sweetness: Adjust the sugar to suit your palate; the recipe works beautifully with both light and richer versions.
- ✨ Visual Appeal: A golden top with a subtle caramelized edge makes this pie look as impressive as it tastes.
- ✨ Perfect for Any Season: Its cool, creamy interior feels refreshing in summer, while the warm spices make it cozy in winter.
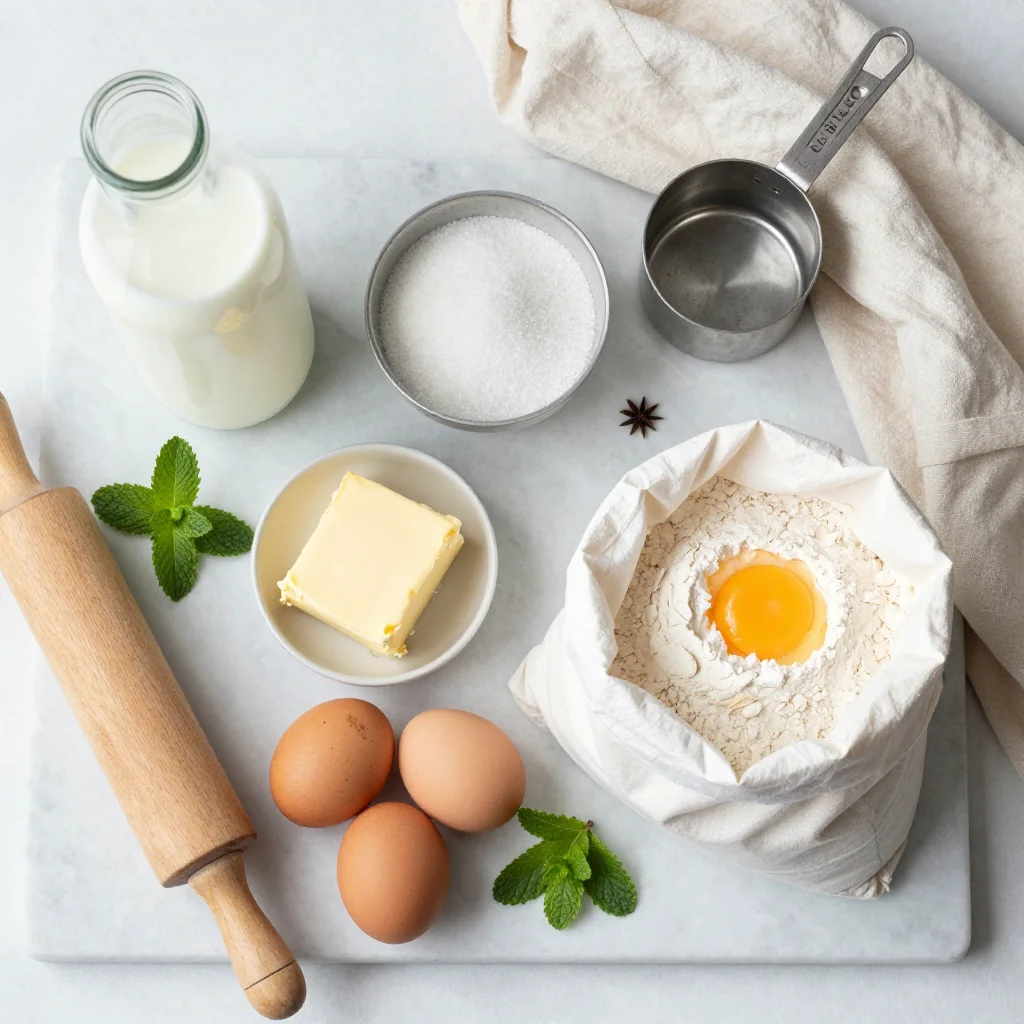
🥗 Ingredients
📝 Complete Ingredient List
For the Crust:
For the Filling:
Optional Topping:
🔍 Focus on Key Ingredients
Buttermilk
Buttermilk provides the distinctive tang that sets this pie apart from ordinary custards. Its acidity helps the proteins in the eggs coagulate gently, resulting in a smooth, custard‑like texture. When selecting buttermilk, choose a cultured version with a thick consistency; the richer the buttermilk, the richer the final pie.
Unsalted Butter
Butter is the backbone of both the crust and the filling. For the crust, cold butter creates layers of steam as it bakes, yielding flakiness. In the filling, melted butter adds richness and helps bind the custard, preventing a watery finish.
Ground Nutmeg
Nutmeg offers a warm, earthy note that complements the tangy buttermilk. A little goes a long way; it’s best added with the flour to ensure even distribution and avoid clumping.
🔄 Quick Substitutions
| If you don’t have… | Use instead… |
|---|---|
| Buttermilk | 1 cup milk + 1 tbsp lemon juice (let sit 5 min) |
| All‑purpose flour (crust) | Whole‑wheat pastry flour |
| Unsalted butter | Equal amount of salted butter, reduce added salt |
👨🍳 Step‑by‑Step Instructions
Follow these detailed steps to create a flawless buttermilk pie that will impress family and friends alike.
📋 Phase 1: Preparation and Mise en Place
Start by gathering all ingredients and preparing the crust.
Make the Crust
In a large bowl, whisk together 250 g flour, 50 g sugar, and 1 tsp salt. Add the cold cubed butter and, using a pastry cutter or your fingertips, blend until the mixture resembles coarse crumbs with pea‑size pieces of butter. Drizzle in ice water, one tablespoon at a time, mixing gently until the dough just comes together. Form the dough into a disc, wrap in plastic, and chill for at least 30 minutes.
Roll Out the Dough
On a lightly floured surface, roll the chilled dough into a 12‑inch circle, about ¼‑inch thick. Carefully transfer it to a 9‑inch pie dish, gently pressing into the corners. Trim excess dough, leaving a 1‑inch overhang, then fold the edges under to create a neat rim. Refrigerate the crust while you prepare the filling to prevent shrinkage.
🔥 Phase 2: Filling and Baking
Combine the custard ingredients and bake to a golden perfection.
Prepare the Custard Filling
In a medium bowl, whisk together 200 g sugar and 3 eggs until smooth. Gradually whisk in 400 ml buttermilk, ensuring a uniform mixture. Sift 30 g flour and ¼ tsp nutmeg into the bowl, whisking to avoid lumps. Stir in melted butter, vanilla extract, and ¼ tsp salt. The batter should be glossy and slightly thick.
Blind‑Bake the Crust
Preheat the oven to 190 °C (375 °F). Line the chilled crust with parchment paper and fill with pie weights or dried beans. Bake for 12‑15 minutes, then remove the weights and parchment. This prevents a soggy bottom and ensures a crisp edge.
Assemble and Bake
Pour the custard filling into the partially baked crust, spreading evenly. If using the optional topping, sprinkle a mixture of light brown sugar and ground cinnamon over the surface. Bake for 35‑40 minutes, or until the edges are set and the center jiggles slightly when the dish is gently shaken.
✨ Phase 3: Finishing Touches and Serving
Cool, garnish, and present your masterpiece.
Cool the Pie
Allow the pie to cool on a wire rack for at least 2 hours. This cooling period lets the custard set fully, making it easier to slice without crumbling.
Garnish (Optional)
Just before serving, dust the top with a light sprinkle of powdered sugar or a few fresh mint leaves for color contrast. A dollop of lightly sweetened whipped cream adds an extra layer of indulgence.
Serve
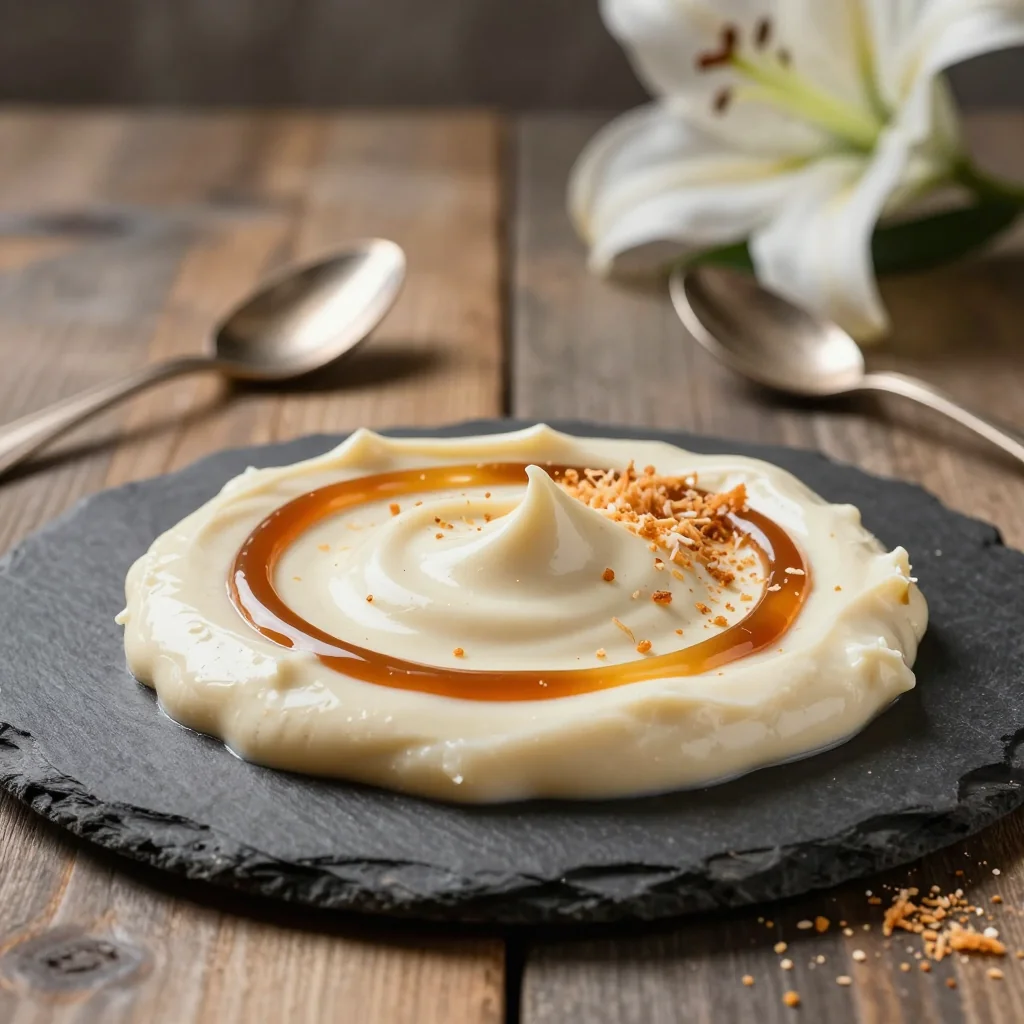
Slice the pie with a sharp, warm knife, and serve each piece with a drizzle of caramel sauce or a scoop of vanilla ice cream if desired. The cool custard pairs beautifully with a warm, buttery crust.
💡 Expert Tips and Tricks
🛒 Choosing the Right Ingredients
Opt for cultured buttermilk rather than the low‑fat variety; the higher fat content contributes to a richer mouthfeel. When buying butter, select European‑style butter with at least 82% butterfat for a more pronounced flavor. For flour, sift it before measuring to avoid compacted, heavy dough. Fresh eggs at room temperature blend more easily, preventing a lumpy custard.
🔪 Preparation Techniques
Keep all your tools and ingredients as cool as possible, especially the butter and water for the crust. When mixing the crust, work quickly; over‑working can develop gluten, making the base tough. Use a light touch when folding the flour into the butter—small pea‑size pieces are ideal. For the custard, whisk continuously while adding buttermilk to avoid streaks.
🌡️ Mastering the Bake
Blind‑baking is crucial to avoid a soggy bottom. Use parchment paper and pie weights to keep the crust flat. Monitor the pie after 30 minutes; if the edges brown too quickly, shield them with foil. The center should wobble slightly—this indicates a perfectly set custard that will finish cooking as it cools.
🍽️ Presentation and Service
Serve the pie on a warm plate to keep the custard from cooling too fast. A light dusting of powdered sugar adds visual appeal without overwhelming the flavor. Pair with a chilled glass of Riesling or a sweet tea for a balanced palate.
🏆 Pro Tips
Professional chefs distinguish a good pie from a great one through precision, technique, and subtle enhancements.
- 🎯 Temperature‑Controlled Butter: Chill the butter in the freezer for 10 minutes before cutting it into the flour. This ensures the butter remains solid longer, creating steam pockets that yield a flakier crust.
- 🎯 Double‑Sifting Flour: Sift the flour twice—once for the crust and once for the filling. This removes any lumps and aerates the flour, resulting in a lighter custard.
- 🎯 Egg‑Water Emulsion: Beat the eggs with a splash of cold water before adding the buttermilk. The water helps dissolve the proteins evenly, reducing the risk of curdling.
- 🎯 Sugar Caramelization: Sprinkle a thin layer of brown sugar on top before baking. As it melts, it forms a caramelized crust that adds a subtle crunch and deeper flavor.
- 🎯 Resting the Pie: After baking, let the pie rest in the oven with the door slightly ajar for 10 minutes. This gentle cooling prevents sudden temperature changes that could cause cracks.
- 🎯 Serving Temperature: Serve the pie slightly chilled (around 10 °C). This temperature highlights the custard’s silky texture while keeping the crust crisp.
"A perfect pie is a harmony of texture, flavor, and timing; master each, and the dessert sings." — Thomas Keller
🔄 Variations and Adaptations
This classic can be tweaked to suit dietary preferences, seasonal flavors, or creative twists.
🥬 Vegetarian/Vegan Version
Replace the eggs with a blend of ¼ cup silken tofu and 1 tbsp flaxseed meal mixed with 3 tbsp water (let sit 5 min). Use plant‑based butter for the crust and a vegan cultured “buttermilk” made from soy milk plus lemon juice. The texture remains creamy, and the flavor profile stays true to the original.
- Vegan butter (for crust) – ensures flakiness.
- Silken tofu + flaxseed mix – mimics egg binding.
🌶️ Flavor Variations
Experiment with complementary spices and additions to create new taste experiences.
Spicy Version:
Add ¼ tsp cayenne pepper and a pinch of smoked paprika to the filling for a subtle heat that contrasts the sweet custard.
Mediterranean Version:
Incorporate 2 tbsp finely chopped fresh rosemary into the crust and drizzle a thin layer of honey over the baked pie before serving.
Asian‑Inspired Version:
Swap vanilla for 1 tsp toasted sesame oil and garnish the finished pie with toasted black sesame seeds for an earthy, nutty finish.
⚠️ Dietary Adaptations
Gluten‑Free:
Use a 1:1 gluten‑free flour blend for the crust and 2 tbsp cornstarch in place of the all‑purpose flour in the filling.
Lactose‑Free:
Replace butter with a lactose‑free margarine and use lactose‑free buttermilk (available in most health stores) or make your own with almond milk plus lemon juice.
Low‑Calorie:
Reduce sugar by 25 % and substitute half the butter in the crust with a light olive oil. Use low‑fat buttermilk to cut calories while maintaining tang.
👶 Kid‑Friendly Version
Omit nutmeg and brown‑sugar topping to keep flavors simple. Serve with a drizzle of chocolate syrup or a scoop of vanilla frozen yogurt for extra appeal to younger palates.
📦 Storage and Reheating
🧊 Conservation
Refrigerator:
- Duration: 4 days
- Container: Airtight glass or plastic container
- Tip: Cover the pie loosely with foil to prevent the crust from absorbing odors.
Freezer:
- Duration: 2 months
- Method: Wrap the cooled pie tightly in plastic wrap, then in aluminum foil.
- Defrosting: Transfer to refrigerator overnight, then reheat as described below.
💡 For best texture, reheat the pie rather than serving it cold; the custard will regain its silky mouthfeel.
♨️ Reheating
🔥 Oven (Recommended):
- Preheat to 175 °C (350 °F).
- Cover the pie loosely with aluminum foil.
- Heat for 15 minutes.
- Remove foil and continue for 5‑7 minutes to crisp the crust.
⚡ Microwave (Quick):
- Place a slice on a microwave‑safe plate.
- Cover with a microwave‑safe lid.
- Heat on medium power for 45 seconds, then check and repeat in 15‑second intervals.
🍳 Skillet:
Heat a non‑stick skillet over low heat, add a thin slice, and cover with a lid. Warm for 2‑3 minutes, turning once, until the center is heated through.
🍷 Perfect Pairings
🥗 Side Dishes
- Fresh Mixed Greens: A simple vinaigrette of lemon juice, olive oil, and a pinch of salt balances the sweet custard.
- Roasted Sweet Potatoes: Their natural sweetness echoes the pie’s caramel notes without overwhelming the palate.
- Spiced Pecans: Lightly toasted with brown sugar and a dash of cayenne, they add crunch and a hint of heat.
🍷 Wine & Beverage Pairings
- Riesling (Off‑dry): The acidity cuts through the richness while complementing the tangy buttermilk.
- Champagne Brut: Bubbles cleanse the palate and enhance the buttery crust.
- Non‑Alcoholic: Sparkling apple cider with a splash of cinnamon syrup offers a festive, alcohol‑free option.
🍰 Complementary Courses
Begin with a light citrus salad dressed in honey‑mint vinaigrette, follow the pie with a scoop of vanilla bean ice cream, and finish with a coffee‑infused chocolate mousse for a well‑rounded dessert experience.
❓ Frequently Asked Questions
Q: Can I use low‑fat buttermilk?
Yes, but the custard will be slightly less rich and may set a bit firmer. To compensate, increase the sugar by 10 % and add an extra tablespoon of melted butter.
Q: How do I prevent the crust from shrinking?
Chill the dough thoroughly before rolling, avoid over‑rolling, and use pie weights during blind‑baking. Also, ensure the oven temperature is accurate; an oven thermometer can help.
Q: What if the custard cracks on top?
Cracks usually result from over‑baking or sudden temperature changes. Bake at a moderate temperature, and let the pie cool gradually in the oven with the door ajar for 10 minutes.
Q: Can I add fruit to the filling?
Yes—fold in ½ cup fresh blueberries or sliced peaches after mixing the custard, but reduce the sugar slightly to balance the fruit’s natural sweetness.
Q: Is it possible to make mini individual pies?
Absolutely. Divide the crust and filling into 4‑inch tart pans or a muffin tin. Adjust baking time to 20‑25 minutes, watching for a golden edge.
Q: How far in advance can I prepare the pie?
You can bake the pie up to two days ahead and store it refrigerated. Reheat gently before serving to restore the custard’s silkiness.
🎉 To Your Oven!
This Buttermilk Pie Old Fashioned Recipe captures the essence of Southern hospitality—creamy, tangy, and undeniably comforting. By mastering the flaky crust, the silky custard, and the subtle spice balance, you’ll have a dessert that shines at any gathering, from casual brunches to elegant dinner parties. Remember, the key lies in cold butter, precise measurements, and gentle handling, all of which we’ve detailed above.
If you’ve enjoyed the journey, please share your results, ask questions in the comments, and don’t forget to rate the recipe. Your feedback helps the community grow and inspires new culinary adventures.
Have you tried this recipe?
Leave a comment and a rating below! Share your photos on Instagram with #ButtermilkPieJoy to be featured.
Buttermilk Pie Old Fashioned Recipe
A classic Southern custard pie with a buttery crust and tangy buttermilk filling.
📝 Ingredients
Crust
Filling
Optional Topping
👨🍳 Instructions
- 1
Combine crust ingredients, chill dough, and roll out.
- 2
Blind‑bake crust with weights.
- 3
Whisk together filling ingredients until smooth.
- 4
Pour filling into crust, sprinkle optional topping.
- 5
Bake until edges set and center jiggles.
- 6
Cool completely before slicing.
- 7
Garnish with powdered sugar or whipped cream.
- 8
Serve with desired accompaniments.
- 9
Store leftovers according to storage guidelines.
- 10
Enjoy and share your creation!
🥗 Nutritional Information (per serving)
*Values are estimates based on standard ingredients.
📚 You Might Also Like
Lemon Meringue Pie
Pecan Pie
Chocolate Silk Pie


💬 Comments & Reviews
Leave a Comment
No comments yet. Be the first to share your thoughts!