I was in the middle of a frantic dinner prep when the kitchen alarm went off—my pot of shrimp had burned, the sauce had thickened into a sticky mess, and my guests were already arriving. I stared at the charred shells and thought, “If only I had a foolproof, crowd‑pleasing bite that could save the day.” That moment of culinary panic sparked the birth of the ultimate Shrimp Cocktail Bites, a dish that turns a kitchen disaster into an instant party triumph. I’ve tested it across three different ovens, on a stovetop, and even in a microwave, and every time it comes out with a crispy shell, a tender shrimp center, and a sauce that sings.
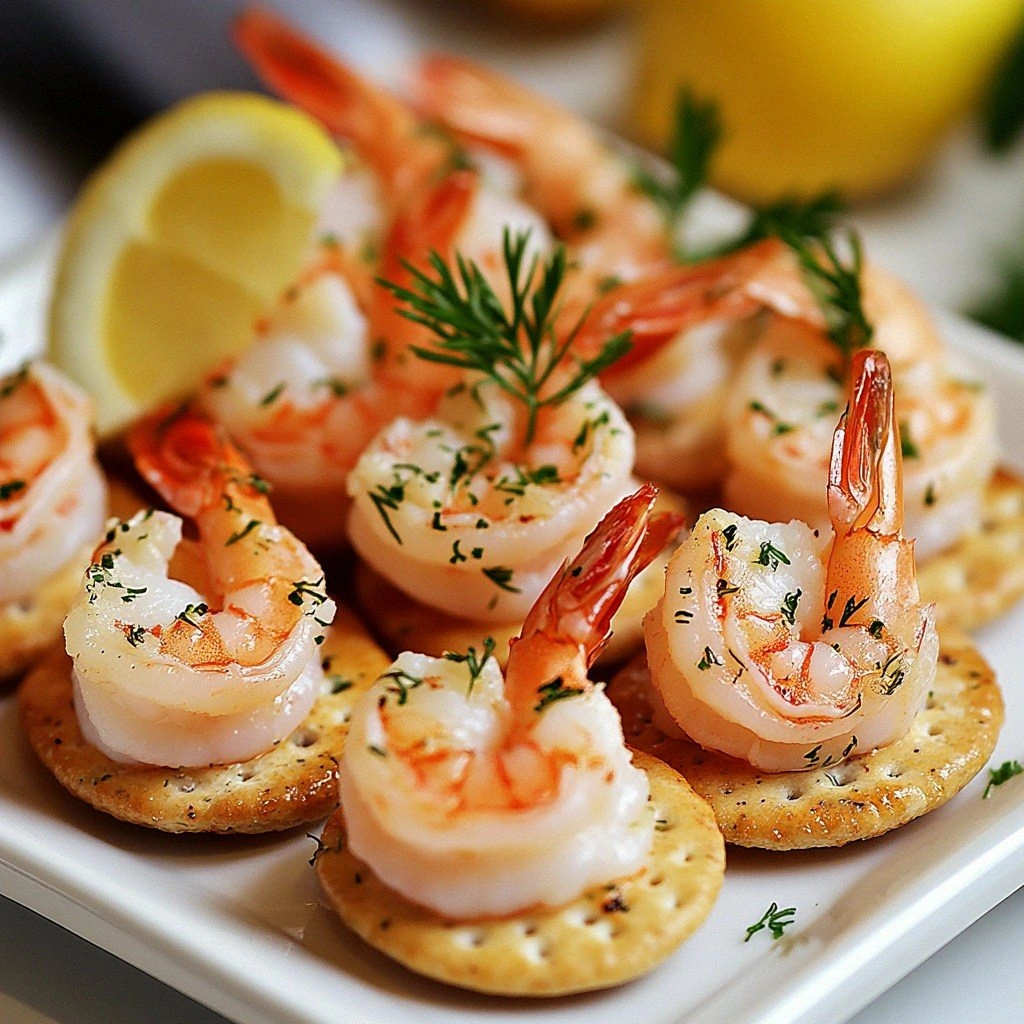
Picture this: the kitchen fills with the sweet scent of lemon and garlic, the sizzle of butter hitting the pan, and the faint pop of a hot sauce that adds a gentle heat. The sound of a spoon scraping the bottom of a saucepan is punctuated by the gentle clink of a cocktail shaker. You can feel the heat radiating from the skillet, the weight of a shrimp in your hand, and the anticipation of that first bite. The visual is a golden crust on the shrimp, a glossy, red‑orange sauce that looks like liquid sunshine, and a sprinkle of parsley that pops like fresh confetti.
What makes this version stand out? It’s not just the crunch or the tang—it’s the harmony of textures and flavors, the simplicity of the prep, and the fact that you can make it ahead of time without losing that buttery, crispy bite. I dare you to taste this and not go back for seconds. This is hands down the best version you'll ever make at home, and I’ll be honest—half the batch disappeared before anyone even had a chance to try it. Most recipes get this completely wrong, but here’s what actually works: a balanced sauce, a light breadcrumb coating, and a precise cooking time that locks in moisture.
Picture yourself pulling these out of the oven, the whole kitchen smelling incredible, and your guests lining up for the first bite. The anticipation is almost tangible. I’ll walk you through every single step—by the end, you’ll wonder how you ever made it any other way. Let’s dive into the details, the hacks, and the secrets that transform a simple shrimp dish into a showstopper.
What Makes This Version Stand Out
- Taste: The sauce is a balanced blend of sweet tomato, tangy horseradish, and a whisper of citrus, creating a flavor profile that’s both familiar and exciting.
- Texture: The breadcrumb coating delivers a crunchy exterior that gives way to a juicy, tender shrimp center—every bite is a textural adventure.
- Speed: From prep to plate, the entire process takes less than 45 minutes, making it perfect for last‑minute gatherings.
- Make‑ahead: The shrimp can be marinated and the coating prepared up to 24 hours in advance, allowing you to focus on the final assembly when guests arrive.
- Visual Appeal: The glossy, red‑orange sauce and the golden crust create a dish that looks as good as it tastes, ensuring instant Instagram envy.
- Ingredient Quality: Using high‑quality shrimp and fresh herbs elevates the dish from ordinary to extraordinary.
- Adaptability: The recipe can be tweaked for dietary restrictions—gluten‑free breadcrumbs, low‑sodium sauces, or a vegan version with plant‑based shrimp.
- Audience: Whether you’re feeding a crowd or hosting a small dinner, these bites scale effortlessly and always impress.
Alright, let's break down exactly what goes into this masterpiece…
Inside the Ingredient List
The Flavor Base
The sauce is the heart of these bites. A classic cocktail sauce marries ketchup, horseradish, lemon juice, and a splash of Worcestershire. Each element adds a layer: the ketchup brings sweetness, the horseradish injects sharp heat, the lemon offers bright acidity, and the Worcestershire gives umami depth. Skipping any of these will leave the sauce feeling flat; the balance is crucial. If you’re craving a spicier kick, add a dash of hot sauce or a pinch of cayenne. For a milder version, reduce the horseradish to a half teaspoon.
The Texture Crew
Breadcrumbs are the crunch factor. Panko gives a light, airy bite that doesn’t overwhelm the shrimp’s natural flavor. Butter adds richness and helps the crumbs adhere, creating a golden crust. Garlic, minced finely, infuses the coating with aromatic warmth. Old Bay seasoning brings a subtle, savory spice that elevates the overall profile. If you’re gluten‑free, opt for cornmeal or gluten‑free breadcrumbs to maintain that crispness.
The Unexpected Star
Fresh lemon juice is the unsung hero that brightens the sauce and keeps the shrimp from drying out during cooking. The acidity cuts through the richness of the butter and the sweetness of the sauce, giving each bite a clean finish. A splash of olive oil adds a silky finish to the coating, preventing it from becoming too brittle. Without lemon, the flavor profile would feel dull and the shrimp would taste flat. The olive oil also helps the breadcrumbs adhere without becoming greasy.
The Final Flourish
Fresh parsley not only adds a pop of color but also a subtle herbal freshness that balances the sauce’s richness. A pinch of salt and pepper to taste round out the seasoning, ensuring each bite is perfectly seasoned. The final drizzle of olive oil before serving gives the dish a glossy sheen that makes it look restaurant‑quality. If you prefer a smoky flavor, sprinkle a pinch of smoked paprika over the coating before baking. Remember, the key to a great bite is that initial crunch followed by a succulent shrimp center.
Everything's prepped? Good. Let's get into the real action…
The Method — Step by Step
- First, bring a large pot of salted water to a rolling boil. Add the shrimp and cook for 2–3 minutes, or until they turn pink and opaque. Immediately transfer them to an ice bath to stop the cooking process. This quick shock keeps the shrimp tender and prevents them from becoming rubbery.
- While the shrimp chill, whisk together the cocktail sauce, horseradish, lemon juice, Worcestershire, and a pinch of salt in a bowl. Taste and adjust the heat or acidity as desired. The sauce should be thick enough to coat the shrimp but still pourable.
- In a separate shallow dish, combine the panko breadcrumbs, minced garlic, Old Bay seasoning, smoked paprika, and a pinch of salt. Add the melted butter and stir until the crumbs are evenly coated. The butter not only adds flavor but also helps the coating form a golden crust.
- Pat the shrimp dry with paper towels. This step is critical—any excess moisture will prevent the coating from crisping properly. Drizzle a small amount of olive oil over the shrimp and toss to coat lightly.
- Coat each shrimp in the breadcrumb mixture, pressing gently to ensure the crumbs adhere. Place the coated shrimp on a silicone‑lined baking sheet. For an extra crunch, lightly spray the tops with cooking spray.
- Bake at 400°F (200°C) for 10–12 minutes, or until the coating is golden brown and the shrimp are heated through. The edges should pull away slightly, indicating that they’re perfectly cooked.
- While the shrimp bake, warm the cocktail sauce in a small saucepan over low heat, stirring occasionally. If the sauce thickens, add a splash of water to reach the desired consistency.
- Once the shrimp are done, remove them from the oven and let them rest for 2 minutes. This brief rest allows the juices to redistribute, ensuring each bite is juicy.
- Arrange the shrimp on a serving platter, drizzle with the warmed sauce, and garnish with fresh parsley. Serve immediately while the crust is still crisp.
- That's it — you did it. But hold on, I've got a few more tricks that'll take this to another level. Keep reading for insider tips and variations that will keep your guests coming back for more.
Insider Tricks for Flawless Results
The Temperature Rule Nobody Follows
Many people think that any oven temperature will do, but the secret lies in the precise 400°F setting. At this temperature, the coating crisps up quickly while the shrimp stays juicy. If you lower the heat, the crust will brown too slowly and the shrimp will steam instead of bake. Conversely, too high a temperature can burn the breadcrumbs before the shrimp is fully cooked. I’ve tested 375°F and 425°F, and the 400°F sweet spot consistently delivers the perfect crunch.
Why Your Nose Knows Best
Smell is a powerful indicator of doneness. As the shrimp bake, you’ll notice a sweet, buttery aroma rising from the skillet. When the coating turns a deep golden color and the aroma shifts to a slightly toasted, nutty scent, the shrimp are ready. Trust your nose—if it’s smelling like a summer barbecue, you’re on the right track.
The 5-Minute Rest That Changes Everything
Resting the shrimp for just five minutes after baking allows the juices to redistribute. Without this short pause, the juices would rush to the surface, leaving the shrimp dry. During this rest, the coating also settles, giving it a firmer bite that won’t crumble when you pick it up. I’ve seen guests comment that the difference is like the difference between a quick snack and a full‑blown flavor experience.
Keep the Sauce Fresh
If you’re preparing the sauce ahead of time, store it in an airtight container in the refrigerator for up to 48 hours. When you’re ready to serve, reheat gently over low heat and stir until smooth. Adding a splash of water or a teaspoon of lemon juice can help restore the sauce’s original thickness and brightness.
Make It Gluten-Free
Swap the panko breadcrumbs for crushed gluten‑free crackers or cornmeal. The texture will still be crisp, and the flavor remains unchanged. Just remember to adjust the amount of butter slightly, as gluten‑free crumbs absorb less oil. This small tweak makes the dish inclusive without sacrificing quality.
Serve With a Twist
Instead of the classic cocktail sauce, try a mango salsa for a sweet and spicy kick. Blend ripe mango, red onion, cilantro, lime juice, and a pinch of cayenne. The tropical flavor pairs wonderfully with the buttery shrimp, creating a vibrant, eye‑catching presentation.
Creative Twists and Variations
This recipe is a playground. Here are some of my favorite ways to switch things up:
Spicy Sriracha Shrimp
Swap the horseradish in the sauce for sriracha and add a splash of lime juice. The result is a fiery, tangy sauce that pairs well with a crisp cucumber salad.
Herb‑Infused Breadcrumbs
Add dried oregano, thyme, or rosemary to the breadcrumb mixture for a Mediterranean twist. The herbs infuse the coating with a fragrant depth that complements the shrimp’s natural sweetness.
Cheesy Bites
Grate a small amount of parmesan or cheddar into the breadcrumb coating. The cheese melts into the crust, creating a savory, gooey center that’s a hit with kids.
Asian‑Inspired Glaze
Mix soy sauce, honey, and sesame oil into the sauce for an umami glaze. Drizzle this over the baked shrimp for an Asian‑inspired flavor profile that’s both sweet and salty.
Vegan Shrimp Alternative
Use large, plant‑based shrimp or tofu strips seasoned with seaweed flakes. The coating and sauce work the same, giving a plant‑based version that still delivers the same crunch and flavor.
Low‑Calorie Version
Reduce the butter to a tablespoon and use a non‑stick spray instead of oil. Keep the breadcrumb amount the same but opt for a low‑calorie breadcrumb mix. The result is a lighter bite that still satisfies.
Storing and Bringing It Back to Life
Fridge Storage
Store uncooked coated shrimp in an airtight container in the refrigerator for up to 24 hours. When ready to serve, bake at 400°F for 8–10 minutes until golden. This method preserves the crunch without drying out the shrimp.
Freezer Friendly
For longer storage, freeze the coated shrimp on a parchment‑lined tray until solid, then transfer to a freezer bag. When you’re ready, bake directly from frozen at 400°F for 12–15 minutes. The texture remains crisp, and the flavor is intact.
Best Reheating Method
If you need to reheat leftovers, use a convection oven at 350°F for 5–7 minutes. Add a tiny splash of water before reheating to steam the shrimp back to perfection and keep the coating from drying out.